
Maneuvers are a set of actions that a player can perform with the Warframe and melee weapon. This includes rolls, wallruns, swordplay, and acrobatics.
Basic Movements
Sprinting
| Shift | L3 |
Sprinting will cause the frame to run at greatly increased speed. Each Warframe has a different base Sprint Speed. Firing will cancel the sprint, but certain melee weapons can be swung while sprinting.
In Settings, you may configure a new Key Binding to Toggle On/Off to auto-sprint. This is useful so you don't end up holding the sprint button all the time.
- For more information, see Sprint Speed.
Rolling
| Combo | Tapping Sprint |
|---|

Rolling is a basic combat evasive maneuver that evade charging enemy, evade bullets, grenades or melee attacks. Rolling also reduces all damage taken by the player by 75% (or invulnerability with ![]() Rolling Guard) during its animation.
Rolling Guard) during its animation.
Rolling shakes off certain enemies or projectiles that cling to the player (such as Latchers, Maggots, or Leeches) and can also 'dispel' certain status effects such as Swarm Mutalist MOA spores and unwanted ![]() Banish effects. Rolling just before touching the ground from high elevations also prevents hard landings.
Banish effects. Rolling just before touching the ground from high elevations also prevents hard landings.
Roll distance can be increased with Bullet Jump (e.g. ![]() Mobilize) and Parkour Velocity (i.e.
Mobilize) and Parkour Velocity (i.e. ![]() Endurance Drift,
Endurance Drift, ![]() Hit And Run, and
Hit And Run, and ![]() Swing Line) mods, Roll speed with
Swing Line) mods, Roll speed with ![]() Mirage's Passive or
Mirage's Passive or ![]() Amalgam Barrel Diffusion, and
Amalgam Barrel Diffusion, and ![]() Deadly Maneuvers provides Critical Chance on headshots after a roll.
Deadly Maneuvers provides Critical Chance on headshots after a roll.
Carriables such as Mobile Defense datamasses or Excavation power cells can be picked up by rolling over them while pressing the interact key, bypassing the normal pickup animation.
Certain Warframes utilize different animations instead of the standard rolls but otherwise remain identical in function:
 Limbo (
 Prime),
  Hildryn (
 Prime),
  Wisp (
 Prime),
  Titania Prime,
  Xaku (
 Prime),
  Qorvex,
  Dante, and
  Jade all dash upright.
 Protea (
 Prime) performs a cartwheel.
 Sevagoth (
 Prime) utilizes bullet jumps.
 Gyre executes a twirl.
Sidespring
| Combo | Aim + Left/Right + Tap Sprint |
|---|
While aiming, move sideways and tap the sprint button to do a sideways roll. As of now, the side-roll's range is short compared to the other ones, though it is still useful because of the damage reduction. As with all rolling maneuvers, it can be used in midair to adjust a trajectory or landing.
Backspring
| Combo | Aim + Backward + Tap Sprint |
|---|
While holding the aim button hold the back key and tap the roll button to do a back handspring. This maneuver is useful to put a modest distance between the player and any threat, while still maintaining their orientation. As with all rolling maneuvers, it can be used in midair to adjust a trajectory or landing.
Note that aiming is not required to perform this maneuver in midair, as the character does not automatically turn around when pressing backward like it would do while on the ground.
Crouching
| Ctrl | L1 |
Crouching lowers the Warframe to an average of about half height, reducing hitbox size and assists with stealth movements. When crouched, near-normal movement is still possible, albeit slower. You can, however, still roll while crouched. If crouch is toggled on, you stay crouched. Press V (default) to toggle crouching.
Sliding
| Combo | While Moving + Crouch |
|---|
Sliding is crouching while moving. This will bring a frame to a gradual stop because of Friction, except when on slopes. Ranged weapons may be used while sliding and a melee attack creates a separate combat maneuver.
Sliding is helpful for going under obstacles quickly that would otherwise need to be crawled under by Crouching.
Jump Kick
| Combo | While Moving Mid-Air + Crouch |
|---|
This action is essentially the same as a crouch which has been initiated while midair. It will help maintain momentum and allow the frame to travel further. When landing on the ground, the Warframe will return to a slide. Like sliding, the frame's jump distance is also improved allowing to reach distant places.
Jump Kicking will also knockdown most enemies on hit, as well as dealing pure ![]() Impact damage equal to 20 + 100% of equipped melee weapon base damage (including base damage mods). This damage cannot be increased by headshotting an enemy, but can be increased to 20 + 200% of melee base damage with
Impact damage equal to 20 + 100% of equipped melee weapon base damage (including base damage mods). This damage cannot be increased by headshotting an enemy, but can be increased to 20 + 200% of melee base damage with ![]() Gale Kick equipped.
Gale Kick equipped.
Jumping
| Space |
A basic jumping function that propels players upwards.
Double Jump
| While Mid-Air + Jump |
Players can jump twice by tapping the jump button twice. Double jumping carries the momentum the player has, and can be used in tandem with other advanced maneuvers to achieve a complex feat. In addition, coming into contact with any surface – wall and ground alike, will recharge the player's ability to double jump again.
Bullet Jump
| Combo | While Crouching + Jump |
|---|
While crouching, pressing the jump button will cause the Warframe to quickly launch themselves towards the direction of the reticle, leaping into midair with a spiraling movement. This allows the Warframe to close a longer gap or reach a higher destination.
Bullet Jump deals 100 ![]() Blast damage and guaranteed proc within a 3-meter radius (damage falling off over distance) from where the user initiates the jump. This damage can be modified and amplified by some Exilus Mods such as
Blast damage and guaranteed proc within a 3-meter radius (damage falling off over distance) from where the user initiates the jump. This damage can be modified and amplified by some Exilus Mods such as ![]() Piercing Step.
Piercing Step.
It is possible to bullet jump from a slide (crouching after moving), which will still propel the Warframe forward with extra speed.
Bullet jumping while having the camera pointed to the ground will propel the players up and slightly forward, allowing them to easily aim at ground enemies mid-air (usually in tandem with Aim Glide).
Bullet jumping can be done in the air, if airborne for other reasons than bullet jumping. Meaning a normal jump or walking off of a ledge.
Aim Glide
| Combo | While Airborne + Aim |
|---|
Players can aim midair to perform Aim Gliding, this slows player's descent into a controlled gliding while allowing them to aim better even while moving through the air. Players can only Aim Glide for 3 seconds – after which they will descend rapidly to the ground.
Despite its name, Aim Gliding can also be performed while holding melee weapons by Blocking or while casting abilities.
Aim gliding makes players harder to hit by enemies, effectively reducing enemy accuracy.
While an Archgun is deployed, Aim Glide duration is reduced by approximately 70%; 0.9 seconds without increases.
This maneuver shares its timer with Wall Latching.
Edge Grab
| Combo | Approach Edge + Jump |
|---|
After jumping, a frame will attempt to grab onto an edge of any kind, then attempt to climb up to a standing position regardless if there is enough space to stand or not.
Players can double jump while edge grabbing to flip upwards, achieving faster climb.
Wall Dash
| Combo | Sprint Forward + Jump |
|---|
Run at a wall then tap jump and a directional key to perform wall dash.
Vertical
Run at a perpendicular direction towards a wall, then tap jump to wall dash upwards. Players can continue to wall dash indefinitely by subsequently holding jump, and can flexibly switch to walldash sideways by pointing the camera relative to the direction. The faster the sprint speed of the frame, the faster it can climb.
Horizontal
Run with less than a 70 degree angle towards a wall and tap jump to wall dash across the wall. Players can continue to wall dash indefinitely by subsequently holding jump, and can flexibly switch to walldash upwards by pointing the camera relative to the direction. The faster the sprint speed of the frame, the faster it can climb.
Players can also propel themselves away from the wall by pointing the camera relative to the direction players wish to jump away to.
Wall Latch
| Combo | While Walldashing + Aim |
|---|
During wall dashing, players can latch onto a wall by aiming. This stops any movements players currently have and will remain stationary on the place, such as a high vantage point. Players using the wall latch may also cast some abilities that normally cannot be cast in the air. However, players can only perform this maneuver for a limited amount of time of 6 seconds – if the timer runs out, they will involuntarily latch off the wall.
Performing this maneuver in the air while falling will prevent a hard fall that stops you from moving momentarily.
While an Archgun is deployed, players cannot Wall Latch.
This maneuver shares its timer with Aim Gliding.
Hard Landing
A Hard Landing occurs when a Warframe drops to the ground at a velocity of 20 meters per second from high altitudes, causing them to impact the ground with heavy force. During a Hard Landing, the Warframe is unable to move briefly as it recovers from the impact. However, the Warframe will not receive any fall damage.
Hard Landings can be prevented by double jumping, jump kicking, rolling, or aim gliding just before hitting the ground. Alternatively, players can equip ![]() Kavat's Grace to mitigate the effects of Hard Landings.
Kavat's Grace to mitigate the effects of Hard Landings. ![]() Valkyr is unique in that her Passive prevents her from suffering Hard Landings no matter how fast she falls.
Valkyr is unique in that her Passive prevents her from suffering Hard Landings no matter how fast she falls.
Zipline
Ziplines are hanging lines strung between two objects, which can be found on many maps. Players can mount ziplines by pressing or holding the Use key (default X ) to instantly hop unto the zipline, making the Warframe crouch on it like a tightrope. Mounting ziplines can be performed as long as the player is within the vicinity of the line even while in mid-air, and can be mounted on any part of its length. Dismounting from a zipline can be done by pressing the Use key again, or by performing a maneuver like Bullet Jump.
Players can walk, sprint and slide along the zipline's length at will, as well as fire weapons. However, players cannot cast powers while mounting a zipline, nor use melee attacks.
While on a zipline, player base movement speed is increased from 6m/s to 7.5m/s. Aiming does not apply its movement speed debuff while on ziplines.
Knockdown Recovery
Players can press the jump key when the Warframe glows during a Knockdown animation to do a recovery animation, however the glow is currently bugged and will not appear in any instances of knockdown, although the recovery window will still be present.
- Counterintuitively, Handspring speeds up the knockdown animation by a significant amount, shrinking the recovery window making it more difficult to recover instead.
Advanced Tech

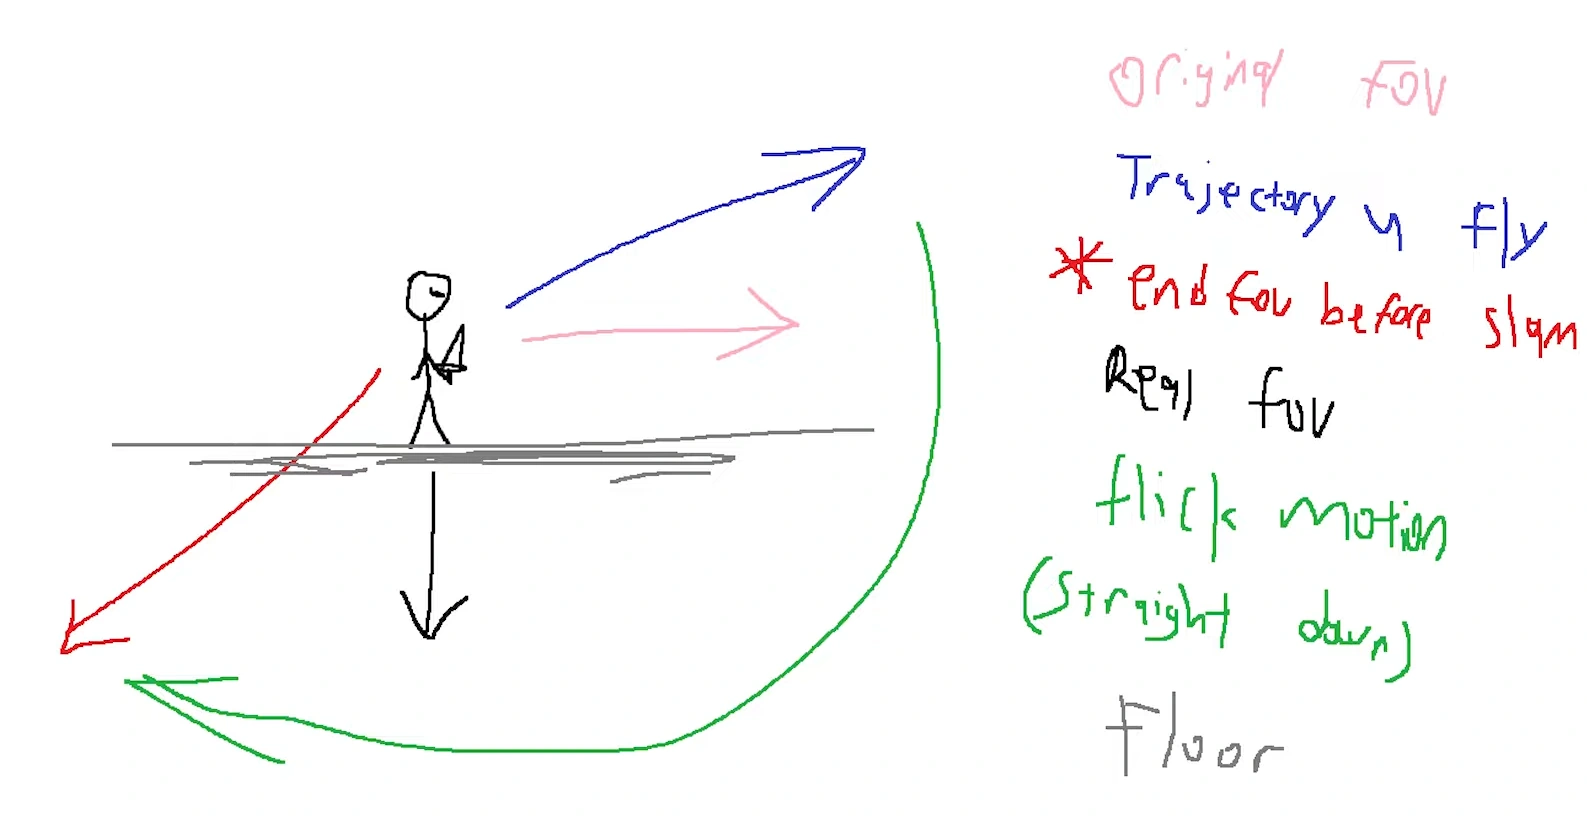
Slam Jump
| Combo | In Air + E + Flick Camera Down |
|---|
A Slam Jump is performed by jumping, and then flicking the camera down and melee-ing midair at the same time to exploit the momentum gained from Melee Slam forward. This sends the player flinging 30° higher than the initial player FOV at a high speed at around ~50m/s, comparable to ![]() Itzal's base sprinting speed.
Itzal's base sprinting speed.
- Increasing look sensitivity in the Settings may help perform this movement tech.
- When failing this move:
- Performing regular aerial attack indicates that you are meleeing too fast or flicking down too slow.
- Performing regular slam indicates that you are meleeing too late.
- It is notable that Kahl can perform Slam Jumping in Break Narmer missions where he possesses a Jetpack, making this Kahl's fastest movement tech.
- A Jetpack is required for Kahl to perform melee slam. As Sneaky Sabotage does not have any accessible Jetpack it remains the only Kahl mission he cannot perform this tech.
Slam Cancel
| Combo | In Air + Melee Slam + Tap Shift |
|---|
A Slam Cancel can be performed by melee slamming and timing a roll to exit out of the slamming animation. Best used when the map requires players to head downwards.
Roll Slide
| Combo | Tap Sprint + Crouch in any direction |
|---|
A Roll Slide can be performed by inputting a slide during a roll. This will push the player in a specified direction during a roll, which allows for fine-tuning of rolling movements.
Pre-Roll Pickup
| Combo | Tap Sprint + Tap X on item |
|---|
Pre-Roll Pickup can be executed by pre-rolling and pressing the interact button (default: X ) when the player is near an item, which allows them to pick up items without going into an animation lock.
Melee Maneuvers
- Main article: Melee
Melee is a form of combat system that utilizes edged or blunt weapons and close quarter attacks. Every attack causes the player to take a single step forward. However, if the player is crouched, non-combo melee attacks will not cause a step forward. Melee weapons can be equipped in the tertiary slot of the arsenal in Warframe.
Current melee weapons consist of a number of classes, in which each class of weapons has a unique set of attack animations, including normal, jump, slide, stealth attacks, finishers, combos, and blocking.
Archwing Maneuvers
- Main article: Archwing Maneuvers
Archwing Maneuvers are a set of actions that a player can perform with the Archwing, a set of mechanical wings used by a Tenno to fly and engage in combat in space and underwater.
Archwing flight controls are similar to normal ground-based controls, with some variations for three-dimensional movement. Movement is controlled with both the W A S D Space Ctrl keys and mouse, in conjunction. Unlike ground combat, Archwings retain momentum after releasing movement keys mid-flight. Higher velocity allows a further coast. Archwings move at 55 m/s in space[note 1], and 20 m/s in atmospheric mode, modified by the Archwing's base Sprint Speed stat.
Hitting objects at high speed will result in the Archwing taking damage, making collision avoidance important to gameplay. Maneuvers still remain the same in submersible combat, albeit with reduced speed due to the water surrounding the player.
Increasing Maneuverability
Aim Glide/Wall Latch Duration
Aim Glide/Wall Latch Duration is an Upgrade type that increases the Aim Glide and Wall Latch durations.
")
")
")
")
")
")
")
")
")
")
")
")
Dodge Speed
Dodge Speed is an Upgrade type that increases the player's rolling, sidespring, and backspring speeds.
")
Mobility
Mobility is a Conclave-exclusive stat that represents a multiplier to the player's Bullet Jump speed, sliding speed, and sliding friction.
")
")
")
")
")
")
")
")
")
")
")
")
Movement Speed
- Main article: Movement Speed
Movement Speed is an Upgrade type that increases the animation speed of certain non-sprinting maneuvers.
Mods
")
")
")
")
")
")
")
")
Warframe Abilities
|
 4 +10/s |
Effigy Chroma turns his pelt into a massive sentry that strengthens nearby allies and engulfs enemies in elemental attacks. Introduced in Update 16.0 (2015-03-19) |
| ||||
Info
- Chroma expends
 50 Energy to shed his outer pelt, imbued with elemental energy while sprouting wings and converting it into a stationary floating sentry with
  1000 / 2000 / 4000 / 8000 Flesh health and 140 Ferrite Armor. The sentry will attack all enemies within 20 meters with a continuous stream of elemental energy, dealing 100 / 200 / 300 / 400
  Heat,
Heat,  Electricity,
  Toxin, or
  Cold damage per tick with a ?% status chance at 5 ticks per second. If enemies come within 5 meters of the sentry, it will periodically unleash a radial knockback that inflicts 200 Heat, Electricity, Toxin, or Cold damage and
  Ragdoll. The sentry can also unleash a radial roar to temporarily stun all enemies within 30 meters.
- Damage type is based on Chroma's current elemental alignment, determined by Chroma's primary emission color or the selected element of
 Spectral Scream.
- Damage type is based on Chroma's current elemental alignment, determined by Chroma's primary emission color or the selected element of
- Enemies killed by the sentry have a 15% / 30% / 45% / 60% chance to drop additional credits. In addition, all credits that drop within 10 meters of the sentry yield 25% / 50% / 75% / 100% additional credits.
- For enemies killed by the sentry within the percentage credit bonus range, credit income is increased by an average of 43.75% / 95% / 153.75% / 220%. This assumes the credit chance on kill results in double credits from that enemy.
- While Effigy is active, Chroma can fight in his lightened form, gaining 20% movement speed but with a 50% armor reduction.
- The armor reduction is a multiplicative penalty that's applied to Chroma's total armor (e.g., with a maxed
 Steel Fiber and Intensify, Chroma with
  Vex Armor at full capacity will have his armor lowered to 350 × (1 + 1.1 + 3.5 × 1.3) × 0.5 = 1,163.75 when Effigy is activated).
- The armor reduction is a multiplicative penalty that's applied to Chroma's total armor (e.g., with a maxed
- Effigy drains
 10 energy per second while active, and will deactivate if Chroma runs out of energy, sentry health is depleted, or if manually deactivated by pressing the ability key again (default 4 ).
- Channeling energy cost is affected by Ability Efficiency and Ability Duration.
- Chroma cannot gain energy from
 Energy Vampire,
  Rally Point, Rift Plane's innate energy regeneration, Squad Energy Restores, Energy Siphon, Energy Nexus, Dreamer's Bond, and/or
  Wellspring while Effigy is active.
 - Energy Orbs, Orokin Void Death Orb's energy restores, Rage, Hunter Adrenaline, Spellbound Harvest,
 Arcane Energize, and
  Emergence Dissipate's Energy Motes can still replenish Chroma's energy while Effigy is active.
- Ability Synergy: Effigy's damage per tick and knockback damage can be boosted by the Fury aspect of Vex Armor.
- Effigy will only maintain the damage increase from Fury so long as Chroma's Effigy is within range of Vex Armor.
- Effigy will only maintain the damage increase from Fury so long as Chroma's Effigy is within range of
- When deactivated, Chroma can teleport his pelt from anywhere onto himself. This will stop movement and interrupt any action Chroma is doing, such as reloading, leaving a player vulnerable.
- When deactivated while sliding, Chroma's pelt will be reapplied to him without triggering the animation, even if the player immediately cancels his slide.
- Both the initial cast and the return of Chroma's pelt will cease any actions as they are a two-handed ability.
Augment
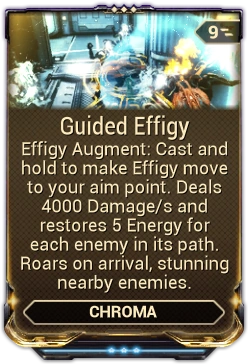
- Main article: Guided Effigy
Guided Effigy is a Warframe Augment Mod for ![]() Chroma's
Chroma's ![]() Effigy that allows him to control the Effigy, dealing rapid damage to enemies in its path while recovering energy and stunning enemies at the destination.
Effigy that allows him to control the Effigy, dealing rapid damage to enemies in its path while recovering energy and stunning enemies at the destination.
Tips & Tricks
- The pelt usually unleashes its roar a few seconds after deploying. This allows you to quickly deploy the sentry for a temporary stun to all nearby enemies.
- The pelt can be
 Banished, preventing damage from non-banished enemies while still being able to damage all enemies normally.
 - The pelt gains shields from the Shield Osprey Eximus Specter.
- As the pelt will not move from the spot it is cast on (unless the Guided Effigy mod is equipped), it would serve quite well as an impromptu turret. As such, it is recommended to place the pelt on top of an objective that needs to be defended such as in a Defense mission. If that is the case, then it is recommended to equip energy-regenerating mods such as Rage or Hunter Adrenaline to keep the pelt active for as long as possible.

|
 1 |
Metamorphosis Switch forms, temporarily gaining bonus shields and armor in Night-Form, or bonus damage and speed in Day-Form. Introduced in Update 17.0 (2015-07-31) |
|
Info
- Equinox expends 25 Energy to transform between her night or day forms. She acquires abilities exclusive to each form and gains bonuses that diminish over 10 / 15 / 20 / 25 seconds.
- These bonuses decay linearly every second until they equal zero on ability expiration.
- The bonuses differ depending on Equinox's form:
- Upon switching to Night Form, Equinox can use
 Rest,
Rest,  Pacify, and
  Mend.
Mend. - She gains 100 / 150 / 200 / 250 armor and 50 / 75 / 100 / 150 shields.
- Both are additive with Equinox's current armor and shield capacity (e.g., a level-30 Equinox with a maxed Redirection, Steel Fiber, and Intensify will have 370 + 370 × 1 + 150 × 1.3 = 935 shields and 135 × 2 + 250 × 1.3 = 595 armor within the first second of a rank-3 Metamorphosis after the initial transformation is complete).
- On missions with ice hazards, the shield decay rate is halved. When the ability ends, Equinox will be left with overshields equal to 50% of the listed maximum shield bonuses.
- Both are additive with Equinox's current armor and shield capacity (e.g., a level-30 Equinox with a maxed
- Upon switching to Day Form, Equinox can use Rage, Provoke, and Maim.
- She gains 10% / 15% / 20% / 25% weapon damage and 5% / 10% / 12% / 15% Movement Speed.
- The damage buff is additive with the base damage of weapons (e.g., with a maxed Heavy Caliber and Intensify, a weapon that inflicts 250 base damage will be increased to 250 × (1 + 1.65 + 0.25 × 1.3) = 743.75 within the first second of a rank-3 Metamorphosis after the initial transformation is complete).
- Does not work on melee weapons
- The movement speed buff is additive with other movement speed modifiers (e.g., with a maxed Dispatch Overdrive and Intensify, a rank-3 Metamorphosis will increase Equinox's move speed to (1 + 60% + 15% × 1.3) = 1.795 times her base speed within the first second after the initial transformation is complete).
- The damage buff is additive with the base damage of weapons (e.g., with a maxed
- Form switch takes about 1 second to complete.
- Switching between forms removes any bonuses granted by the previous form. Only a single set of Metamorphosis buffs can be active at any given time.
- While switching, Equinox cannot cast any abilities but can perform all other actions such as moving and using weapons.
- Pacify & Provoke and Mend & Maim are deactivated upon casting Metamorphosis. However, casting Metamorphosis in Day Form while Provoke is active will increase the armor and shield bonuses for Equinox's Night Form.
- During the transformation, Equinox momentarily becomes whole with her night and day features merged together, then separates into the opposite form.
Augment
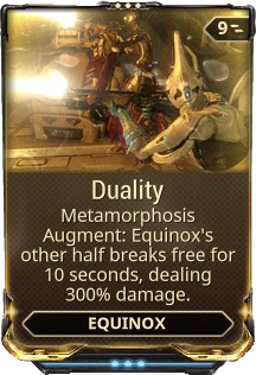
- Main article: Duality
Duality is a Warframe Augment Mod for ![]() Equinox that causes her opposite form to split from her when casting
Equinox that causes her opposite form to split from her when casting ![]() Metamorphosis, creating a Specter armed with the weapon Equinox was using during casting.
Metamorphosis, creating a Specter armed with the weapon Equinox was using during casting.
|
 4 |
Rotorswell Gyre’s mechanisms spin at incredible speeds, generating an Electric Field that shocks nearby enemies. When Gyre gets a critical hit, a large electrical discharge will chain from the enemy that was hit to nearby enemies. Introduced in Update 31.5 (2022-04-27) |
250 / 350 / 400 / 500 (discharge |
10 m (discharge range) | |||
|
Misc:
50% (move speed bonus) |
Info
- With a graceful whirl, Gyre expends 100 energy to overcharge her coil gown as its rotors gyrate rapidly and conductive plating lift apart, granting her a 50% movement speed bonus lasting for 10 / 14 / 18 / 22 seconds. A sustained radial electrical surge contained within a ring of Gyral Blocks surrounds Gyre, shocking all enemies within a
 4 meter sight detection radius around her to inflict 100 / 150 / 200 / 250 Electricity damage per second with a guaranteed status effect.
- Damage per second can damage and break destructible Objects in range.
- Gyre's player camera positions itself further away while Rotorswell is active to expand her field of view.
- Electric field is a spherical radius around Gyre that affects enemies above and below her, despite the visual indicator being represented by the horizontal Gyral Block ring.
- While active, inflicting a Critical Hit from Gyre's weapons or abilities against an enemy target triggers a lightning discharge that chains outward, striking the target plus up to 5 other enemies within a 10 meter sight detection radius around the source enemy. The source enemy and chained enemies are inflicted 250 / 300 / 400 / 500 Electricity damage with a guaranteed status effect. Up to 2 lightning discharges from 2 separate critical hits can occur simultaneously; after discharging, Rotorswell undergoes a 1 second cooldown before it can create discharges again.
- Discharge damage is independent of the used weapon's damage.
- Ability Synergy:
- Gyre's passive and
 Cathode Grace enable ability Critical Hits by granting 0% to 300% critical chance to damage and status effects dealt by Rotorswell.
- Critical hits dealt by
 Arcsphere,
  Coil Horizon, Rotorswell's electric field and its discharge will trigger the discharge effect.
- Critical hits dealt by
- Direct kills by Rotorswell, its Electricity status effects, and kill assists from allies extend Cathode Grace's duration.
- Killing enemies with Cathode Current active releases an additional discharge from Rotorswell while extending its duration equal to Cathode Grace's bonus duration.
- Gyre's passive and
- Can be recast while active to briefly cancel the ability then renew into a new instance with full duration.
- Casting Rotorswell is a full-body animation that interrupts Gyre's grounded movement and other actions.
- In Landscapes, deploying and riding an Archwing or a K-Drive while Rotorswell is active will retain the gyrating transmitters and will keep dealing damage.
- This is also true when casting Rotorswell before getting off a Railjack to fly via Archwing, giving an additional damaging source while engaging enemy craft in melee.
- Gyre visually performs a clockwise pirouette from where she stands, ending the whirl with a right-footed stomp as she braces her arms to the sides for the electrical overcharge. Gyre's body is enveloped in electricity, as 8 Transmitter Drones launch outward and take flight in a zigzagging pattern, following Gyre wherever she goes to detect her critical hits and discharge a lightning strike against her targets. Her coil gown's crinoline splits apart and lifts the conductive plating up to the sides to provide her ample legroom for swift movement. A persistent horizontal ring of 72 Gyral Blocks materializes and surrounds Gyre to denote her electric field's radius, while the electric surge spreads from her coil gown out toward the ring and concentrates itself within Gyre's proximity as the electrical current stabilizes.
- Transmitter Drones use the same model as
 Vauban's grenades and default to the silver coloration and white energy. They travel their own flight paths and attempt to follow Gyre once she moves away.
 - All Gyral Blocks have a stylized engraving that resembles Mastery Slate Decorations, rapidly spinning counterclockwise along the X axis and pulse together in a wave-like pattern. The spacing between Gyral Blocks widens or tightens depending on Gyre's Ability Range stat.
- Transmitter Drones use the same model as
Tips & Tricks
- Synergizes particularly well with high ammo, high fire rate guns even if they have low damage and/or critical chance such a full-auto
 Tiberon Prime, as the lightning arcs' damage is independent of said weapons' damage and the fire rate may compensate for the low chances at critical hits.
- Can also work for high fire rate, high multishot but mediocre critical chance shotguns such as the
 Boar Prime, as their individual pellets have their own chance at striking a critical hit.
- Can also work for high fire rate, high multishot but mediocre critical chance shotguns such as the
- As the electrical discharges from Rotorswell require only critical hits and not critical kills to trigger, weapons with high potential for extremely high critical chance and high fire rate/attack speed - such as the
 Grakata,
  Soma Prime with Hata-Satya, or
  Tekko - will synergize extremely well with the ability.
 - Activating Rotorswell before riding an Archwing or a K-Drive will make Gyre deadly against enemies that get too close.
|
 3 |
Venari Command Venari to focus on a target. Hold to cycle between Attack, Protect, and Heal postures. If Venari is killed, use this ability to revive her instantly. Introduced in Update 22.18 (2018-04-20) |
350 (snare damage) 50 HP/sec (health regen) |
|
Misc:
120 s (mark duration) |
Info
- Khora commands her loyal Kavat companion
 Venari to prioritize a target on the aiming reticle for 25 energy, leaving Venari's mark above the target for 120 seconds. Once commanded, Venari chases the marked target if nearby or teleports to it if far away, while refreshing the special effect for her battle posture if it is on cooldown. When Venari reaches the target, she will perform different tasks depending on her battle posture.
- The target is marked by a floating battle posture icon above their head.
- Venari's mark cannot be recast on the same target while still active.
- Venari's mark lasts until removed via duration end, Khora marking a different target, switching battle posture, or the target is killed.
- Marked targets are prioritized by Venari over enemies afflicted by
 Slash with Hunter Command equipped.
 - When a target is marked, Venari audibly snarls in response.
- While Venari is alive, Khora passively gains a 1.05x / 1.1x / 1.12x / 1.15x movement speed multiplier. This stacks multiplicatively with speed mods like Rush. When Venari is killed, she will respawn beside Khora after 45 seconds or instantly by casting this ability using 50 energy.
- Speed multiplier stacks multiplicatively with mods such as Rush.
- Revive energy cost is reduced proportionately based on the remaining time until Venari respawns (e.g. 1 second remaining on timer = 1 energy used to revive Venari.)
- Respawn time is not affected by mods.
- Respawn time is displayed on the ability icon when Venari is killed.
- When respawned, Venari visually leaps down from above landing next to Khora.
- Speed multiplier stacks multiplicatively with mods such as
- All postures are available by default when Venari is unlocked at Warframe rank 5.
- Holding the ability key (default 3 ) cycles to Venari's next battle posture for no energy cost, and also deactivates any current Mark:
- Khora commands Venari to adopt her Attack posture, causing her to ferociously assault nearby enemies and allowing her to use Snare. During Snare, Venari chains her chosen target in place for 2.5 seconds, as she damages the target with 5 hits over the course of the animation; each hit inflicts 350 Slash damage with a guaranteed Status Effect proc. Snare has a cooldown of 3 seconds, which can be bypassed by Khora manually marking a target.
- Snare damage is affected by by Maul, Venom Teeth and other elemental damage mods.
- Snare damage type is affected by elemental mods, including Venom Teeth, Shock Collar, Flame Gland, and Frost Jaw.
- Snare is capable of Status Effect procs with every hit in addition to the forced Slash proc. It inherits Venari's Status Chance and damage spread shown on the Arsenal as normal.
- Snare has 0% critical chance and is not affected by Bite or Hunter Synergy.
- Venari's Attack mark can only be cast on an enemy target.
- Venari's Attack mark will remain on the target until it expires, allowing Venari to focus on killing the target with multiple Snare attacks.
- Snare damage is affected by by
- Snare is not affected by Swipe's multiple targeting and range extension.
- Casting Snare is a full-body animation that causes Venari to maneuver around the target, before reappearing near the target once finished.
- Venari is still vulnerable to damage while performing her special attack animation.
- During Snare, the target is visually held in place by living chains that attach to nearby surfaces.
- Tail Whip will affect the target even if it moves away from Venari during her spin animation.
- Does not knockdown nor disarm enemies innately wielding melee weapons.
- Venari's Protect mark can only be cast on an enemy target.
- Venari's Protect mark is removed once Tail Whip is performed on the target.
- Eligible targets for healing includes all Warframes, Companions, Eidolon Lures, summoned allied units such as Specters, allied Invasion units, Hostages, Kavor Defectors, Sortie and Arbitrations Defense Operatives, and Defense Objects.
- Venari's Heal does not affect Necramechs or Operators.
- Revitalize deactivates when all allied players are above the missing health threshold.
- Revitalize does not grant Shield points.
- Venari's Heal mark can only be cast on an ally target.
- Venari's Heal mark is removed once Khora marks another target, the target is killed, or Khora switches battle posture.
- Venari will closely follow its target and Revitalize will not deactivate until the mark is removed. While following a target, Venari also will not attack nearby enemies unless she is equipped with supplemental attack mods like Sharpened Claws or Pounce.
- Battle posture cannot be switched while Venari is dead, instead the respawn function overrides any input on the ability key.
- While Venari is in a neutral state with no active Marks she is far less likely to get stuck in terrain, frequently teleporting in beside you if you have gotten ahead of her.
- Casting speed on all animations related to this ability, on both Khora and Venari, is not affected by mods such as Natural Talent and Speed Drift.
- Venari does not benefit from the set bonus of Hunter Mods.
- Set Mods equipped on Venari do not count towards the number of mods equipped for the set bonus.
- Fetch equipped on Venari does not stack with Vacuum or Fetch equipped on companions.
- Casting Venari's mark and summoning Venari do not play any animations on Khora, while changing posture is an upper-body animation that allows movement and parkour Maneuvers.
- Khora's metallic adornments and Venari's tail change appearance depending on the selected posture: Attack (long spikes), Protect (small stubs and hammer tail), and Heal (curved blades).
- While Venari is dead, Khora's metallic adornments are hidden from view and will reappear once Venari respawns.
- The following visual effects are affected by Khora's chosen Warframe energy color:
- Venari's eye and regalia colors, mark icon color, as well as her death and respawn/teleport landing impact.
- Khora's battle posture switching.
- Attack posture Snare trails and Heal posture Revitalize glow.
Augment
- Main article: Venari Bodyguard
Venari Bodyguard is a Warframe Augment Mod for ![]() Khora's
Khora's ![]() Venari that makes Venari die in Khora's place at the cost of an increased spawn timer, but every enemy killed decreases the spawn timer.
Venari that makes Venari die in Khora's place at the cost of an increased spawn timer, but every enemy killed decreases the spawn timer.
Tips & Tricks
- Khora's passive speed multiplier affects her regular movement speed, which also enhances sprint speed. Combine with high Ability Strength and sprint speed mods such as Rush and Armored Agility to gain vastly increased mobility.
- Keep moving and do parkour maneuvers while switching battle postures to evade incoming enemy attacks.
- By default, Venari will attack enemies and perform her battle posture effects on her own. Place a mark on your target to direct Venari's attention where you desire.
- Equip Hunter Recovery on Venari and place an Attack mark on a distant enemy. Venari will teleport to the target and immediately use Snare to attack it, quickly healing Khora in the process.
- Use Protect mark to knockdown and disarm dangerous threats such as Napalm and Tech.
- Heal mark allows versatile options to grant health regen in an area:
- Use on an ally or Khora herself to have Venari follow suit.
- Use on Venari to order her to stay put.
- Use on Khora if Venari is far away to recall her back to your side.
- Use on an ally in the distance to teleport Venari to the fray.
- Venari's Heal posture is able to heal static objectives such as Cryopods, Excavators, and Kuva Harvesters. Place a Heal mark on the objective to have Venari stand guard over it providing healing to it and nearby teammates. It can also be used to heal moving objectives like defectors and hostages.
- Cast
 Ensnare to group up enemies for Venari to attack them for double damage.
Bugs
- Slash procs do not change Venari's target with Hunter Command equipped, even when no enemies are marked.
- Venari's UI will be completely hidden if Venari is dead and the player uses Transference to return to the Warframe.
- Venari's respawn function can rarely not trigger when Venari is killed, requiring Khora to spend a revive on herself to bring Venari back.
- Venari randomly stops moving when her heal aura is activated. This bug occurs for targets she automatically chooses to heal, as well as targets marked by Khora. Switching to Attack or Protect postures will reset her AI to normal.
- Placing a Heal mark on Khora or an ally sometimes causes Venari to toggle the healing aura on and off repeatedly as she edges toward the marked target.
- Venari is not going to collect items with Fetch mod. (only works well playing solo mode)
- Locked lockers unlocked by Venari via the Scavenge mod still appear as locked (red) despite being unlocked, and can still be opened.
- Fear Sense can sometimes make enemy markers appear outside of the minimap in the UI if Venari uses it and Khora moves away from the enemies.
- If during a Sortie the energy level is insufficient to cast this ability, then it will be rendered inactive completely. The side effect is that if Venari dies it will not revive itself during the mission.
- Client only: If Venari dies and the ability is cast to revive her, the passive movement speed may be applied with unmodded Strength.
|
 1 |
Fire Walker Blaze a trail of flames, scorching enemies and cleansing allies. Introduced in Update 18.1 (2015-12-16) |
500 / 750 / 1000 / 1250 ( |
5 / 6 / 7.5 / 10 s (flame duration) | |||
|
Misc:
15 / 15 / 20 / 25 % (movement speed bonus) | |||
| Subsumable to Helminth |
Info
- Nezha expends 25 energy to ignite his Wind Fire Wheels to gain 15% / 15% / 20% / 25% bonus Movement Speed for 15 / 20 / 25 / 30 seconds, while leaving behind a trail of fire beneath his feet that lasts for 5 / 6 / 7.5 / 10 seconds. Enemies that walk over the flames are dealt 50 / 100 / 150 / 200 Heat damage per 0.5 seconds, with each instance of damage having a 10% / 25% / 50% / ? Heat status chance. While Nezha and his allies stand on the flames, they are immune and continually cleansed of all Status Effects.
- Cast animation of ~0.5 seconds, affected by Casting Speed.
- Flames can be formed in mid-air but only while Bullet Jumping. Falling will not leave behind any flames.
- Ability Synergy: If Fire Walker is active when using
 Blazing Chakram's teleportation, Fire Walker will overheat at the destination and deal 500 / 750 / 1000 / 1250 Heat damage with a 10% / 25% / 50% / ? Heat status chance within a radius of 3 / 4 / 5 / 6 meters, as well as leaving a lingering ring of Fire Walker's flames for ? seconds.
- Damage does not bypass obstacles in the environment and diminishes with distance.
- Fire Walker can be cast while moving but will interrupt all other actions.
- Can be recast while active to refresh its duration.
- Subsuming Nezha to the Helminth will offer Fire Walker and its augments to be used by other Warframes.
- This does not allow other Warframes to use Fire Walker's explosion on teleport. This is exclusively a synergy with Blazing Chakram.
Augment
- Main article: Pyroclastic Flow
Pyroclastic Flow is a Warframe Augment Mod for ![]() Nezha and
Nezha and ![]() Nezha Prime that accumulates the damage
Nezha Prime that accumulates the damage ![]() Fire Walker deals and unleashes it in a trail of fire upon reactivating the ability.
Fire Walker deals and unleashes it in a trail of fire upon reactivating the ability.
Tips & Tricks
- The 100% chance of the Heat status effect makes this an effective form of control for narrow hallways or choke points.
- Quickly sliding into groups of enemies can reliably disable them.
- The amount of ground that can be covered in flames can be improved using Sprint Speed mods.
- Also works as an escape tool to prevent enemies from following you.
- Can be used to cut off melee units from defense objectives.
- Briefly tapping slide key allows for additional control over Nezha's momentum while maintaining the additional speed.
- Choosing a dark energy color makes the visual effect less intrusive.
|
 3 |
Metronome Grants buffs to those who consistently perform actions in time to Octavia’s music. Timed jumps offer the Vivace speed buff. Crouching on the beat grants cloaking with the Nocturne buff. Firing rhythmically bestows Opera multishot buff. Timed melee swings give the Forte damage buff. Introduced in Update 20.0 (2017-03-24) |
10 / 15 / 20 / 30 % (speed bonus) |
5 / 8 / 12 / 15 s (buff duration) | |||
Info
- Octavia expends 75 energy to produce a melodic musical aura with a radius of 6 / 8 / 10 / 12 meters for 8 / 12 / 16 / 20 seconds. Octavia and her allies gain an 10% / 15% / 20% / 35% Armor bonus while inside the melodic aura.
- Metronome's music is in tune with the Melody section of the Mandachord, drawing from the preset musical notes to determine the melodic aura's note intervals.
- While the player and allies can hear the melody, Metronome's aura is considered silent to enemies.
- While inside the melodic aura, Octavia and her allies can perform specific actions in sync to the melodic music to gain various Sync Buffs that can be active simultaneously:
How to Synchronize with Metronome:
- Each line of Melody notes is visually represented as a concentric ring of light, which begins at the edge of the melodic aura and shrinks toward Octavia’s feet, where the ring disappears as the sound of the notes are played.
- In order to gain buffs, players must time their actions to sync with the moment a concentric ring is centered on Octavia, as the sound of the notes are played. A flash of light will appear below the player upon a successful sync.
- Synchronize percentages are listed between 0% and 100%, and will raise or lower depending on the player's timing. Once the percentage reaches 100%, the player gains the corresponding buff.
- Synchronize percentage is displayed as an icon with the current stored percentage beside the health and shield indicators on the HUD. Once synchronized, the corresponding buff icon will also be displayed with the remaining buff duration beneath and bonus percentage at the top-right of the icon.
- Each player must perform actions individually to gain buffs. Sync buffs are gained per-player and are not shared between allies in range.
- If a player does not perform an action when the ring disappears, their existing synchronize percentage does not decrease. however, if they do perform an action at the wrong time, their synchronize percentage resets; Meaning that players can skip certain beats and focus on precision if they cannot keep up with the Mandachord's rapid pace. This is particularly important for weapons with low fire rate / attack speed and with the vivace (movement speed) buff.
- The amount of notes on one line of the Melody section on the Mandachord determines the brightness of the concentric rings.
- Multishot bonus stacks additively with multishot mods such as Split Chamber.
- Damage bonus stacks additively with base damage mods like Pressure Point.
- Metronome can be recast while active to refresh its duration. On recast, existing synchronize percentages will not carry over and will be reset to 0%.
- Casting Metronome is not a One-Handed Action and interrupts other actions, but allows movement.
- Casting animation is affected by Casting Speed.
- When Octavia is standing on higher elevations or objects, the concentric rings of light from the melodic aura will partially fade depending on the surrounding terrain to allow better visibility.
- Concentric ring color and Nocturne cloak effect are affected by Octavia’s chosen Warframe energy color.
- Metronome affects the visuals and audio of any nearby
 Mallet and
  Resonator belonging to Octavia herself.
Tips & Tricks
- Having the mandachord's melody set to a consistent rhythm makes it much easier to sync up your buffs.
- Similar to Octavia's other abilities, without a melody this skill will do nothing.
- The longer the pause is between notes, the higher is the percentage gained per successful action.
- The intensity of light rings is determined by the number of notes in a particular column.
|
 2 |
Molt Shedding her skin like a snake, Saryn leaves a decoy behind to draw fire from enemies. Introduced in Update 7.0 (2013-03-18) |
240 / 300 / 350 / 400 ( 30% / 35% / 40% / 50% (movement speed buff) |
3.5 / 4 / 4.5 / 5 s (movement speed buff) | |||
|
Misc:
100 % (status cleanse on cast) | |||
| Subsumable to Helminth |
Info
- Saryn expends 50 energy to shed her skin, removing all existing status effects and increasing her Movement Speed by 30% / 35% / 40% / 50% for 3.5 / 4 / 4.5 / 5 seconds, while leaving behind a decoy with 400 shields and 150 / 300 / 400 / 500 health that draws enemy fire for 14 / 24 / 32 / 40 seconds. When deployed, the decoy is Invulnerable for 1.5 / 2 / 3 / 3 seconds, during which all incoming damage absorbed by it is converted and added to its health. The decoy will explode if it loses all of its hitpoints, if its duration expires or if the ability is cast again, inflicting 240 / 300 / 350 / 400 Toxin damage with 100% Toxin status chance to all enemies within 5 / 6 / 7 / 10 meters from it. A maximum of 1 Molt can exist.
- Explosion damage does not bypass obstacles in the environment and diminishes with distance.
- Recasting while active will detonate the Molt and spawn a new one.
- Does not have a cast time or animation.
- Molt's decoy is placed at Saryn's current position, mirroring her pose and elevation.
- Molt's shields regenerate over time and can be buffed with the use of allied Shield Ospreys, whether in Specter or
 Mind Controlled forms.
 - Elemental augment mods, such as
 Ember's Fireball Frenzy, can be applied to Molt. The damage augment will not affect the explosion damage or damage type upon Molt's expiration.
 - Molt cannot be knocked down or moved, and acts as a physical object, unlike
 Loki's
  Decoy.
 - Molt will slowly vaporize and dissipate for its duration, eventually exploding once it nearly vanishes.
- Molt's shields regenerate over time and can be buffed with the use of allied Shield Ospreys, whether in Specter or
- Casting Molt can be done while performing any action without interrupting it, including reloading, charging, shooting, maneuvering, and while on a zipline.
- Can be cast in all states (except while upside down in a flip jump or while dodging) and can be reused instantly.
- Subsuming Saryn to the Helminth will offer Molt and its augments to be used by other Warframes.
Augment
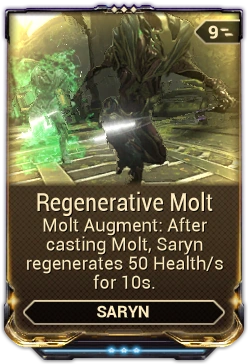
- Main article: Regenerative Molt
Regenerative Molt is a Warframe Augment Mod for ![]() Saryn that allows her to regenerate health over a span of time after casting
Saryn that allows her to regenerate health over a span of time after casting ![]() Molt.
Molt.
Tips & Tricks
- Using during a well timed jump can result it being low enough for enemies to target, such as Infested or Melee units, but be more protected from most melee attacks. (Ancients will still be able to reach, as well as the knockback damage from Leapers).
- Place Molt in locations which can protect it from enemy attacks to maximize its survival.
- Limbo can utilize this ability by casting Banish on the decoy, granting it immunity to all attacks that do not affect targets in the Rift Plane.
- If Molt is closer to the enemy than the player, enemies will (normally) focus it. Applies to the caster as well as other players, unless they're using aggro-increasing abilities such as
 Nyx's
Nyx's  Absorb or
  Rhino's
  Iron Skin.
 - It can be used as protection from enemy fire, when you revive an downed teammate.
Bugs
- When knocked back by an Ancient, the physical target of the decoy will move, but the model remains in place. This can be seen while having Enemy Sense and Enemy Radar equipped while seeing the decoy (as a friendly blip) against a group of infested.
- For clients, Molt will sometimes be in a default standing position when deployed.
|
 2 |
Speed Volt energizes his body and nearby Warframes, giving them increased speed and dexterity for a short time. Introduced in Update 5.3 (2013-01-10) |
10% / 15% / 20% / 25% (reload speed buff) |
Info
- Volt expends 25 energy to energize the surrounding area, increasing the mobility of himself and his allies within 25 meters. Affected players will gain 10% / 15% / 20% / 25% weapon Reload Speed and 75% melee Attack Speed and Movement Speed bonuses, lasting for 9 / 10 / 11 / 12 seconds.
- The attack speed buff grants an additive bonus that will stack with other attack speed modifiers. (e.g., Fury combined with Speed at max rank and +30% Ability Strength will increase Volt's attack speed by 0.75 × 1.3 + 0.3 = 127.5%).
- The movement speed buff grants a multiplicative bonus that will stack with other movement speed modifiers. (e.g., Rush combined with Speed at max rank and +30% Ability Strength from Intensify will increase Volt's sprint speed by (1 × 1.3) × (1 + (
 0.75 × 1.3)) − 1 = 156.75%).
 - The reload speed buff grants an additive bonus that will stack with other reload speed modifiers. (e.g., Quickdraw combined with Speed at max rank and +30% Ability Strength from Intensify will increase Volt's reload speed by 0.25 × 1.3 + 0.48 = 80.5%).
- The attack speed buff grants an additive bonus that will stack with other attack speed modifiers. (e.g.,
- Allies can backflip to remove Speed if they wish to opt-out.
- Increases the distance of Maneuvers like the sliding front flip and wall run as a result of the faster sprint speed.
- Can be used while performing many actions without interrupting them, including reloading.
- Can be recast while active.
Augment
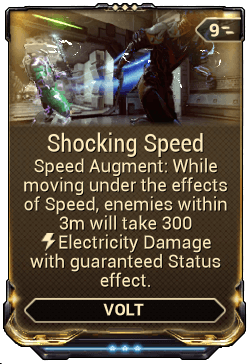
- Main article: Shocking Speed
Shocking Speed is a Warframe Augment Mod for ![]() Volt's
Volt's ![]() Speed that causes him and his allies to inflict
Speed that causes him and his allies to inflict ![]() Electricity damage and status to enemies within close proximity while moving.
Electricity damage and status to enemies within close proximity while moving.
Tips & Tricks
- Great for catching up with teammates that need to be revived, fleeing from tough enemies, or taking the lead.
- Excellent skill to use for a squad looking to get through a mission quickly.
- Can be combined with Rush for speed only rivaled by the likes of Gauss, Titania, etc.
- Combine with Fury and Berserker Fury for absurd attack speed on melee weapons.
- Can be used to avoid enemy fire due to reduced enemy accuracy and to dodge almost all Corpus due to their weapons' projectile travel time.
- Can reduce recharge delay for
 Cycron or a Kitgun equipped with
  Pax Charge, however, it does not affect recharge rate.
 - Using Speed before switching to Archwing mode significantly boost Archwing's flight speed, including underwater
|
 1 |
Shroud of Dynar (TAP) Dynar shrouds Voruna with invisibility and accelerates her speed. Invisibility ends when Voruna attacks. For a short time, melee attacks have increased Critical Damage and Status Chance and inflict Bleed. Melee kill an enemy during this time to extend the buff. (HOLD) Dynar guards Voruna, increasing her Parkour Velocity. Introduced in Update 32.2 (2022-11-30) |
|
5 / 6 / 7 / 8 s max melee buff duration | |||
|
Misc:
+ 25 / 50 / 75 / 100 % Movement Speed bonus |
Info
- Dynar enshrouds his mistress in the night's veil to endow her with stealth, speed, and lethality. Shroud of Dynar expends 25 energy to render Voruna and her Companion both Invisible and accelerates her movement speed by +25% / +50% / +75% / +100% for 8 / 10 / 12 / 14 seconds, ending immediately upon ability expiration or when she performs a ranged weapon attack (default LMB ), or after the first melee animation completes when she performs a melee weapon attack (default E ).
- Performing interactions such as picking up objects, Hacking, or reviving from Bleedout does not break invisibility.
- Attack-related contextual actions (default X ), such as melee Finisher attacks and Parazon Mercy, will break invisibility instantly when the animation begins.
- Invisibility duration timer is displayed on the ability icon.
- While active, her melee weapon gains the following statistic buffs: +0.5x / +1.0x / +1.5x / +2.0x flat Critical Damage, Critical Chance set to a flat 100%, Status Chance set to a flat 25% / 50% / 75% / 100%, and guaranteed Slash status effect per hit.
- Melee weapons modded with above 100% critical chance and/or status chance are not affected by Shroud of Dynar's absolute chance bonuses.
- Guaranteed Slash status effect from Shroud of Dynar does not apply to non-melee strikes from melee weapons, such as explosions (
 Wolf Sledge), projectiles (
 Nepheri), and
  Zenistar's special attack.
- Leaving invisibility will extend the melee buffs for 3 seconds. While Shroud of Dynar is active, melee kill 1 enemy to extend the remaining buff duration to a maximum of 5 / 6 / 7 / 8 seconds.
- Duration extension can only be triggered once per cast; any subsequent melee kills will not extend the ability further.
- Max duration on melee buff can be immediately reached with a lethal melee hit on an enemy during the invisibility phase.
- Melee buff total duration is calculated with the following expression:
- Modded Duration = Minimum Duration + [(Max Duration - Min. Duration) × Ability Duration]
- At ability rank 3 with a maxed Continuity equipped, Shroud of Dynar lasts for 3 secs + [(8 secs - 3 secs) × 1.3] = 9.5 seconds
- In-game Ability menu stat displays the minimum duration up to the max modded duration.
- Buff duration timer is displayed as an ability buff icon beside Voruna's hitpoints indicator.
- Hold down the ability button (default 1 ) to command Dynar to guard Voruna, changing her passive to a permanent +55% Parkour Velocity bonus for no energy cost.
- Ability Synergy:
- During Shroud of Dynar, Voruna blinks out then back into invisibility when casting
 Fangs of Raksh,
  Ulfrun's Descent, and Helminth abilities. Voruna remains invisible when casting
  Lycath's Hunt, Transference, and attacking with the Operator.
 - While Shroud of Dynar's invisibility phase or melee buff phase is active, Ulfrun's Descent's Slash damage benefits from the absolute critical chance and the flat critical multiplier bonus.
- During Shroud of Dynar, Voruna blinks out then back into invisibility when casting
- Cannot be recast during invisibility. Can be recast while melee buffs are active to end them immediately then become invisible.
- Dynar visually idles upon Voruna's left shoulder. His distinct physical feature is the eyepatch covering his left first eye.
- Voruna visually leaps and claws downward, cloaking herself in shadowy tendrils that envelop her body. Shadows dance around her feet while she kicks up a trail of dust clouds as she moves, while Dynar audibly growls and snarls.
- Voruna possesses two Appearance Auxiliary Attachments that make her more visible to players during her Shroud of Dynar: Semi-Cloak, which makes the Warframe semi-transparent; and Glow-Cloak, which produces an opaque glow. These appearances are affected by primary energy color and do not alter how enemies perceive the player.
Augment
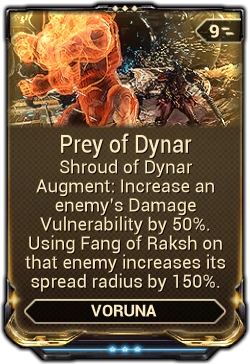
- Main article: Prey of Dynar
Prey of Dynar is a Warframe Augment Mod for ![]() Voruna. While
Voruna. While ![]() Shroud of Dynar is active a random enemy will be marked with a glowing effect, that enemy receives increased Damage Vulnerability. Casting
Shroud of Dynar is active a random enemy will be marked with a glowing effect, that enemy receives increased Damage Vulnerability. Casting ![]() Fangs of Raksh on the targeted enemy increases its spread radius on death.
Fangs of Raksh on the targeted enemy increases its spread radius on death.
Tips & Tricks
- Activate Dynar's passive to make Voruna highly mobile when extracting from a mission. To further increase her survivability in the process, activate Shroud of Dynar while running through enemies to escape detection.
- Shroud of Dynar is also a good way of surviving being overwhelmed by too many enemies by suddenly going invisible and interrupting their attacks, giving Voruna breathing space to plan for a counterattack.
- Modding for high Ability Duration and combining
 Infested Mobility gives Voruna the mobility to quickly speed through missions undetected.
|
 1 |
Reservoirs Choose and summon a Reservoir filled with Motes that attach to and aid Wisp and her allies. Haste Mote grants increased movement and attack speed. Vitality Mote increases maximum health and heals over time. Shock Mote stuns nearby enemies. Introduced in Update 25.0 (2019-05-22) |
| ||||||||||||
Info
- Birthed from Wisp's dimensional habitat, three species of Reservoir pods nursing friendly Motes can be selectively summoned by Wisp. Tap the ability key to freely cycle the selection wheel between the Vitality, Haste, and Shock reservoirs. Hold down the ability key to summon the selected reservoir from a portal above Wisp for 25 energy, placing the pod directly in front of her. The reservoir pods have a range of 5 meters and last indefinitely, while the motes retrieved from the pods lasts 19 / 22/ 26 / 30 seconds while outside of the reservoirs. Wisp can summon a maximum of 6 reservoir pods.
- Casting additional reservoir pods will replace the oldest pod.
- Up to three different reservoir types can be unlocked as the ability is ranked up:
- Vitality: unlocked by default (Unranked Warframe)
- Haste: unlocked at rank 1 (Warframe Rank 7)
- Shock: unlocked at rank 2 (Warframe Rank 14)
- Reservoir selection wheel is displayed above the ability icons. The icon for the currently selected type is enlarged and shown on the left of the wheel. Tapping the ability key (default 1 ) will cycle between the reservoir types, while holding the key will deploy the selected reservoir (tap/hold functions can be inverted in the Settings).
- Reservoir pods are invulnerable static floating objects that are permanently placed until removed by Wisp or by colliding with Nullifier Crewman bubbles.
- Each reservoir pod spawns a floating Mote above it, which can be plucked an infinite amount of times by Wisp, other Warframes, Companions, summoned allied units such as Specters and Railjack Crews, allied Invasion units, Hostages, converted Liches and Sisters, Kavor Defectors, Sortie and Arbitrations Defense Operatives, and Defense Objects coming into the reservoir's range.
- Motes grant the affected entity a specialized buff based on the reservoir type.
- Motes respawn from their reservoirs after a brief cooldown if taken by an entity.
- Motes last for a duration, with their timers able to be refreshed and paused indefinitely while the buffed entities are standing in range of the respective reservoir type.
- Reservoir pods take on Wisp's Ability Strength when placed, and will remain at that Ability Strength percentage indefinitely.
- If there are multiple reservoir pods, the pod with the highest buff value will take effect, with its corresponding duration.
- A lower-value pod will still refresh the duration of a higher-value pod.
- Each entity is limited to 1 active Mote buff per reservoir type.
- The electric charge shows as electricity surging around the Shock Mote when ready to discharge.
- Ability Synergy:
- Casting
 Breach Surge on an active reservoir pod will teleport Wisp to its location and double Breach Surge's range.
- Targeting a reservoir pod with the reticle will encircle it with Wisp's chosen energy color to indicate Breach Surge's ability to be cast on it and can be used at any range, provided there is line of sight.
- Reservoir pods can be targeted through solid surfaces provided there is vision of them (e.g. windows).
- Wisp cannot teleport to a pod while within less than 10 meters of it.
- Currently obtained Motes provide additional properties to
 Sol Gate.
- Casting
Augment
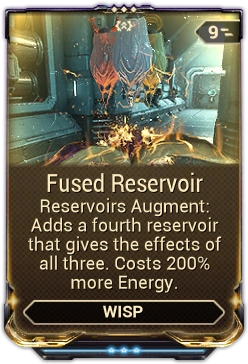
- Main article: Fused Reservoir
Fused Reservoir is a Warframe Augment Mod/Exilus Mod for ![]() Wisp that allows her to spawn a fourth
Wisp that allows her to spawn a fourth ![]() Reservoir with all three buffs at an increased energy cost.
Reservoir with all three buffs at an increased energy cost.
Tips & Tricks
- Avoid using Shock Motes in Spy missions, as it can hit Grineer Sensor Regulators and alert them.
- Because motes will refresh the duration of any other mote buff (regardless of power), you can make very effective use of temporary Ability Strength buffs such as Growing Power, Energy Conversion, or (especially) the power increase from a Void Fissure mission. You can put down reservoirs while under these effects, acquire more powerful reservoir buffs, and then endlessly refresh their duration using regular-strength reservoirs. This makes any buff to power strength effectively infinite in duration, so long as you do not let your reservoir buffs expire (or get nullified).
- Similarly, if there are multiple Wisps in a mission, they can space their reservoirs out to effectively gain all the buff benefits of the strongest Wisp, while also increasing the area covered.
|
 2 |
Cloud Walker Evaporate into a cloud of mist and float through the battlefield, dazing any enemy encountered, while healing Wukong and his twin. Introduced in Update 17.12 (2015-11-25) |
|
|
Misc:
+300% (movement speed bonus) |
Info
- Wukong expends 25 energy to disappear into a cloud, turning Invisible for 2 seconds. In this form, Wukong gains +300% Movement Speed, along with vertical and horizontal flight capabilities using the movement (W A S D ), crouch (Ctrl ), and jump (Spacebar ) hotkeys, similar to Archwing Maneuvers. While traveling in the cloud, Wukong is Invulnerable to damage, cleanses all Status Effects, and restores 0.5% / 0.6% / 0.8% / 1% health per meter travelled. Enemies that come within the cloud's radius of 5 / 6 / 7 / 8 meters are temporarily
 Stunned for 2 seconds and opened to Melee Finishers (default X ). Cloud Walker can be manually cancelled by pressing the ability key again (default 2 ) or by attacking.
- Movement Speed buff is additive to other sources of movement speed such as Dispatch Overdrive or from infusing
 Saryn's
  Molt onto Wukong.
- Buff is not affected by Sprint Speed, such as from Rush or parkour speed buffs such as Lightning Dash.
- Buff is not affected by Sprint Speed, such as from
- Unalerted enemies staggered by Cloud Walker remain unalerted during the stagger animation, and thus can engage Stealth Kill Affinity Bonuses when killed.
- Movement Speed buff is additive to other sources of movement speed such as
- Cloud Walker does not trigger Sensor Bars, Laser Barriers, and Security Cameras, and can pass through Spy defenses without triggering alarms.
- Ability Synergy: When activating Cloud Walker with an active
 Celestial Twin, the twin becomes invulnerable to damage and receives its health restore per meter travelled bonus. After Cloud Walker ends, Wukong's twin is teleported to his side instantly.
 - Wukong cannot cast other abilities, perform parkour Maneuvers or general interactions while channeling this ability.
Augment

- Main article: Enveloping Cloud
Enveloping Cloud is a Warframe Augment Mod for ![]() Wukong's
Wukong's ![]() Cloud Walker that gives allies near the cloud temporary invisibility.
Cloud Walker that gives allies near the cloud temporary invisibility.
Tips & Tricks
- An equipped Sentinel with Vacuum will still collect nearby items and hold onto them for you to collect when Cloud Walker ends.
|
 4 |
The Vast Untime Temporarily shed the outer pieces of Xaku in a destructive blast, then stalk the battlefield in a new, swifter skeletal form. Enemies damaged by the body shrapnel are rendered weaker to Void Damage. Xaku's other active abilities' duration is frozen in time and resumes once The Vast Untime expires. Introduced in Update 29.0 (2020-08-25) |
10 / 15 / 20 / 25 % (slow) |
|
Misc:
+50% ( |
Info
- Death and decay encroach as Xaku detonates themselves, expending 100 energy to explosively fragment their body parts outward. Enemies within direct Line of Sight and 10 / 15 / 20 / 25 meters of Xaku receive 600 / 800 / 1,000 / 1,200
 Void damage from the blast and suffer 50% Void Damage Vulnerability and 10% / 15% / 20% / 25%
  Slow for 10 / 15 / 20 / 25 seconds. For the same duration, Xaku's skeletal form is exposed, increasing their passive ability's Dodge chance and area damage reduction to 75%, grants themselves a 20% movement speed bonus, and completely pauses the duration timers of Xaku's other abilities. Xaku can reform their body and manually deactivate the ability by holding the ability key (default 4 ).
- Slow is capped at 100%, achieved with 400% Ability Strength.
- Debuffed enemies emit a Void energy cloud around their torso.
- Increased dodge chance is displayed next to the shield and health indicators as a buff icon with the chance percentage.
- Void damage from the blast does not reset Sentient damage resistances.
- The blast can destroy Objects, which does not require line of sight.
- Slow is capped at 100%, achieved with 400%
- Ability Synergy:
- The Vast Untime pauses the ability duration timers of Xaku's other abilities, including both currently active and newly cast abilities while in skeletal form.
- Only abilities belonging to Xaku originally are affected by the timer pause, whereas subsumed abilities via the Helminth system are not affected.
- Enemies hit by The Vast Untime's explosion are Void damage vulnerable to
 Xata's Whisper,
  Grasp of Lohk, and
  The Lost's Deny.
- The Vast Untime pauses the ability duration timers of Xaku's other abilities, including both currently active and newly cast abilities while in skeletal form.
- Can be recast while active in skeletal form by pressing the ability key again (default 4 ), causing Xaku to detonate again and affect new enemies in range, as well as refreshing ability duration to full. Note that there is a small window where the timers of Xaku's other abilties can run down before The Vast Untime is recast.
- Activating The Vast Untime is a full-body animation that restricts movement and other actions, while deactivation is near-instantaneous.
- Xaku crouches in place, visually detaching their body pieces and suspending them in the air with Void energy tethers. Xaku then reels back, surging into the air, while most of their pieces scatter outward in an expanding Void energy blast. Xaku's skeletal form retains some body pieces for bare minimal structural support. Reforming the body pieces on Xaku causes them to quickly regrow on the skeleton.
- Xaku's Armor Cosmetics and Syandana are hidden during the skeletal form. Regalia, Sigils, and Ephemera remain visible.
- Equipping the Corporeal appearance auxiliary attachment will have Xaku retain their normal form during The Vast Untime; when casting the ability, Xaku's armor pieces will still fly out and then immediately reattach themselves.
- Equipping the Skeletal appearance auxiliary attachment will have Xaku appear in their skeletal form even when not using The Vast Untime.
Tips & Tricks
- When modded with high Ability Range, this ability can be used to destroy Storage Containers and Resource Deposits across a massive area, even through walls. When paired with a large Loot Radar, this is an excellent strategy for locating Resource Caches, Syndicate Medallions, and other static objects requiring direct pickup, as those would be the only loot icons that do not disappear or "move" when damaged by the blast. A high gather range from Vacuum or Fetch will also help to clear the area of common loot and show only the valuable resources that must be manually retrieved.
Arcanes
")
Weapon Passives
")
")
")
")
")
")
")
")
")
")
")
")
")
")
")
")
")
")
")
")
")
")
")
Parkour Velocity
Parkour Velocity (also localized as "Bullet Jump") is an Upgrade type that increases the player's Bullet Jump speed as well as rolling, sidespring, and backspring speed.
")
")
")
")
")
(+15% Parkour Velocity)
")
(+22.5% Parkour Velocity)
Slide & Friction
Slide is an Upgrade type that increases the player's sliding speed. Friction is an Upgrade type that increases the player's resistance to slowing down from sliding while on the ground, similar to the real-world equivalent.
")
")
")
")
Sprint Speed
- Main article: Sprint Speed
Sprint Speed is an Upgrade type that speeds up the player's sprint animation.
Mods
")
")
")
")
")
")
")
Warframe Abilities

|
 N/A |
Infested Mobility Increase your parkour velocity. Introduced in Update 29.0 (2020-08-25) |
15 / 20 / 25 / 30 % (parkour velocity bonus) |
| Subsumable to Helminth |
Info
- Expend 50 Energy to instantly increase sprint speed by 35% / 45% / 50% / 60% and parkour velocity by 15% / 20% / 25% / 30%, lasting for 5 / 6 / 7 / 8 seconds.
- Infested Mobility's icon with the sprint speed percentage is displayed next to the shield and health indicators while active.
- Cannot be recast while active.
- Casting Infested Mobility does not play an animation.
- The Warframe visually leaves a trail similar to
 Volt's Speed.
- This ability is functionally different from Volt's Speed, however, as it only increases specifically sprinting speed, but not walking speed, therefore it does not speed up abilities that lock the warframe in a walking state, such as Assimilate or Mesa's Waltz.
- However, because this ability also affects parkour speed, it can increase the speed of dodge maneuvers and their momentum. This means that while it does not affect walking speed, walking abilities such as
 Ivara's
  Prowl can still take advantage of the faster rolling speed to move faster without breaking the invisibility conditions.
- This ability is functionally different from Volt's Speed, however, as it only increases specifically sprinting speed, but not walking speed, therefore it does not speed up abilities that lock the warframe in a walking state, such as
- The effects from this ability can stack with similar speed boosting abilities while it is active, such as Speed.
- The sprint speed buff stacks additively with other sprint speed modifiers. For example, Rush combined with Infested Mobility at max rank and 130% Ability Strength will increase the frame's sprint speed by 1 + 30% + (60% × 130%) = 2.08x
- The multiplicative speed buff from Volt's Speed also multiplies the buff from Infested Mobility. For example, Rush combined with Speed and Infested Mobility at max rank and 130% Ability Strength will increase the frames sprint speed by (1 + 30% + (60% × 130%)) × (1 + (50% × 130%)) = 3.432x
- The sprint speed buff stacks additively with other sprint speed modifiers. For example,
Arcanes
")
Weapon Passives
")
")
")
")
")
")
")
")
")
")
Maneuver Bonuses
Some items may provide a unique bonus upon performing manuevers.
")
")
")
")
")
")
")
")
")
")
")
")
")
")
")
")
")
Media
Patch History
Update 38.0 (2024-12-13)
- Fixed a clicking sound occurring when Aim Gliding.
Update 37.0 (2024-10-02)
- Fixed Bullet Jumping at the end of a Slam animation playing a tiny little hop.
Update 36.0 (2024-06-18)
- "Parkour Velocity" mods now affect a few more parkour-related activities:
- Increases velocity when wall running parallel to the wall
- Increases velocity when wall jumping away from a wall
- Increases the instantaneous velocity change when performing a double jump
Update 35.5 (2024-03-27)
- GENERAL CHANGES
- Player avatars no longer get stuck at corners of obstacles when going up a slope or when sliding along a wall that isn't perfectly vertical. Sticky corners be gone!
- This was a consistent issue for Warframe over its development, and the result of this change should be a more fluid movement and parkour experience for players!
Update 34.0 (2023-10-18)
- Added a sound effect to mid-air rolls. Your aerial rolling will be silent no more!
- Fixed being unable to cancel the Bullet Jump animation in Lunaro.
- Fixed weird animation issues when interrupting a double jump with a normal jump.
Update 33.0 (2023-04-26)
- Fixed casting many Warframe abilities interrupting aim gliding and forcing you to land.
Update 32.0 (2022-09-07)
- Fixed incorrect Arching animations when using sprint, aim and dash.
Hotfix 31.6.4 (2022-07-14)
- Fixed an issue where jumping out of a mantle animation wouldn't give you any vertical velocity.
- Previously, if you came across a scalable object, your Warframe would attempt to climb over the object. Pressing the jump button during this action would cause your Warframe to somersault downwards and fall. We have now adjusted the animation to propel the Warframe upwards to allow you to easily climb over the object and maintain your momentum.
Hotfix 30.7.6 (2021-09-23)
- Fixed overly slow Bullet Jump landing recovery if the animation is interrupted.
Update 28.3 (2020-08-12)
- Fixed Slide Kicking/Bullet Jumping a knocked down enemy resulting in multiple hits.
Hotfix 27.2.2 (2020-03-06)
- Fixed a crash that could occur in missions with Zip-lines.
Hotfix 25.8.1 (2019-10-09)
- Fixed Ziplines kicking you off if you bump into geometry instead of just stopping you short of overlapping. Also fixed colliding with other players/enemies on Ziplines when you should be able to pass through.
Update 22.20 (2018-05-17)
- Crouching is now stateful! If you let go of crouch while in a small tunnel, your Warframe will now stand up when it can. You can also now crouch while parrying.
Update 22.3 (2017-11-15)
- Fixed a 300ms delay to start sprinting when using the sprint/roll combination key.
Update: Specters of the Rail 0.0 (2016-07-08)
- Improved jump detection. Before players could prematurely double jump when just about to fall off a ledge, when falling off a small edge, or when walking down a steep incline. Regular jumps will now be performed in these scenarios.
Update 17.0 (2015-07-31)
- Parkour 2.0
This complete overhaul of Warframe’s parkour system brings a dramatic change to one of Warframe’s core elements: movement. With these changes players will be given true freedom of movement without limitations such as being required to use specific weapons or becoming locked into restrictive animations.
The following features have been added to Warframe’s movement system:
- Double Jump: Players can now use a second jump while in mid-air. Players will be able to jump again immediately after touching any surface or enemy.
- Bullet Jump: Pressing the ‘Jump’ button after sliding will send the player into a mid-air dash, temporarily improving movement speed. Players can use a Bullet Jump as a double jump in any direction.
- Wall Latch: Pressing the ‘Right Mouse Button’ button against a wall will allow players to latch onto flat surfaces for a limited duration. Players may fire their equipped Primary or Secondary weapon while using Wall Latch.
- Wall Dash: Pressing the ‘Jump’ button while against any surface will allow players to hop along the surface in any direction. This can be used to scale vertical surfaces, and can be chained indefinitely.
- Aim Gliding: Using the ‘Aim’ button while in mid-air will slow the player’s fall speed, enabling a slow glide that players can fire their weapon in any direction from.
- Ziplines: Pressing X while near a zipline will allow players to jump directly onto the zipline. Players can now run or dash along ziplines, and X to jump on a zipline can be done after a double jump.
- Stamina has now been removed from the game.
- Parrying now only blocks a base percentage of incoming damage.
- Channeling while parrying will block 100% of incoming damage, and reflect a percentage of the damage back at the cost of Energy.
Update 14.0 (2014-07-18)
- Added the ability to Slide Jump into a wall run. Before you would just slide and jump at the wall, but now, if aimed and the correct functions pressed, this will transition into a wall run.
Update 11.1 (2013-11-27)
- Require movement to do an auto-vault (like we do for wallrunning).
Update 11.0 (2013-11-20)
- Sprint is no longer needed to initiate a Wall-Run
Hotfix 10.0.3 (2013-09-14)
- Stamina System tweaks:
- Reduced delay on stamina recharge.
- Increased stamina recharge rate.
- Decreased cost of stamina required for sprinting.
- Dodging now uses stamina and has reduced damage while dodging.
- Dodges are executed slightly faster.
Update 10.0 (2013-09-13)
- Stamina Changes
- Stamina system now has a timer before it recharges. This makes Stamina a more significant system in game play.
- Reduced Stamina cost of melee swings and jumping
- Reduced the rate of stamina recharge
- Added delay timer to Stamina recharge.
Hotfix 8.1.3 (2013-06-19)
- Removed Slide Cooldown
Update 7.11 (2013-05-17)
- Crouch-aim walk is now slower than stand-aim walk
Cite error: <ref> tags exist for a group named "note", but no corresponding <references group="note"/> tag was found