A vast green field with multiple rocks scattered around. Several stonehenge-like structures existed, which were used in the fight against the colossus.
Seamless
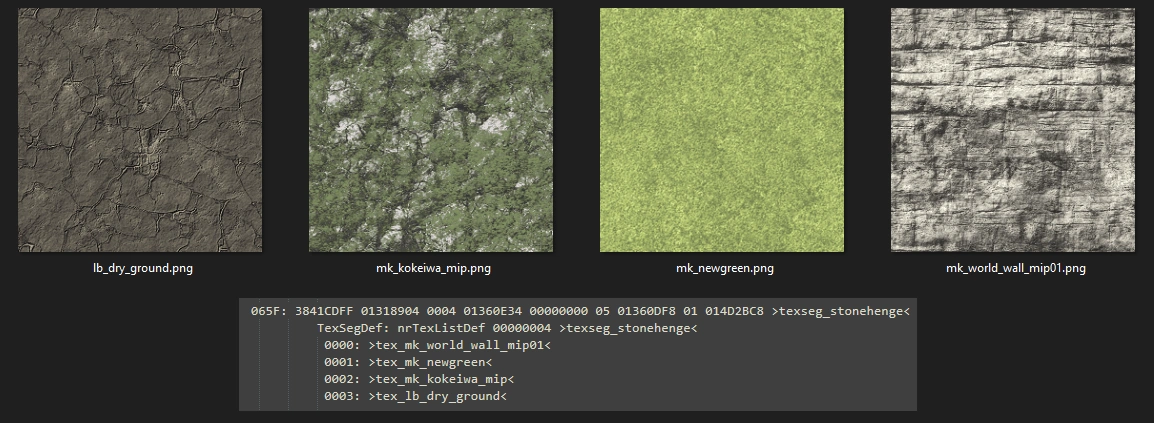
The Stonehenge texture segment, which can be found in the PS3 Data Sheets, only lists four different textures. They are of mountain walls (mk_world_wall_mip01), green fields (mk_newgreen), mossy rocks (mk_kokeiwa_mip), and dry ground (lb_dry_ground).
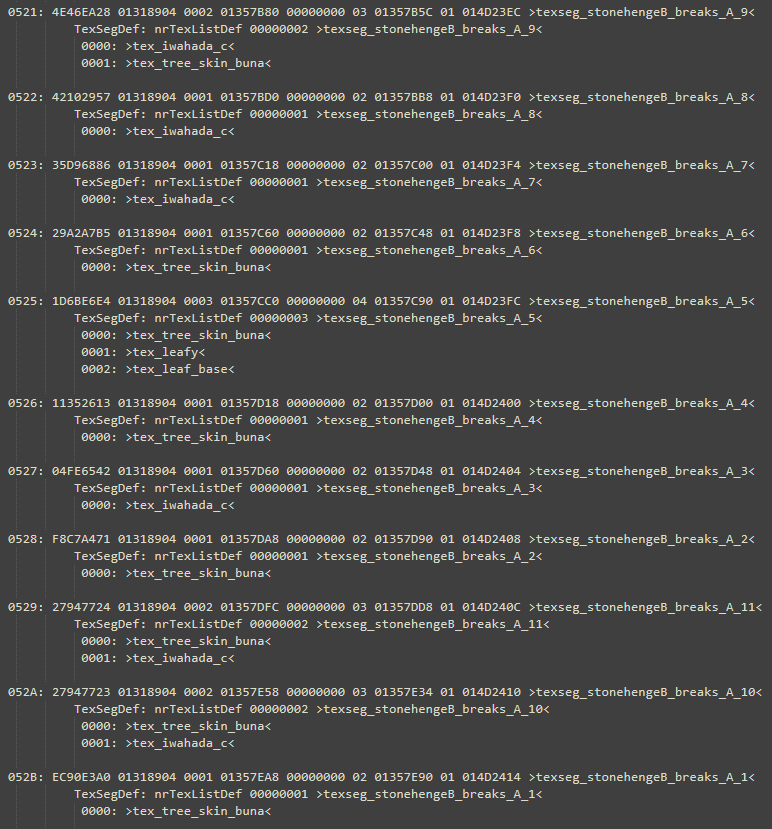
The textures of the stonehenge rocks themselves being absent from the texseg means that they were separate objects, as they were meant to be destroyed. Further evidence of this exists in the data sheets, with it listing several texture segments for objects related to Stonehenge. Examples being the texsegs named as "stonehengeB_breaks", which are separated into eleven pieces, with two others being named "stonehengeB_core" and "stonehengeB_roof". These texsegs are named in the same manner as the columns and rubble that fall on top of the 14th colossus near the end of its fight (st15a_towerC2_breaksB, st15a_towerC2_breaksB_core, st15a_poleB_breaksA), and likely acted in a similar manner.
Test Stage
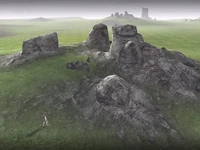
Stage 18 (Sirius's test stage) was where the boss was tested before the arena was placed on the world map. It had footage shown in the Production Reel featured in the Nico bonus DVD,[1] as well as screenshots released in the Artbook. In it, one can see that the arena had several different types of rock structures laid out everywhere, as well as a tree next to one of the stonehenge structures. It is likely most of these were removed from the stage after it became seamless.
The clip also shows that the arena was partially surrounded by the ocean, as a cliff edge is seen in it. The textures from its test stage also reveal that it had water, with it becoming separate from the main model after it was implemented into the map.
Location
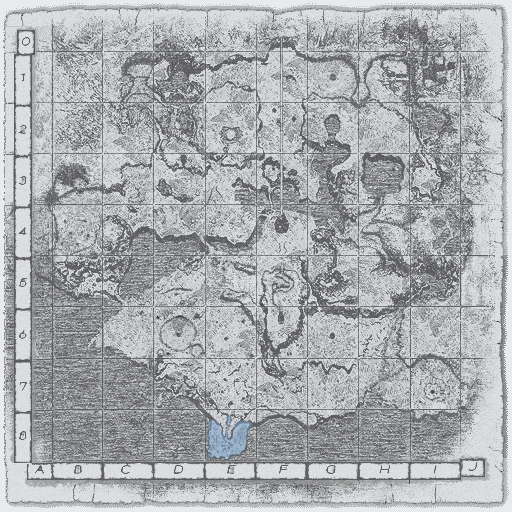
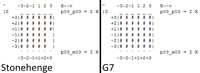
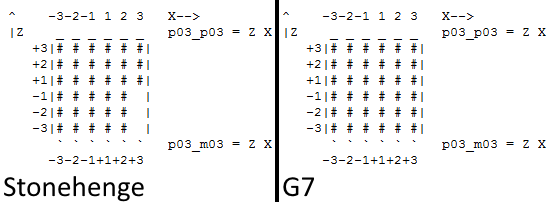
The arena was located at quadrant E8, on the southern part of the Forbidden Lands.
Early pictures of E7 and footage of Wander travelling from E6 to E7 show a swirling sky and beam that form above a colossus arena located on top of E8. The chip data of Stonehenge seems to match with the early version of quadrant F8 when placed next to it. Additionally, the textures match the early version of E7 and F8.
Trivia
While one of the stonehenge structures still exists in the final version of the game, it wasn't its original location; the same is also true for Devil's pillars being located in C2 in the final game instead of D2.
There exists an empty texture segment related to this stage named "st18a_event2_test". Events in Shadow of the Colossus usually refer to cutscenes, possibly suggesting that this was a test for the introduction cutscene of Stonehenge, or for when the rocks fall on top of Sirius.
Comparing pieces of the Stonehenge arena from the height map with several areas of the Forbidden Lands, one can notice that parts of the arena have been reused as normal land. As examples, the early plains in B6, and the cliffs found in the middle of an early version of F4.
Old theories placed the location on G7, with the only proof being the stonehenge structure seen at G7 matching the one used in Sirius' fight as described and shown in the artbook. The chip data of Stonehenge, however, doesn't match G7. In an early picture of G7, the stonehenge structure is nowhere to be seen, and G7's unused layer 2 chip data had a model where the stonehenge rock is currently located. This suggests it was moved there temporarily before being implemented in the area's main model. Several other broken stonehenge structures can also be seen throughout the Forbidden Lands.


")
")
")
")
")
")
")


 Walkthrough