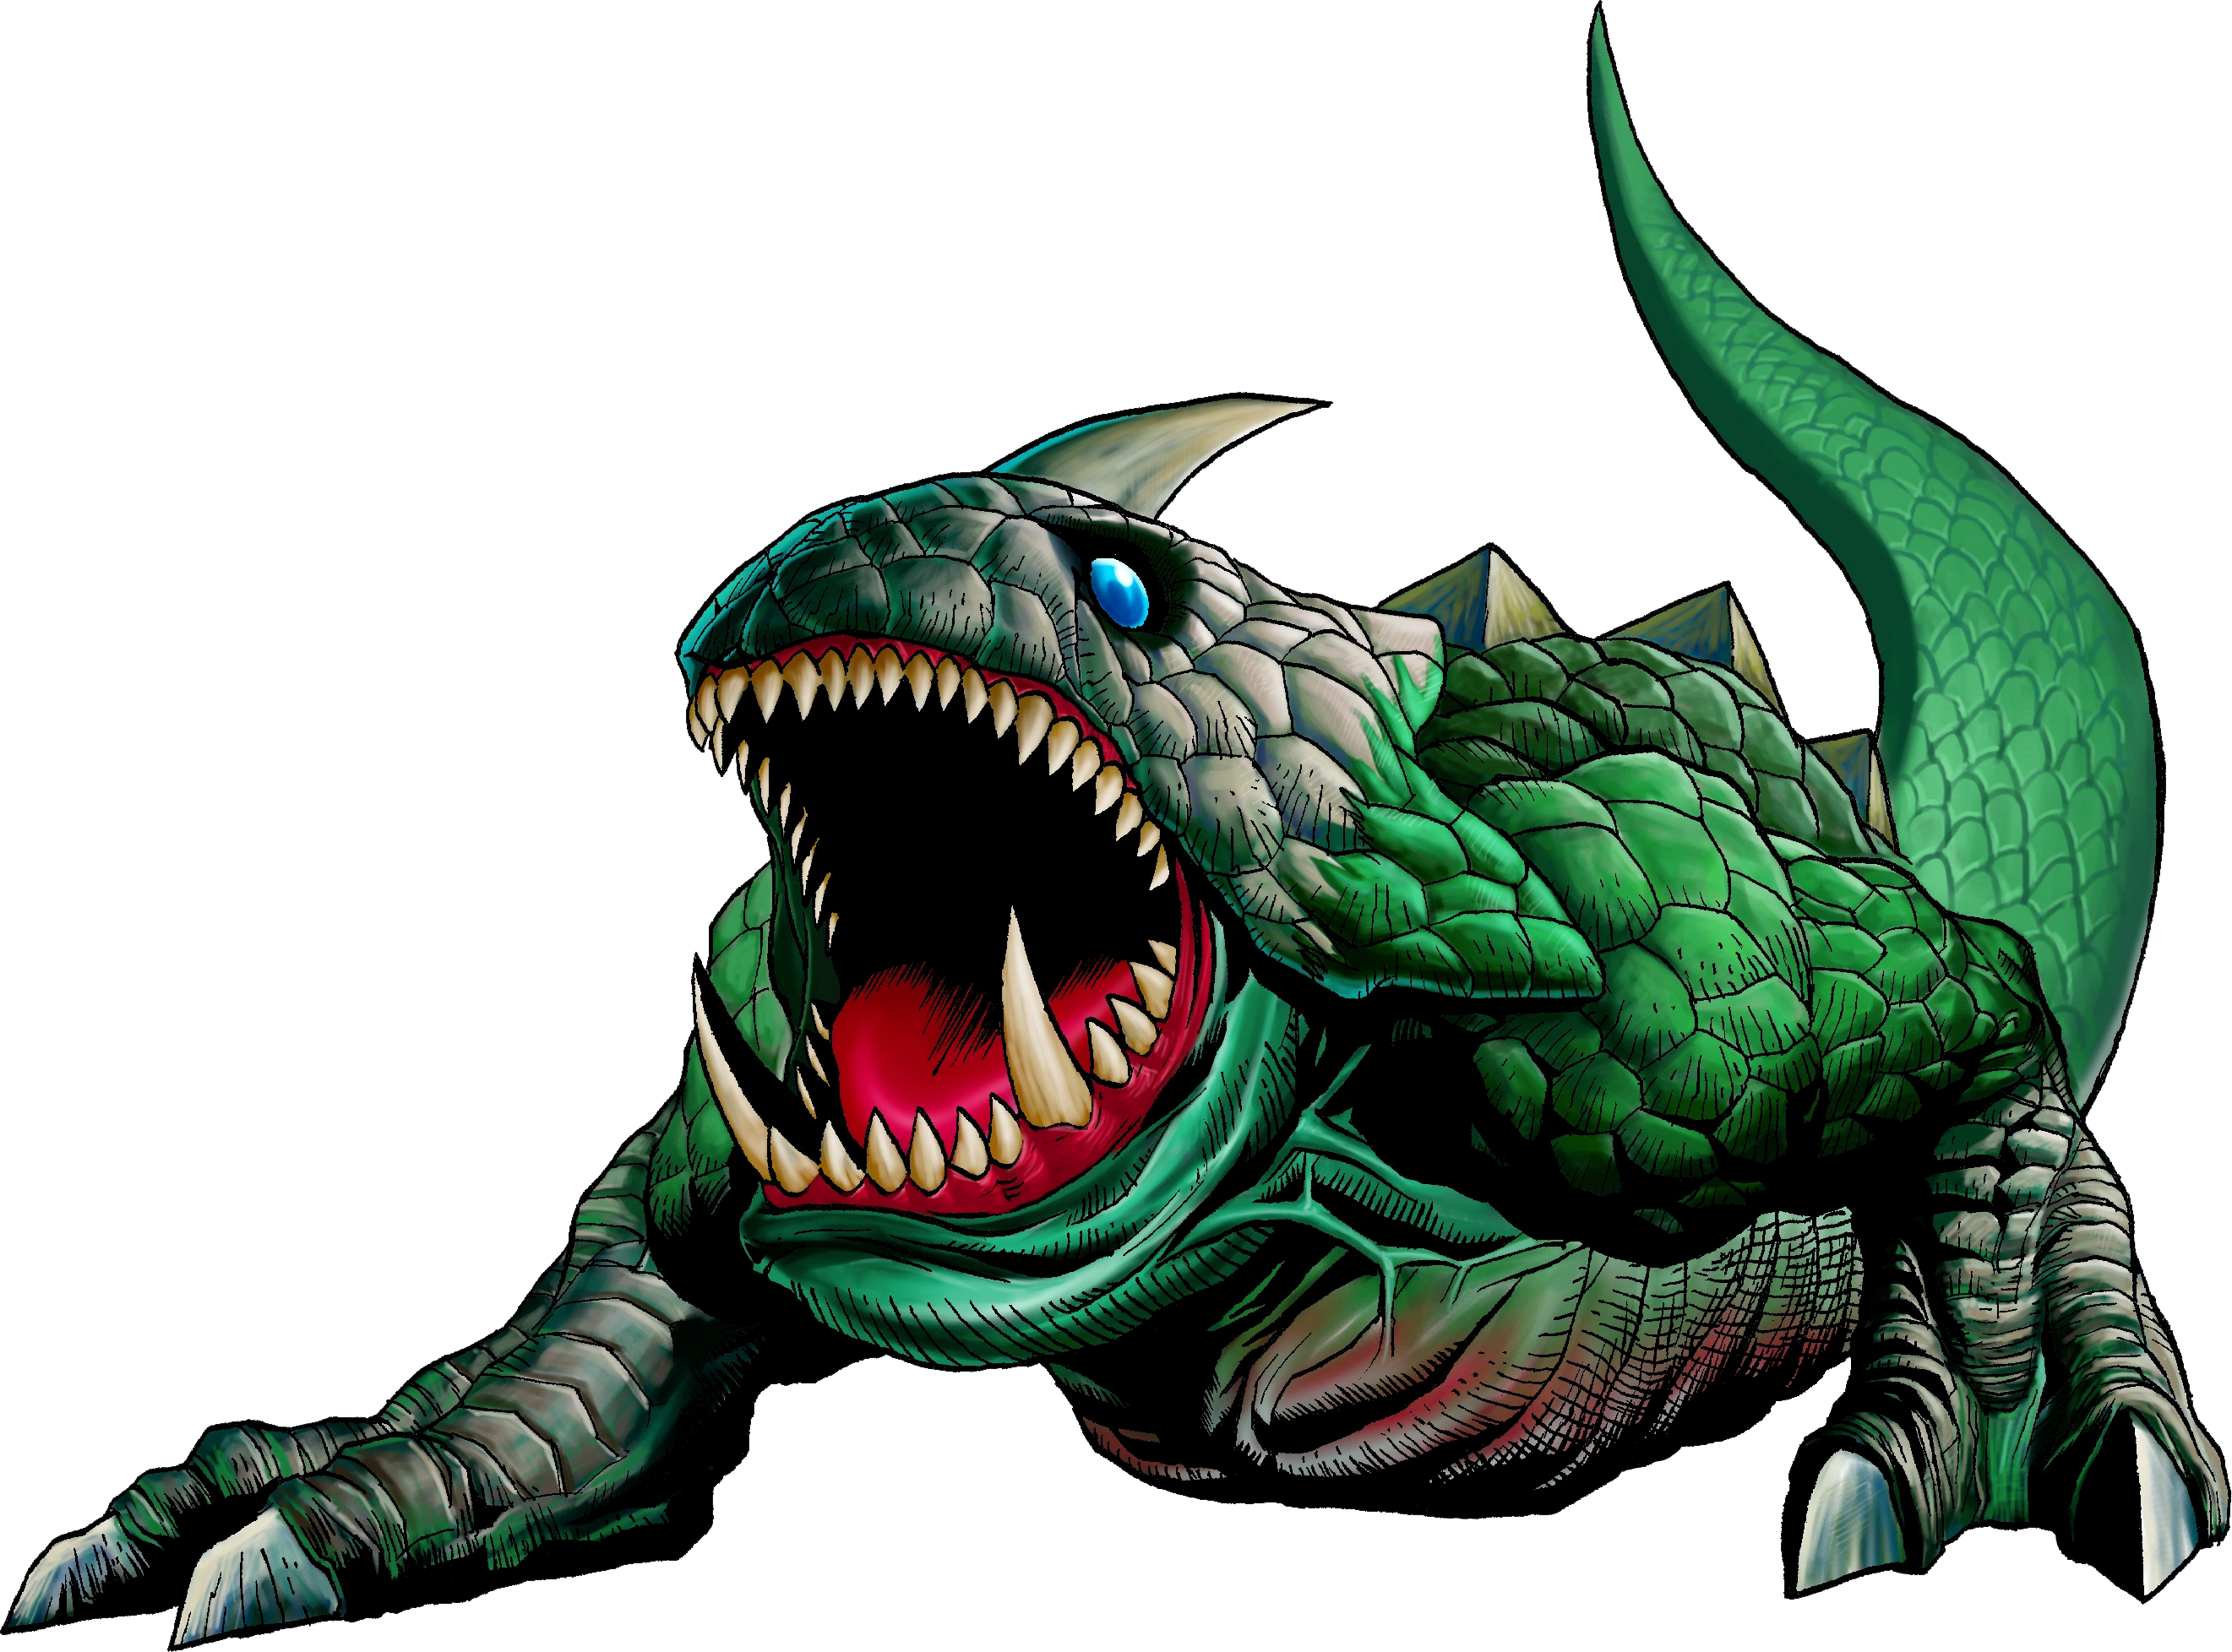
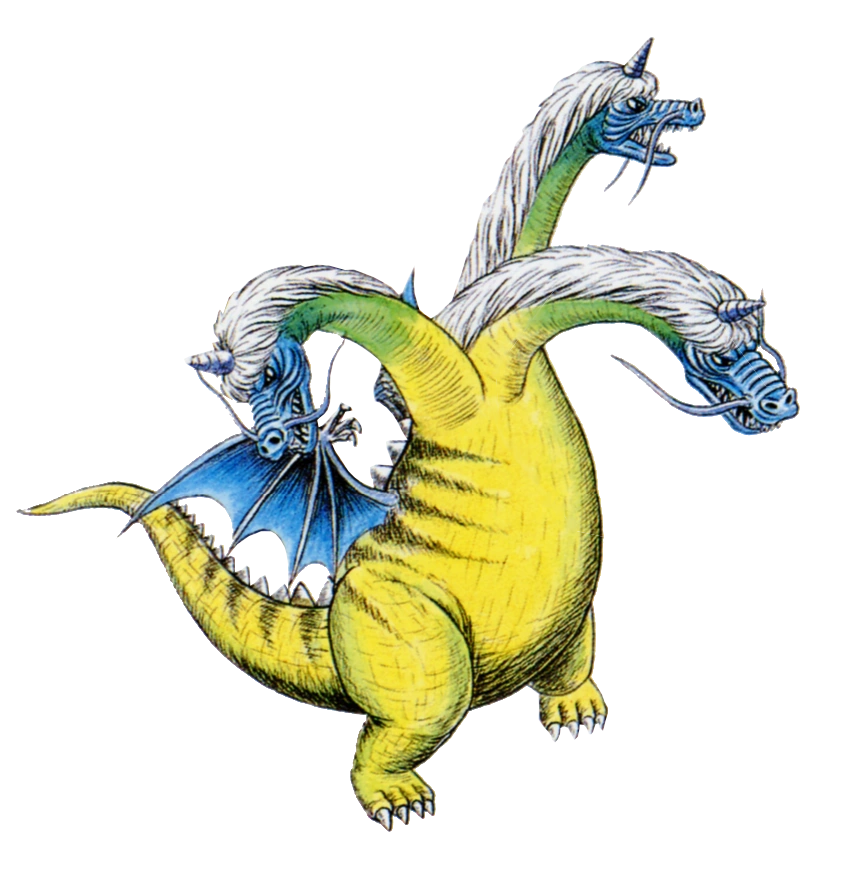
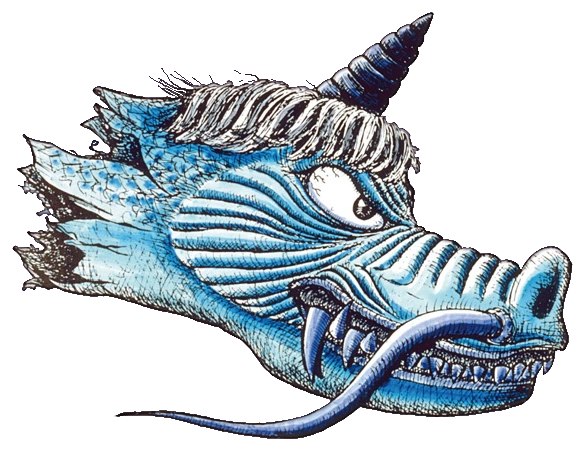
Gleeoks are recurring Bosses in The Legend of Zelda series.[1][note 1] They are dragon monsters with multiple heads, which are called Gleeok Heads.[3] If the Gleeok Heads are struck enough, they often detach and fight independently until the body is finally defeated.
Characteristics
The Legend of Zelda

Gleeok makes three appearances in The Legend of Zelda, all defeated in a similar fashion. Using the Sword, Link must cut off each of the heads on the beast. Once one of the heads is detached from the body, it will float around the room shooting fireballs at Link.[4] He must avoid the fireballs and cut off the other heads. The Magical Shield cannot defend Link from Gleeok's fireballs.
In the First Quest, a two-headed version guards the fourth piece of Triforce in Level 4, a three-headed version is a mini-boss in Level 6, and a four-headed version guards the piece of Triforce in Level 8. In the Second Quest, there are two, three and four-headed versions guarding the pieces of Triforce in Level 2, Level 5 and Level 7, respectively.
Oracle of Seasons
Gleeok is a two-headed version fought in the Explorer's Crypt in Oracle of Seasons.[5] It is defeated in a different fashion from its former counterpart. Getting rid of the beast's heads is still Link's main objective; however, there is one more step before defeating it. Link must quickly slash away the heads, which must be done quickly because the severed heads will reattach themselves to the body if given time. Once both heads are severed, they will be permanently destroyed, reducing Gleeok to a skeleton. However, Gleeok's skeletal remains will continue to fight Link by jumping and causing a massive earthquake in the arena. In addition, Gleeok's body will wildly charge at Link. Using the Roc's Cape is the only way to avoid serious damage from the beast. When the beast is grounded, Link should attack with his Sword. He must continue this process until Gleeok is defeated. It will then give up the Seed of Life, the seventh Essence of Nature.
Phantom Hourglass
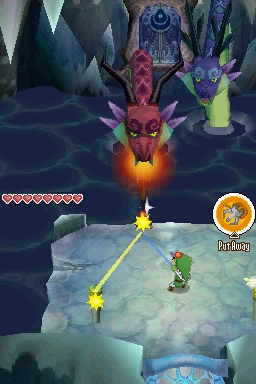
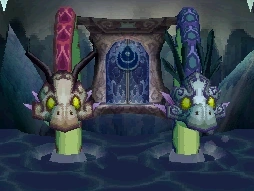
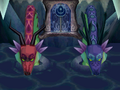
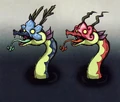
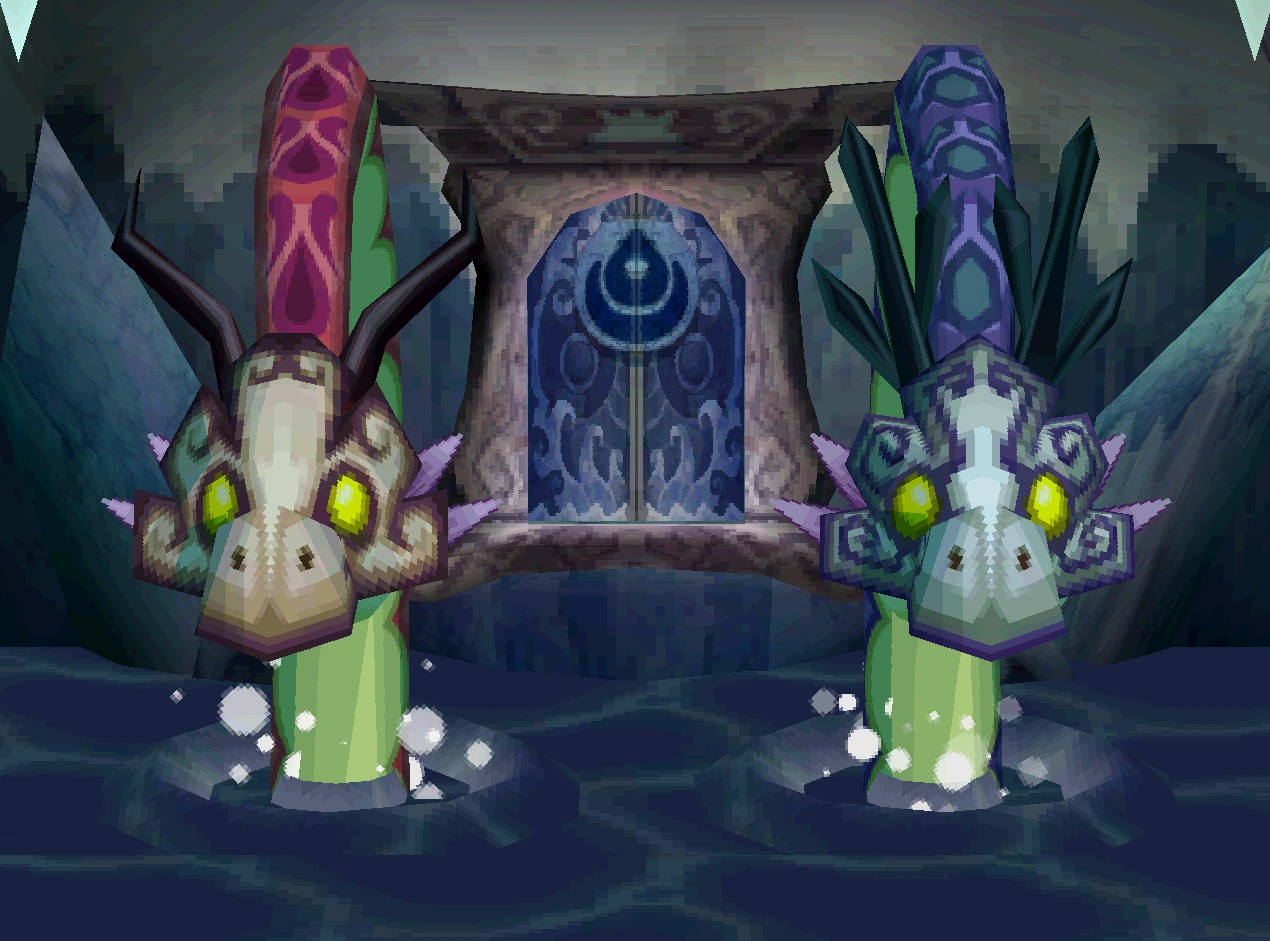
In Phantom Hourglass, Gleeok appears as the Two-Headed Dragon Gleeok, boss of the Temple of Ice and guardian of the Azurine steel. Its red head spews fireballs, while the blue head sprays frigid ice, similar to Trinexx from A Link to the Past.
Link will be standing on a platform with four pegs near each corner. When one of the heads fires a blast at Link, he will need to attach the grappling hook to two pegs diagonally so as the rope launches the blast back at the other dragon's face, cracking its mask. In addition with these blasts, the two heads will lunge to snap the rope Link ties, while trying to bite him as well. They can also sink below the water to cause a tremor that will flood Link's platform, as well as cause chunks of ice to fall from the ceiling and crash into Link. Link can tie the grappling hook to two posts and walk along the rope to avoid the ice chunks. Three blasts to both heads will remove their masks.
With their defenses destroyed the heads will remove two of the four pegs by snapping them with their jaws. Afterward each head will take turns at trying to bite Link, then will charge up for a powered blast. The red dragon head will fire a fiery blast that will scorch him, as well as leave a trail of fire on the platform. The blue dragon head will fire a blast of ice that will freeze Link on contact. While charging, however, both dragons will be sucking in energy, exposing their tongues. Link can pull the head down by tying one end of the grappling hook to a post and using it as an anchor on the dragon's head. Once down, Link must slash at the dragon head before it recovers. Repeating this process to both heads will defeat the dragon, and Link will obtain a Heart Container, extra sands for the Phantom Hourglass, and the second of the three Pure Metals, Azurine.
Tears of the Kingdom
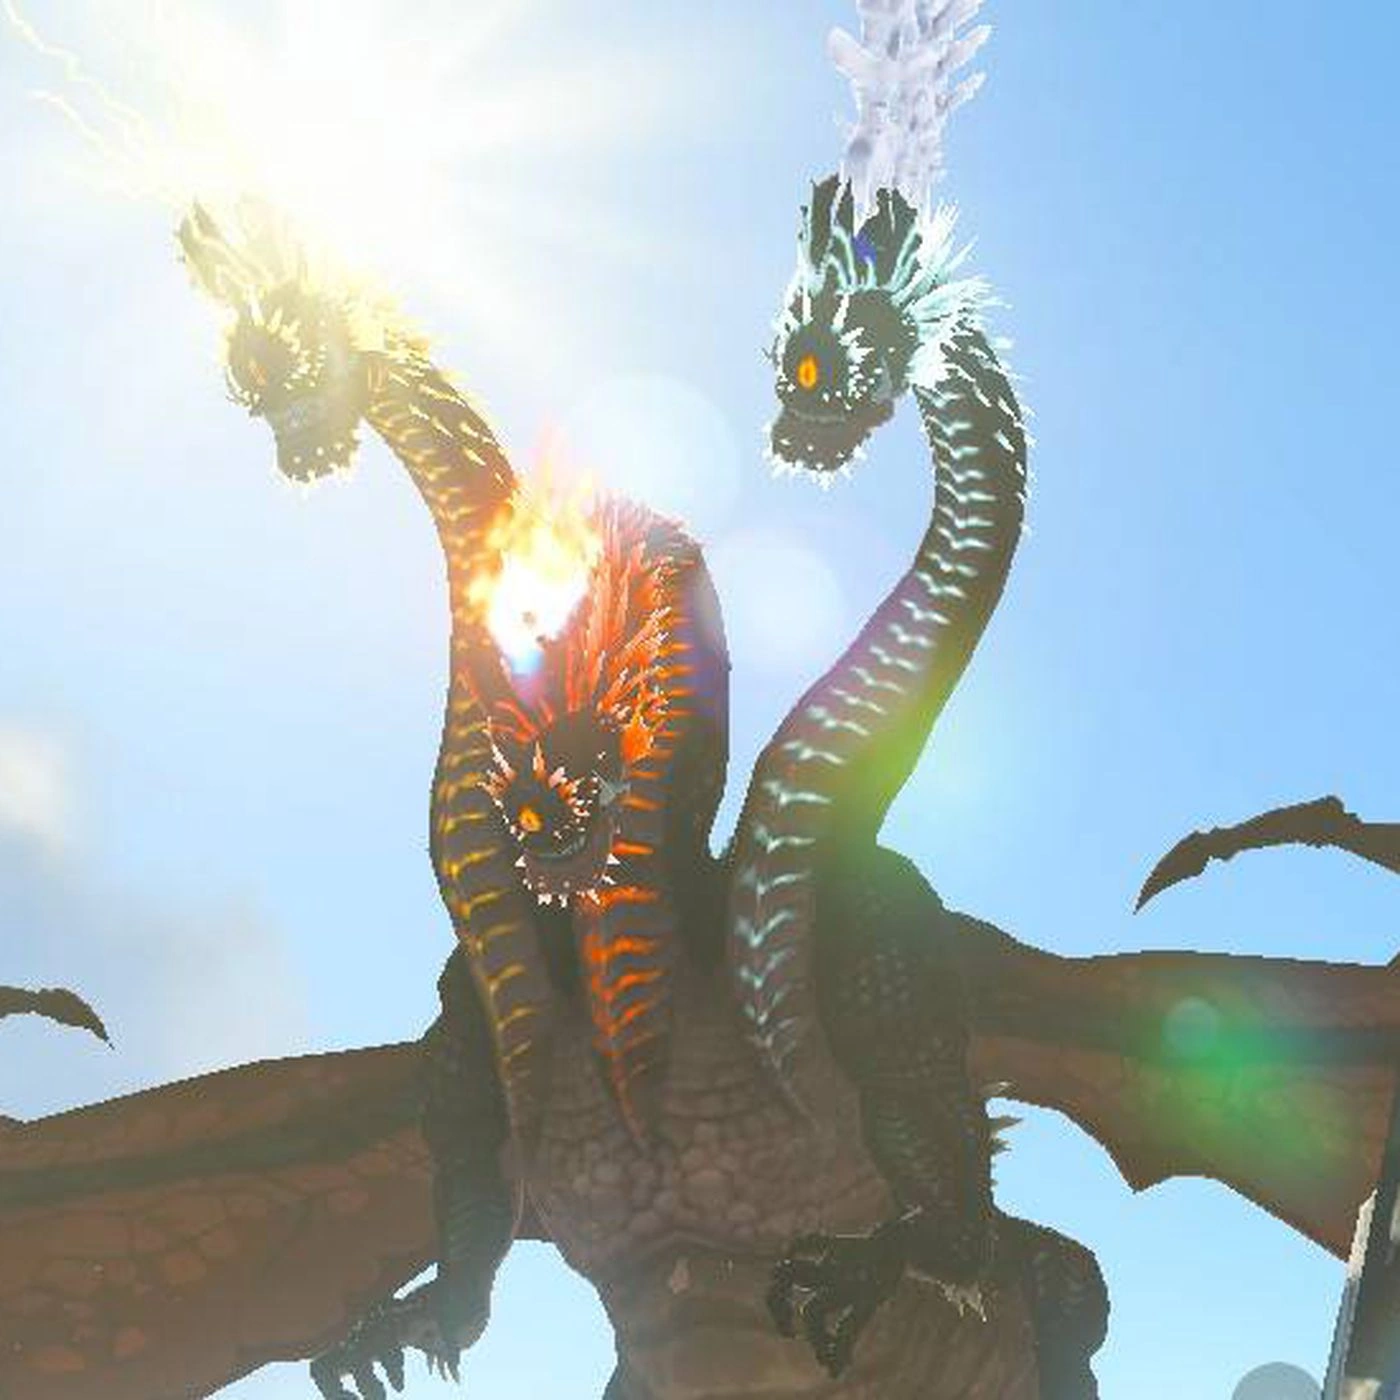
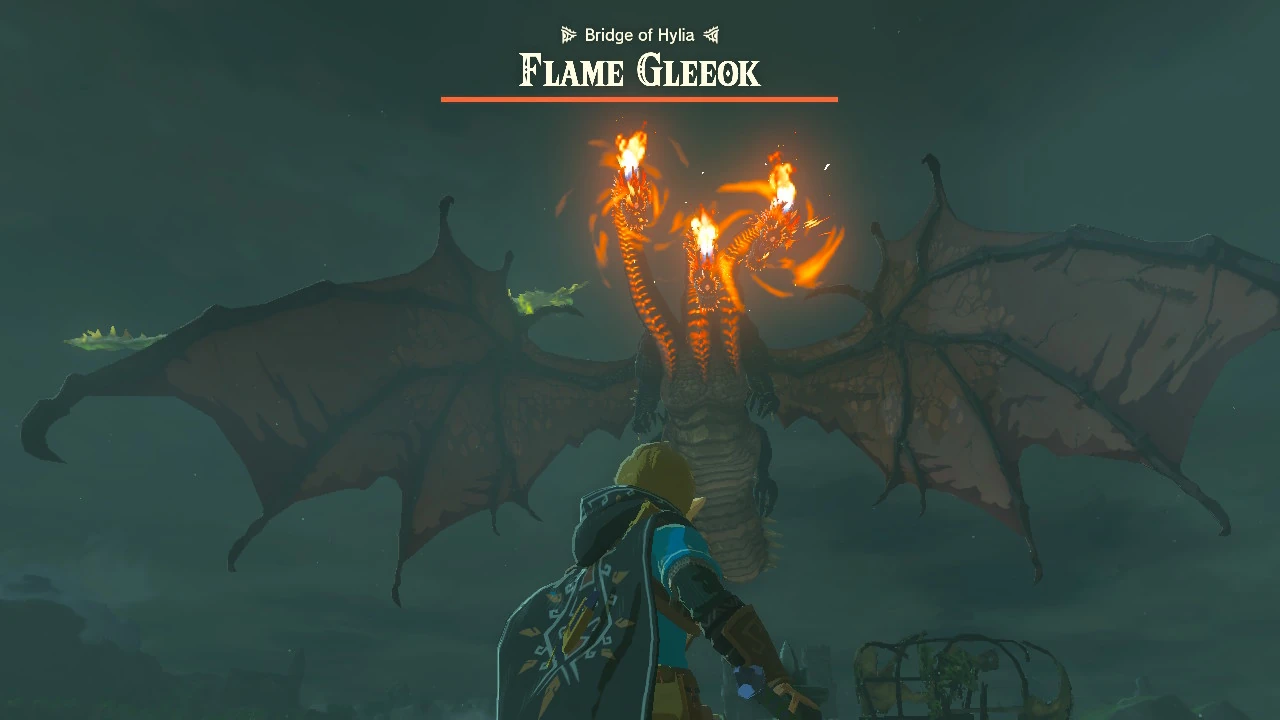
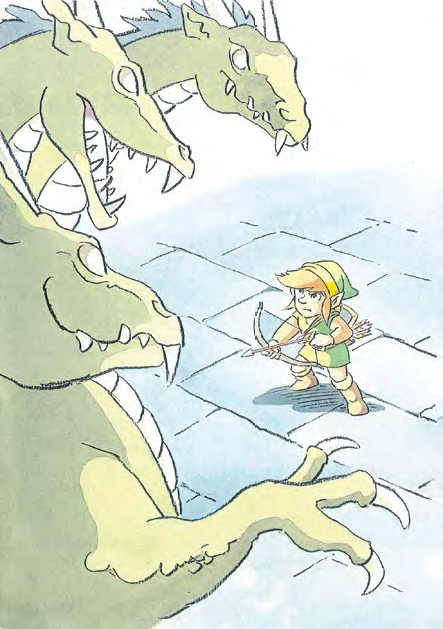
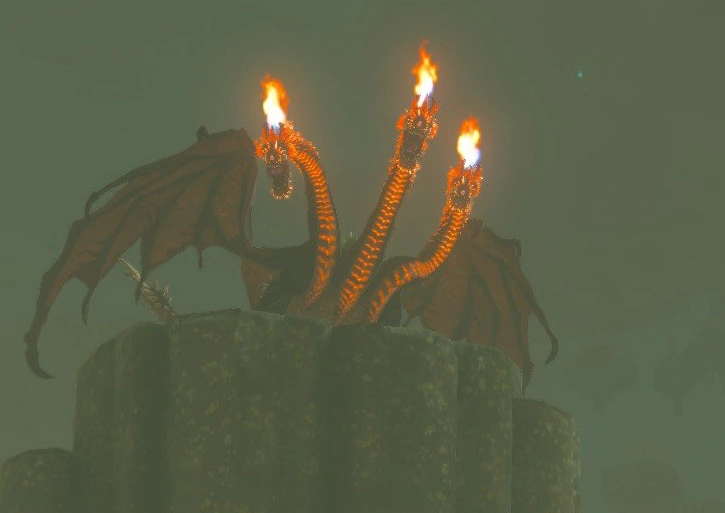
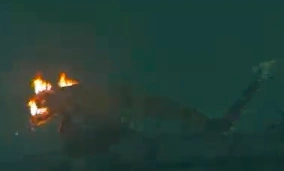
Gleeoks make a return to the series in Tears of the Kingdom. They come in Flame, Frost, and Thunder variants, all appearing as massive dragons with three heads with one eye each. They keep enemies from attacking at close-range by using gusts from the wings to force them back, allowing them to spray their array of elemental attacks from afar at their leisure, and the occasional tail-swipe on the ground. At lower health, they take to the skies to use more powerful blasts of elemental energy. Link can use arrows to target their eyes and send the Gleeok crashing back down to earth, allowing him to close the distance for a follow-up assault. Fusing monster eyeballs to arrows, especially in tandem with a Duplex or Lynel Bow, is highly effective, as it allows Link to rapidly fire them upward with all but guaranteed accuracy towards the eyes.
Superior versions known as "King Gleeoks" also debut, with each of their three heads channeling one of fire, ice and lightning. These are much more dangerous than their more common counterparts due to being able to wield a triple threat of elements. A particular gloom-infused King Gleeok guards a chest containing the Cap of Twilight within its own Gleeok Den, located in the Hyrule Depths.
Locations
Flame Gleeok
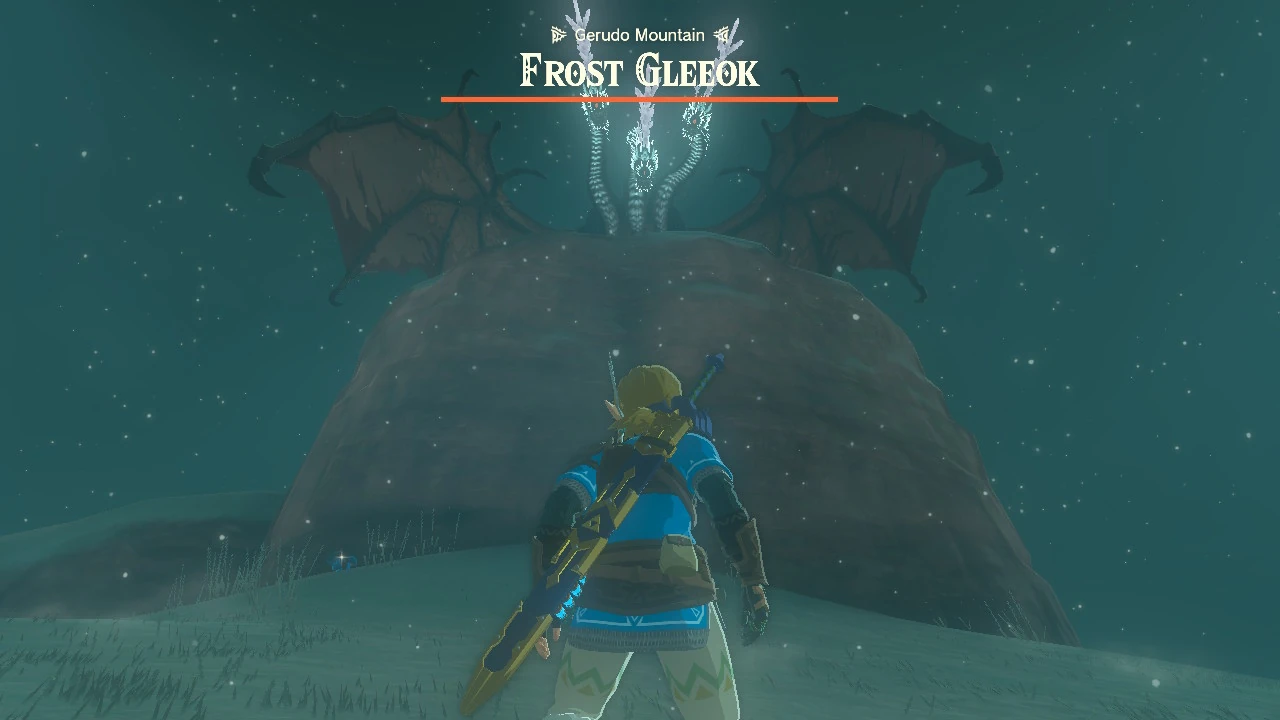
Frost Gleeok
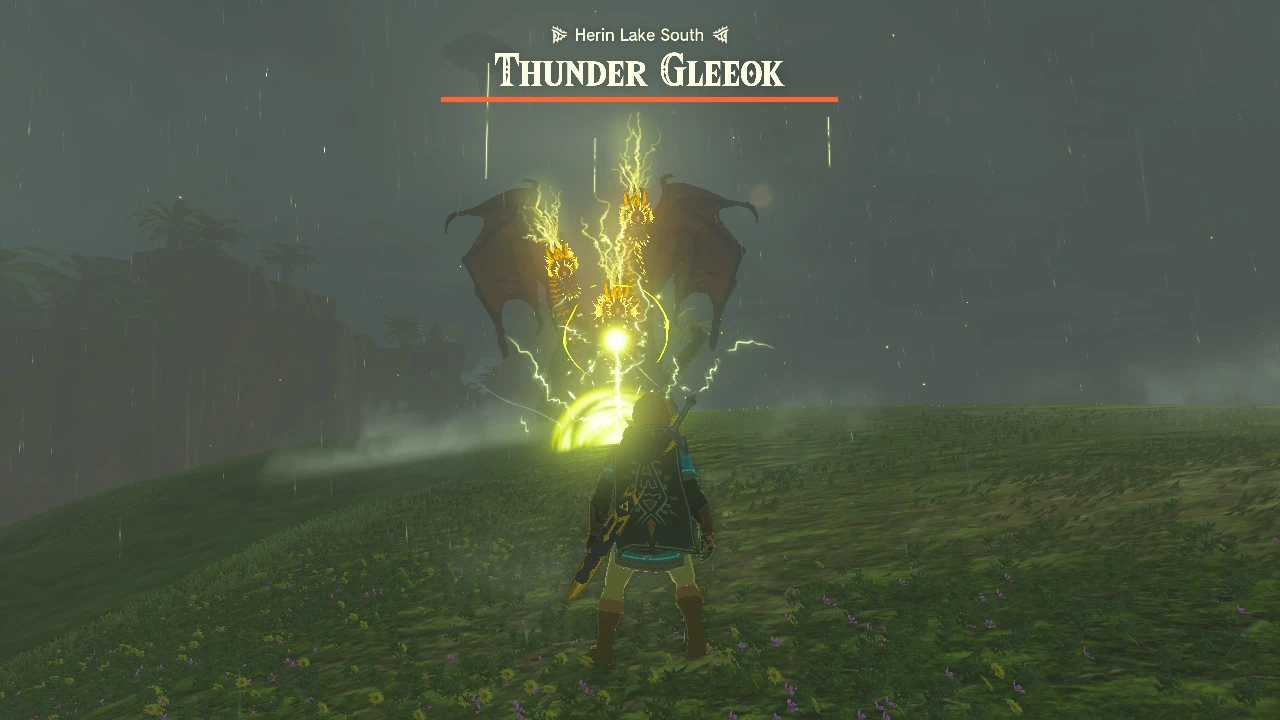
Thunder Gleeok
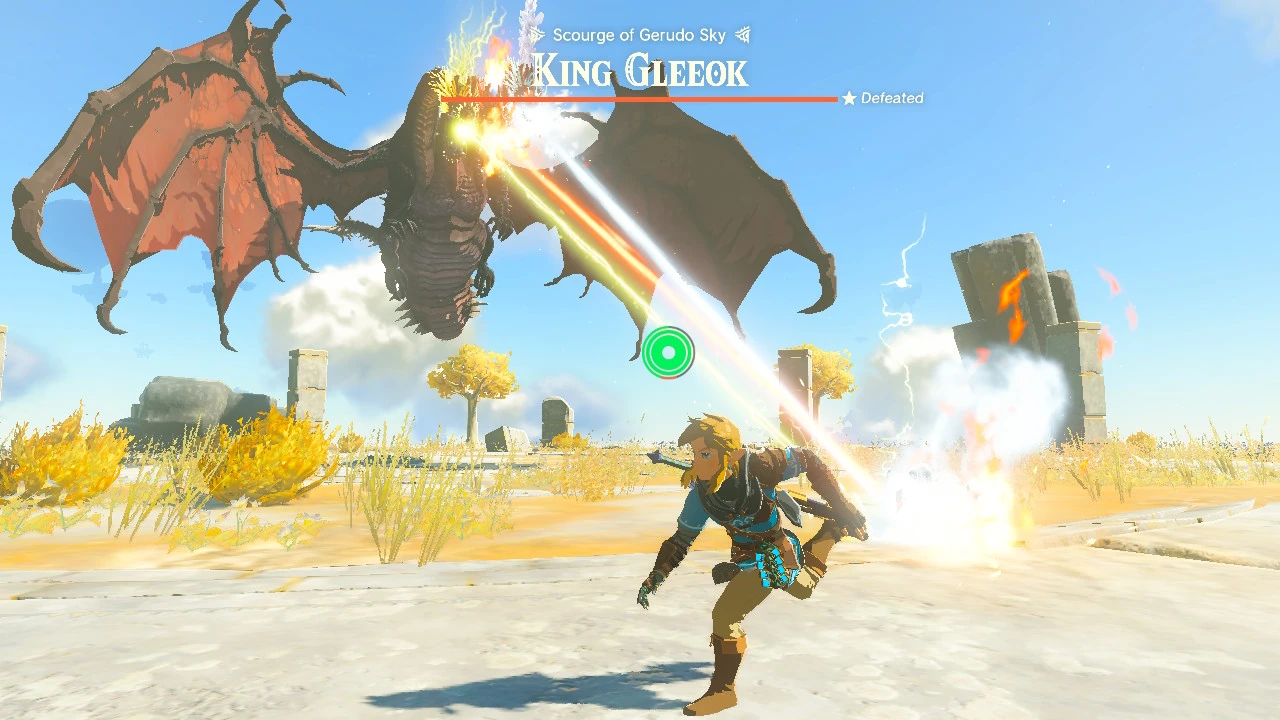
King Gleeok
- Hebra Sky
- Necluda Sky
- Gerudo Sky
- Gleeok Den
Other Appearances
The Legend of Zelda TV Series
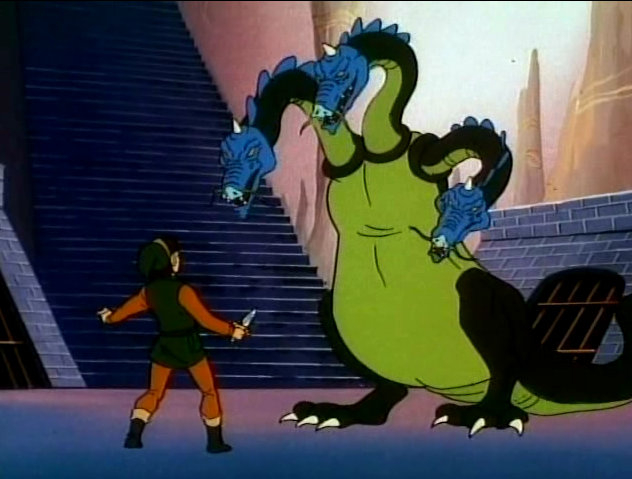
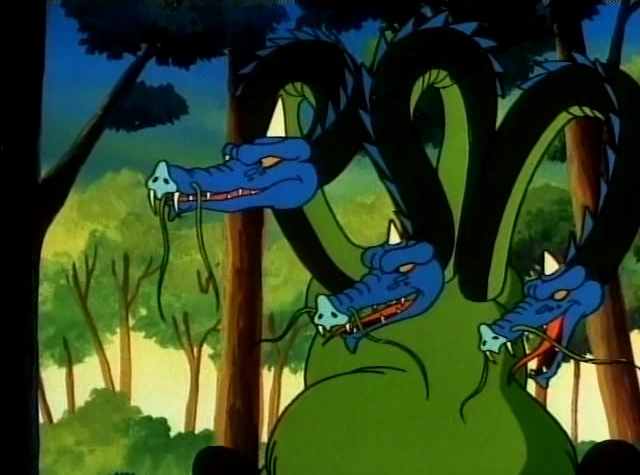
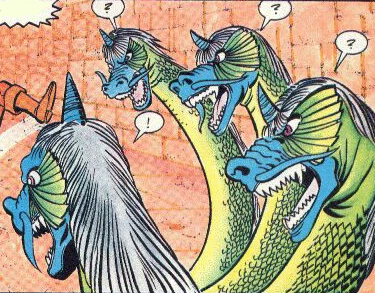
Gleeok appears in two episodes of The Legend of Zelda TV series. In "Kiss'n Tell", Ganon sends a Gleeok and a Gibdo disguised as a beautiful maiden to a forest, where the Gleeok pretends to be attacking the maiden so that they can lure Link into the scene. However, Princess Zelda arrives instead and proceeds to try and fight off the Gleeok by throwing various kinds of fruits at the three-headed monster.[6][7] When the Gleeok is stunned for a moment, Zelda sees a chance to go but the maiden refuses, saying she wants to be rescued by a handsome hero.[8] Soon after, Link appears and battles against the Gleeok, who quickly zaps the two outer heads. With only one head left, Link grabs the Gleeok's tail, but the monster begins to run around in circles. Zelda, who was eating a banana from the fruit basket, throws the banana peel to the ground and causes the Gleeok to slip,[9] allowing Link to deliver the final blow and send the Gleeok back to the Evil Jar.
In "Hitch in the Works", when Link arrives at the Underworld and tries to stop the wedding between Princess Zelda and Ganon, the evil wizard summons a Gleeok from the Evil Jar to attack Link.[10] Link fires three Sword Beams at the monster's necks, but the heads separate and come after him. He skillfully dodges their attacks, causing them to fly straight into Ganon, thus destroying the evil wizard and the remains of the Gleeok.
The Legend of Zelda (Valiant Comics)
A four-headed Gleeok appears in the Choices story of the The Legend of Zelda comics by Valiant Comics. Link encounters it as he is traveling through the Underworld in search of Princess Zelda. Although Link at first seems to have trouble fighting the Gleeok,[11] Link is able to cut off all four of the Gleeok's heads with a little help from Miff. The disembodied heads then begin to attack the young hero, but after some struggle, Link is able to defeat all of the Gleeok's heads.[12]
A Link to the Past (Ishinomori)

In the A Link to the Past comic by Shotaro Ishinomori, Link is attacked by monsters called Gleeocs in the Palace of Darkness. However, the monsters are bright orange lizards with green gems on their heads, and thus physically resemble smaller versions of the Helmasaur King which is fought in the game. After Link is discovered wandering around the palace by a Rocklops, he is attacked by a Gleeok that was called upon by the Rocklops. Although he defeats it easily with the Master Sword, soon more Hinoxs riding Gleeocs begin to head towards him.[13] Link then gives Epheremelda a bomb, which eventually detonates the firecorn stockpile and destroys the entire palace and, with it, the Gleeocs.
Super Smash Bros. Brawl
Gleeok appears as a Sticker in Super Smash Bros. Brawl.
Sticker Information
| Sticker | Artwork from | Effect in The Subspace Emissary | Usable by |
|---|---|---|---|
Gleeok |
The Legend of Zelda | Launch Power +20 | All |
The Faces of Evil
Alora sends Link to recover her stolen Necklace from the Gleeok living in Spearfish Falls in The Faces of Evil.[14]
The Wand of Gamelon
A Gleeok appears in the Dordung Cave in The Wand of Gamelon, where it guards a Heat Crystal. A Gleeok is also said to have scared away the populace of Aru Ainu.
Trivia
- In The Legend of Zelda, there is an unused variant of Gleeok with one head within the game's code.[15]
- Gleeok is the only boss from The Legend of Zelda to not appear in BS The Legend of Zelda.
- The masks Gleeok wear in Phantom Hourglass are similar to that of the Helmaroc King. Without their masks, they also bear a striking resemblance to Valoo.
- Being a multi-headed dragon, Gleeok bears similarities with the chthonic water beast of Greek mythology, Hydra.
- The final battle phase with the head of Stallord in Twilight Princess may be a homage to the severed heads of Gleeok in the original The Legend of Zelda.
- The series sometimes uses variants of Gleeok with different names:
- The Minish Cap has a similar one-headed variant called Gleerok.
- Cadence of Hyrule uses a four-headed variant called Gleeokenspiel.
Nomenclature
| Language | Name | Meaning | |
|---|---|---|---|
| Japanese | グリオーク (Guriōku)[16] | Same as English. | |
| Dutch | Gleeok[17] | ||
| FrenchEU | Gleeok[18] | ||
| This table was generated using translation pages. | |||
Gallery
Artwork
-
 Gleeok's The Legend of Zelda: Phantom Hourglass artwork

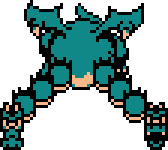
Sprites
Models
-
 Gleeok's The Legend of Zelda: Phantom Hourglass model
Unsorted
-
 Artwork of a three-headed Gleeok from The Legend of Zelda
 -
 Artwork of a Gleeok Head from The Legend of Zelda
 -
 Artwork of Link fighting a Gleeok from The Legend of Zelda
 -
 A Gleeok after all but one of its heads are detached
 -
 A four-headed Gleeok from The Legend of Zelda
 -
 A Gleeok Head from The Legend of Zelda
 -
 Gleeok model from The Legend of Zelda
 -
 Gleeok's skeleton from Oracle of Seasons
 -
 Gleeok from Phantom Hourglass
 -
 Gleeok without masks from Phantom Hourglass
 -
 Three-headed Gleeok from The Legend of Zelda TV series
 -
 Three Gleeok Heads from The Legend of Zelda TV series
 -
 Four-headed Gleeok in The Legend of Zelda comic
 -
 Gleeok from The Faces of Evil and The Wand of Gamelon
 -
 Gleeok's Head from The Faces of Evil and The Wand of Gamelon
 -
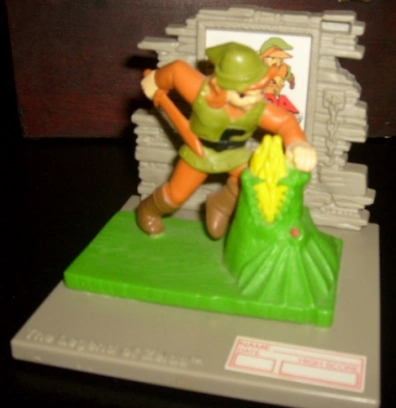
 Link fighting Gleeok action figure from The Legend of Zelda
 -
 Gleeok concept art from Phantom Hourglass
 -
Gleeok concept art from Phantom Hourglass
-
 Gleeok sprite from Oracle Of Seasons
 -
 Gleeok model from Tears of the Kingdom
 -
 A Flame Gleeok from Tears of the Kingdom


See Also
Notes
- ↑ Gleeoks were referred to as Gleeocks on Zelda.com's encyclopedia.[2] However, as this contradicts the name given in Encyclopedia, it is not considered Canon.
References
- ↑ Encyclopedia, Dark Horse Books, pg. 182 (TLoZ | OoS | PH)
- ↑ "Gleeock
Gleeock was a powerful two-headed dragon defeated by Link during his quest to recover the shattered pieces of the Triforce of Wisdom." — The Great Hyrule Encyclopedia, Zelda.com (archive), retrieved January 22, 2022. - ↑ Art & Artifacts, Dark Horse Books, pg. 122(TLoZ)
- ↑ "A huge dragon that has 2 to 4 heads and spits out beams at Link. Heads that Link cuts off from its body fly around in the air." (The Legend of Zelda manual, pg. 38)
- ↑ The Legend of Zelda: Oracle of Seasons and Oracle of Ages — The Official Nintendo Player's Guide, Nintendo of America, pg. 51
- ↑ "And maybe an adventure. Link will be sorry he missed out. REAL sorry. Beautiful girls in trouble are what he LIVES for." — Princess Zelda (The Legend of Zelda TV Series, Episode 4)
- ↑ "Eat these lemons, sourpuss!" — Princess Zelda (The Legend of Zelda TV Series, Episode 4)
- ↑ "No! I want to be rescued by a handsome hero!" — Maiden (The Legend of Zelda TV Series, Episode 4)
- ↑ "Yeah, yeah, but let's get this over with." — Princess Zelda (The Legend of Zelda TV Series, Episode 4)
- ↑ "She's under my control, hero! And as for you, you have your own problems!" — Ganon (The Legend of Zelda TV Series, Episode 10)
- ↑ "Hey, a Gleeok is no problem! A four-headed Gleeok...that's something else!" (The Legend of Zelda comic, Valiant Comics, pg. 5)
- ↑ "Not bad, huh? Sometimes I amaze even myself!" (The Legend of Zelda comic, Valiant Comics, pg. 7)
- ↑ "Link!! There's more on the way!" (A Link to the Past manga, VIZ Media, pg. 12)
- ↑ "Then get my necklace from Gleeok, okay?" — Alora (The Faces of Evil)
- ↑ The Legend of Zelda: Unused Enemy Values
- ↑ Hyrule Encyclopedia, Ambit Ltd., pg. 173
- ↑ The Legend of Zelda manual, pg. 38
- ↑ The Legend of Zelda manual, pg. 38
Mazura · Jermafenser · Rebonack · Carock · Gooma · Barba · Thunderbird ![]() · Link's Shadow
· Link's Shadow
Light World
Ball and Chain Trooper ![]() · Six Armos Knights · Lanmola Trio · Moldorm · Agahnim
· Six Armos Knights · Lanmola Trio · Moldorm · Agahnim ![]()
Dark World
Helmasaur King · Arrghus · Mothula · Blind the Thief · Kholdstare · Vitreous · Trinexx · Ganon
Super Helmasaur · Super Arrghus · Super Mothula · Super Blind · Dark Links![]()
Bosses
Moldorm · Genie · Slime Eye · Angler Fish (2D) · Slime Eel · Facade · Evil Eagle (2D) · Hot Head · Shadow Nightmares
Sub-Bosses
Rolling Bones ![]() · King Moblin
· King Moblin ![]() · Hinox
· Hinox ![]() · Dodongo Snakes x2
· Dodongo Snakes x2 ![]() · Lanmola
· Lanmola ![]() · Cue Ball
· Cue Ball ![]() · Master Stalfos x4 · Gohma Twins · Armos Knight
· Master Stalfos x4 · Gohma Twins · Armos Knight ![]() · Smasher
· Smasher ![]() · Grim Creeper · Turtle Rock · Blaino
· Grim Creeper · Turtle Rock · Blaino
Bosses
Gohma · King Dodongo · Barinade · Phantom Ganon · Volvagia · Morpha · Bongo Bongo · Twinrova · Ganondorf · Ganon
Sub-Bosses
Lizalfos · Big Octo · Stalfos · Meg · Flare Dancer · White Wolfos · Dark Link · Dead Hand · Gerudo Thief · Iron Knuckle · Dynalfos
Bosses
Odolwa · Goht · Gyorg · Twinmold · Majora ![]()
Sub-Bosses
Dinolfos · Gekko · Wizzrobe · Gerudo Pirate · Wart · Gekko and Mad Jelly
Captain Keeta · Iron Knuckle · Sharp · Igos du Ikana · Garo Master · Gomess · Eyegore
Bosses
Aquamentus · Dodongo · Mothula · Gohma · Digdogger · Manhandla · Gleeok · Medusa Head · General Onox ![]()
Sub-Bosses
Brother Goriyas · Facade ![]() · Omuai · Agunima · Great Moblin
· Omuai · Agunima · Great Moblin ![]() · Syger · Vire
· Syger · Vire ![]() · Poe Sisters · Frypolar
· Poe Sisters · Frypolar
Bosses
Pumpkin Head · Head Thwomp (2D) · Shadow Hag · Eyesoar · Smog · Octogon · Possessed Nayru · Plasmarine · Ramrock · Veran ![]()
Sub-Bosses
Giant Ghini · Swoop · Subterror · Armos Warrior · Great Moblin ![]() · Smasher · Vire
· Smasher · Vire ![]() · Angler Fish (2D) · Blue Stalfos
· Angler Fish (2D) · Blue Stalfos
Bosses
Gohma · Kalle Demos · Gohdan · Helmaroc King · Jalhalla · Molgera · Puppet Ganon ![]() · Ganondorf
· Ganondorf
Sub-Bosses
Green Bokoblin · Moblin · Mothula · Darknut · Cyclos · Phantom Ganon · Stalfos · Wizzrobe · Mighty Darknut · Big Octo![]()
Bosses
Phantom Ganon ![]() · Stone Arrghus · Helmaroc King · Big Poe · Big Moldorm x2 · Frostare · Vaati · Ganon
· Stone Arrghus · Helmaroc King · Big Poe · Big Moldorm x2 · Frostare · Vaati · Ganon
Sub-Bosses
Chief Soldier · Shadow Link ![]() · Manhandla · Dodongos · Big Dark Stalfos · Gohma · Big Dodongo
· Manhandla · Dodongos · Big Dark Stalfos · Gohma · Big Dodongo
Bosses
Big Green Chuchu ![]() · Gleerok · Mazaal · Big Octorok
· Gleerok · Mazaal · Big Octorok ![]() · Gyorg Pair · Vaati
· Gyorg Pair · Vaati ![]()
Sub-Bosses
Madderpillar ![]() · Dark Nut · Big Blue Chuchu
· Dark Nut · Big Blue Chuchu ![]() · Red Dark Nut · Black Knight
· Red Dark Nut · Black Knight
Bosses
Diababa · Fyrus · Morpheel · Stallord · Blizzeta · Armogohma · Argorok · Zant · Puppet Zelda · Ganon · Ganondorf ![]()
Sub-Bosses
Ook · King Bulblin · Dangoro · Twilit Carrier Kargarok · Twilit Bloat · Deku Toad · Death Sword · Darkhammer · Darknut · Aeralfos · Phantom Zant
Bosses
Stagnox · Fraaz · Phytops · Cragma · Byrne · Skeldritch · Demon Train · Chancellor Cole · Malladus
Stagnox II · Fraaz II · Phytops II · Cragma II · Skeldritch II · Dark Link![]()
Sub-Bosses
Mothula · Geozard · Rocktite · Ice Keese · Freezard · White Wolfos · Geozard Chief · Big Blin ![]() · Snapper · Helmet Chuchu · Metal Chuchu · Stalfos · Heatoise · Stalfos Warrior · Gerune · Ergtorok ·
· Snapper · Helmet Chuchu · Metal Chuchu · Stalfos · Heatoise · Stalfos Warrior · Gerune · Ergtorok ·
Bosses
Ghirahim ![]() · Scaldera · Moldarach · The Imprisoned
· Scaldera · Moldarach · The Imprisoned ![]() · Koloktos · Tentalus · Levias
· Koloktos · Tentalus · Levias ![]() · Bilocyte
· Bilocyte ![]() · Demise
· Demise
Sub-Bosses
Stalfos · Lizalfos · Stalmaster · Moldarach · LD-002G Scervo · Dark Lizalfos · Magmanos · Moldorm · Dreadfuse
Bosses
Yuga ![]() · Moldorm · Margomill · Gemesaur King · Arrghus · Knucklemaster · Stalblind · Zaganaga · Dharkstare · Grinexx · Yuga Ganon
· Moldorm · Margomill · Gemesaur King · Arrghus · Knucklemaster · Stalblind · Zaganaga · Dharkstare · Grinexx · Yuga Ganon
Sub-Bosses
Armos · Red Stalfos · Heedles · Green & Red Goriyas · Gigabari · Gibdos & Purple Mini-Moldorms · Red Eyegores · Flying Tiles & Devalants · Big Pengator & Pengators · Fire Gimos · Moldorm · Lorule Ball and Chain Soldier · Arrghus
StreetPass bosses
Bosses
Margoma · Arrghus · Moldorm · Blizzagia · The Lady's Pets ![]() · Stalchampion · Prismantus · The Lady
· Stalchampion · Prismantus · The Lady
Shadow Link x3![]()
Sub-Bosses
Electric Blob King · Electric Blob Queen · Hinox Brothers · Freezlord · Vulture Vizier · Grim Repoe · Gigaleon
Bosses
Windblight Ganon · Fireblight Ganon · Master Kohga · Thunderblight Ganon · Waterblight Ganon · Calamity Ganon · Dark Beast Ganon ![]()
Sub-Bosses
Stone Talus · Igneo Talus · Frost Talus · Molduga · Hinox · Blue Hinox · Black Hinox · Stalnox · Igneo Talus Titan · Molduking
Bosses
Colgera · Mucktorok · Marbled Gohma · Queen Gibdo · Phantom Ganon · Seized Construct · The Demon King's Army · Demon King Ganondorf · Demon Dragon ![]()
Sub-Bosses
Flame Gleeok · Frost Gleeok · Sludge Like · Thunder Gleeok · King Gleeok · Yunobo · Frox · Flux Construct · Moragia · Molduga · Hinox · Stalnox · Frost Talus · Igneo Talus · Stone Talus · Battle Talus · Stone Talus (Luminous) · Ganondorf · Master Kohga · Phantom Ganon
| |||||||||||||||||||||||