Biron Monastery (バイロン寺院, Bairon Jiin, alt. "The Holy House of Great Bylon") is a location in Legend of Legaia. It is the head monastery representing the Biron religion. Biron Monastery is located in Drake Kingdom, nestled in between two mountains on the east side of the river. It is home to the Biron Warrior Monks, including Gala and Songi. These monks study the secret martial arts of Biron and have a strict policy against the wearing of Seru.
Originally Biron Monastery did not allow women on its grounds, but the presence of the Mist changed that rule as they allowed women to stay there for shelter while they were put in charge of tasks such as cooking and cleaning.
Storyline
Vahn and Noa arrive at Biron Monastery after freeing Drake Castle from the Mist and closing the Water Gate in order to cross the river. Upon arrival they are greeted by the leader of the Biron Monks, Master Zopu, as well as two monks of Biron, Master Teacher and Songi. After the heroes explain what they did for Drake Castle, Zopu invites them to stay the night. Vahn and Noa then meet Maya, Mei's mother and Vahn's original reason for leaving Rim Elm. Maya recognizes Vahn right away, but before he can try to take her home she runs up stairs in order to help prepare for a party held in Vahn and Noa's honor.
Later that night, the Monestary holds a party and Vahn is able to tell Maya about Juno's unfortunate death and his desire to bring Maya back to Rim Elm so she can take care of Mei. Maya becomes very distraught and leaves to her bedroom to gather herself together. Eventually Zopu arrives and suspects Vahn is really at the monastery in order to take Maya back home. Vahn confirms that his suspicion is correct but Zopu requests that he and Noa journey to revive the Genesis Trees of the Voz forests.
Upon agreeing to revive the Genesis Tree in West Voz Forest first, Master Zopu stands on his platform and announces the intention to everyone, who then toast Vahn and Noa. Zopu then orders Master Teacher to accompany Vahn and Noa to West Voz Forest. Master Teacher, who hates Seru and those who wear them, protests. But he quickly gives in after Zopu reprimands him. Songi calls out to Master Zopu and requests that he be allowed to travel to East Voz Forest in order to protect the Genesis Tree until Vahn and Noa are able to get there. Zopu finds Songi's volunteering unusual, as Songi is usually not one to go out of his way to help others, but he agrees and declares that the party is officially over.
The next day Zopu greets Vahn, Noa, Master Teacher, Songi and three other warrior monks in front of the Biron shrine and blesses them all on their journey. After Songi and his group of monks leave for East Voz Forest, Noa tells Master Teacher that he has a strange name. He responds that it is not a name, but a title and when Noa asks what his name is he replies that his true name is Gala. They then head off to West Voz Forest.
- See West Voz Forest for more information.
After returning from West Voz Vahn finds that the Monestary has been overrun with Mist and its fans broken beyond repair. Gala runs off to look for survivors. After talking to the remaining survivors Vahn discovers that Songi betrayed the Monestary and killed many of the monks. Vahn and Noa later find Maya in her bedroom turned into a Seru monster. Noa tries to pull the Seru off of Maya, but Terra tells her to stop. Tera reveals that the Seru and its host become one in the Mist, and so if the Seru is pulled off both the host and the Seru will die.
Vahn and Noa then begin to head to East Voz Forest and are stopped by Gala who tells them that everyone is either dead or turned into Seru monsters. He begs them to allow his company in East Voz Forest so he may confront Songi. Vahn and Noa agree to let him join them once more and head off.
-See East Voz Forest for more information.
Upon returning from East Voz, they find the Monestary free of Mist and learn of its source in the valley. Master Zopu thanks Vahn and Noa for freeing them, but because Gala put on a Ra-Seru (Ozma) in East Voz Forest in violation of his oath as a Biron monk, Zopu has no choice but to excommunicate him from the monastery. This frees him to contine long with Vahn and Noa throughot the adventure. The heroes depart for the strange castle that was revealed when the power of the Genesis Trees thinned out the Mist.
After the heroes destroy the Mist Generator in Drake Kingdom they return to Biron Monastery. Zopu speaks of a Cave to the north that leads to the Sebucus Islands and the heroes take their leave.
Layout

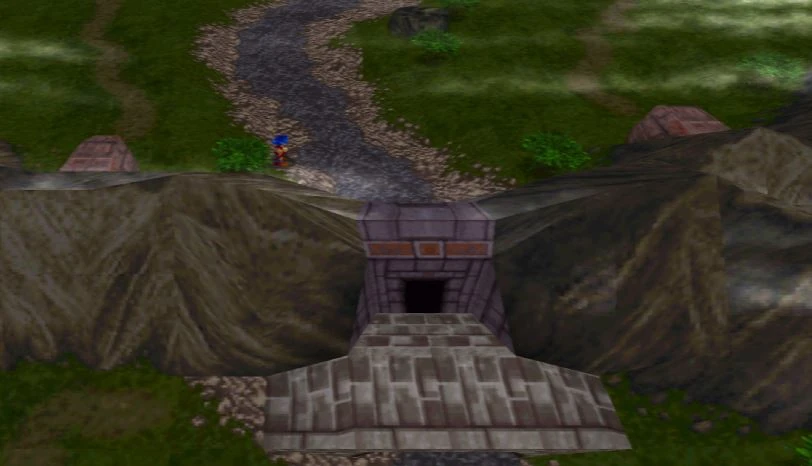
Biron Monastery is built on top of a bridge that hangs over a flowing river from the north of Drake Kingdom and is nestled in between two mountains, with many of its chambers being built within the mountain interiors. Those who wish to travel to the Sebucus Islands in the north must pass through the Monastery (before the Mist Generator was built in Drake Kingdom it was possible to travel through the valley and bypass the Monastery).
Biron Monastery is very simple technologically, aside from the fan rooms at each of its entrances that protect it from the Mist outside. The Monastery holds separate bedrooms for the men and women in the Monastery. Blankets and pillows are arranged on the bedroom floors to serve as beds. The Monastery is equipped with a large kitchen and dining area where the warrior-monks eat their meals.
The Master of the Monastery has his own chamber in the back of the Monastery, which is located between two doorways that lead to passages going to West Voz Forest or East Voz Forest. Additionally, the Monastery holds a large shrine room dedicated to Biron and a training room for daily practice.
Shops
| Arms Shop | Cost | ||
|
180G | |||
|
160G | |||
|
1,800G | |||
|
420G | |||
|
320G | |||
|
1,100G | |||
|
560G |
| Items Shop | Cost |
| Healing Flower | 400G |
| Healing Bloom | 600G |
| Magic Leaf | 1,000G |
| Earth Jewel | 2,000G |
| Deep Sea Jewel | 2,000G |
| Burning Jewel | 2,000G |
| Tempest Jewel | 2,000G |
| Healing Leaf | 100G |
| Medicine | 300G |
| Door of Light |
200G |
The Arms Shop in Biron changes after you revive the Genesis tree in East Voz Forest
| Arms Shop(After Tree Revived) | Cost |
|
1,200G | |
|
980G | |
|
860G | |
|
940G | |
|
1,800G | |
|
1,400G | |
|
780G | |
|
2,120G | |
|
1,300G |
Map
