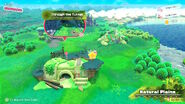
Through the Tunnel is the third stage in Kirby and the Forgotten Land. It is the third stage of Natural Plains. It succeeds Downtown Grassland and precedes Rocky Rollin' Road.
General Information
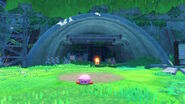
The stage begins with Kirby in a small clearing before a massive tunnel. Upon entering the tunnel, Kirby is immediately attacked by a Hot Head. It is highly recommended that the player inhales it to receive the Fire Copy Ability, as this stage focuses on utilizing Fire's ability to light Cannon fuses and Lantern Switches. Kirby is then challenged by a few enemies before reaching a much smaller tunnel. After crawling through the tunnel, Kirby encounters many enemies such as Bronto Burts and several metal platforms suspending over pits. This area has significantly more pits than Point of Arrival and Downtown Grassland, so it teaches the player to move cautiously. Following this section, another tunnel takes Kirby to an area with light shining through and a narrow bridge. A Door then takes Kirby to the next section of the stage.
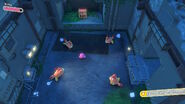
Gordos and Gordo Bars pose a challenge in the next section, as it is comprised of many blocks moving up and down. The Gordo Bars prevent Kirby from moving to the other side of the block at certain elevations. A Lantern Switch can be lit to reveal a path leading to a Switch, which opens a gate containing a Gotcha Capsule. Kirby then must jump between moving blocks over a pit before reaching a platform with 2 Food items. Grabbing these, however, causes 3 Awoofies to spawn and attack Kirby. After jumping between a few more blocks, Kirby finds a Lantern Switch guarded by moving Gordos and another Door.
The next section gives the player a view of the path ahead, which contains a few enemies and a cannon fuse. This section is rather brief, as right after the cannon there is a small bridge leading to another Door and an Awoofy.
The following section contains a few Kabus and destroyed bleachers before introducing the player to the Stairs Mouth. This is used in a sidescrolling area to crush Durable Blocks and squash enemies. Soon after, the player is shown how the stairs themselves can be used to reach high-up areas, as a high ledge contains a Capsule hidden behind blocks. To the right of the ledge, there is a puzzle requiring the player to light a cannon fuse and then place stairs in the correct area to reach a cannon without stepping on the fuse. If the puzzle is successfully completed, Kirby discovers 2 treasure chests and the final Waddle Dee prisoner. Finally, to the right, Kirby may leave through a tunnel to reach the outdoors once again. This area is a small clearing with a few patches of Grass, one patch containing a Capsule, and the goal straight ahead.
Missions
Italicized missions are hidden from view on the player's first playthrough.
- Clear the stage: When Kirby clears the stage for the first time, he will automatically rescue 3 Waddle Dee prisoners from the golden cage.
- Save the hidden Waddle Dees: 4 Waddle Dee prisoners can be found here, their locations being the following:
- In the secret room mentioned in the first hidden mission, several Awoofies attack the player. Once defeated, the player may open a treasure chest with a Waddle Dee inside.
- Activating the stage's final Lantern Switch creates a path of Star Coins that leads to a Bomb Block. Destroying it opens up a wall with a Waddle Dee prisoner hidden inside.
- The third room of the stage contains a Cannon fuse. After activating, the player should quickly run to the cannon to be launched up into several Hard Blocks. Directly behind the blocks is a Waddle Dee in a small tunnel.
- During the Stairs Mouth segment, the Cannon puzzle leads straight to the final Waddle Dee.
- Find the secret room: In the room with metal platforms over pits, the left side contains an opportunity for Kirby to use Dome Mouth. If used, it reveals a switch that opens a hall leading to a secret room.
- Light 4 Lantern Switches: Several Lantern Switches require Fire Kirby to light them, their locations being:
- At the start of the tunnel, behind some construction gates.
- Immediately after entering the first Door, the Lantern Switch is placed behind some metal gates.
- After the second moving platform in the stage, the Lantern Switch is behind another construction gate.
- Guarded by Gordos at the unmoving center of a moving block.
- Remove the wanted poster: During the Stairs Mouth section, Kirby may leave the stairs in an area where they can be climbed to easily destroy the wanted poster.
