
Wolfman is a major character and a vendor in Darkwood for the duration of Chapter 1. Whether he appears in Chapter 2 is dependent on the player's choices.
Wolfman has the beastly appearance reminiscent of a wolf and trades in guns, ammunition, and some miscellaneous crafting materials in exchange for Reputation points. With his cunning yet often cruel remarks, he functions as a valuable guide to the Protagonist in the early stages of the game, though his explosive and derisive temperament may suggest otherwise.
Wolfman has a camp in Dry Meadow and Silent Forest, while Old Woods contains his hideout, a large barn with a collapsed chain link fence that was likely once a farm. When killed, Wolfman most notably drops an Assault Rifle and the Wedding Ring (Fake).
Plot
On the dawn of day 2, and if the Protagonist has not found his camp first, Wolfman will appear near the Oven. He will inform the Protagonist that he can help retrieve what he has lost if the Protagonist is willing to help him in return. He requests that the Protagonist prove his capability of performing his assignment by reaching the Camp in the Silent Forest after marking its location on the Player Map. He will also reveal the location of his Camp in the Dry Meadow, and tells the Protagonist to visit him there if he wishes to see him again before making his way to the next area.
When the Protagonist finds Wolfman in the Silent Forest, he congratulates the Protagonist and tells him to find the Road to the Village. There, he should have a chat with "the hag who reeks of chickens", the Chicken Lady, who has something interesting to tell the Protagonist. Wolfman also says to be on guard, because she hides something behind a locked door that doesn't belong to her. He then asks for the Key to that door, in exchange for the information of where the Protagonist's key is.
Wolfman will gossip about how the inhabitants of the The Village treat him and others like him poorly, due to their mutations in appearance. He will inform the Protagonist that the Villagers have "many secrets", and that he should "find the pigshed, and get rid of that whimpering", in exchange for a reward. If the Protagonist chooses to kill The Sow and then talks to Wolfman again, he will reward the Protagonist with a Hotbar Upgrade.
Wolfman dislikes Piotrek so much that he wants the Protagonist to sabotage Piotrek's quest of building a fantasy spaceship. He offers no reward for it.
Depending on the player's actions, he may follow the Protagonist to Chapter 2 and steal much of their inventory before challenging them to a fight that is heavily weighted in his favour (see Quest section for further detail).
Quest
The Protagonist is left with essentially two meaningful paths of interacting with Wolfman from this point on, other than killing him: bringing him the Key, or ignoring his request and finding another way to the Doctor's House.
A: Bringing Wolfman the Key
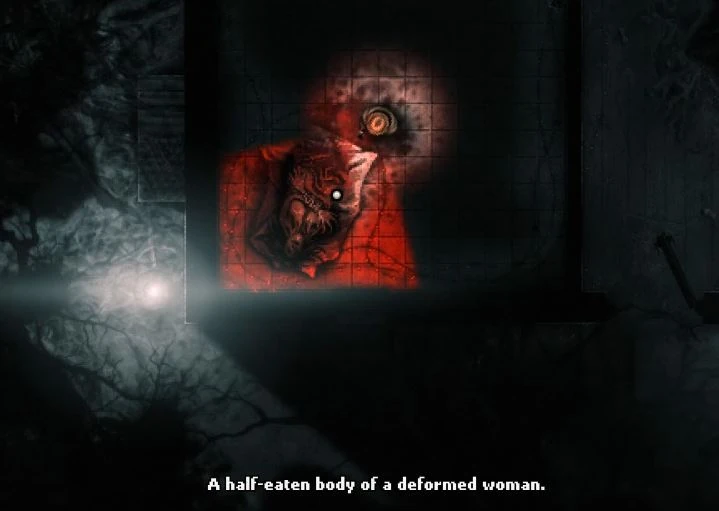
Should the Protagonist choose to satisfy Wolfman's request to retrieve the Key from Janek's house in the Village, he will be waiting for the Protagonist a final time in his large, dog-infested complex located within the Old Woods. Wolfman will greet the Protagonist covered in blood and smelling of rot. Exploring his small home-like section near the back of the complex will reveal the half-devoured corpse of the Pretty Lady, and Wolfman will thank the Protagonist for the chance to "regain his girl." In return for his efforts, the Protagonist will be rewarded with a Hunting Rifle, and Wolfman will agree to take him to the Doctor's House.
After this, there's no plot-important interaction between the Protagonist and Wolfman, and he will not appear in Chapter 2.
B: Killing the Pretty Lady
If the Protagonist kills the Pretty Lady and leaves the Chicken Lady alive. Wolfman offers to appease him by killing the Chicken Lady. He will continue to trade with you, but you get no reward in return. If the Protagonist kills the Pretty Lady and then the Chicken Lady without showing him the Bloodstained Shawl first, he will tell the Protagonist to "fuck off" and refuse dialogue from this point on.
C: Ignoring Wolfman's Request
If the Protagonist instead decides to complete the main quest in Chapter 1 by other means (and doesn't at any point decide to kill Wolfman), an entirely different set of events unfolds, although the consequences of this choice are not felt until Chapter 2.
Aftermath to B and C (if the Wolfman is left alive)
On the fifth day of staying in the Swamp, if the Protagonist goes far enough from the hideout then goes back, he will find many items missing from his workbench along with an angry note from Wolfman. In the note, Wolfman demands that the Protagonist visits the Sawmill if he desires to retrieve the stolen items and expresses his anger at the Protagonist for ignoring his request. It is not necessary to have any item in the workbench inventory to trigger this event, if it is left empty the note will still appear but Wolfman will not be able to steal anything.
Upon arriving at the Sawmill the Protagonist will find that a previously locked metal door is now unlocked. When going inside Wolfman will first ask for the Protagonist to leave all of his items on a corpse at the entrance. The Protagonist will then receive a knife, a table leg and 2 pills (healing). Wolfman will then send 2 huge dogs after him. If the Protagonist succeeds in killing them, Wolfman himself will show up and attack the Protagonist. When killed, he drops the Sawmill Key, allowing the Protagonist to exit the Sawmill and collect his lost items in a chest. If the Protagonist is instead killed by Wolfman during the fight, their stolen goods will be lost forever and a consolation prize can be found in the previously locked back room.
Strategy
Wolfman is fast and aggressive during combat, comparable to a Huge Dog. He charges straight at the Protagonist then lunges forward, swinging both arms in a 1-2 attack with good range. If you take both blows you'll receive a considerable chunk of damage. Sometimes after lunges, he pauses for a brief moment before getting to his feet and resuming his assault.
As other strategies are cheaper and easier, a straight-up fight with melee is not recommended. He can be downed in 10 standard hits by a Board with Nails with no upgrades, and can be stumbled by weapons that do so after each hit. Because of his speed, it's important to remain mobile and use a hit-and-run strategy; create distance, charge your attack, hit him after he closes the distance, repeat. Run in tight circles to best avoid his lunges, listen to determine where he is behind you, and try to wait for him to lunge before charging another attack. When he pauses, only close in and strike if you're close enough as he can attack immediately after recovering. This strategy also applies to fighting him with guns, although you can be a lot less cautious when doing so.
But as stated, other strategies are much more effective. If he's in one of his camps, utilizing Bear Traps is the cheapest option. If you have a gun and melee, simply place the trap on the ground a little ways away from him, then shoot him. After stumbling, he should run straight at you- and once he steps in the trap, he can be incapacitated in 1-3 blows. Kiting him into the trap after meleeing him is also easy and doesn't require a ranged weapon; the trap will take 50% of his HP, so note that you'll need to be quick in hitting him 5-6 more times to finish the job. Chain traps aren't recommended unless you're using ranged attacks, since he can still attack while immobilized by them; but they can work well when used along side ranged or Molotovs.
Explosives, while not exactly cheap, are definitely the most effective option. A single Exploding Barrel or Gas Tank placed close to Wolfman will incapacitate him instantly. A Bear Trap with an Exploding Barrel next to it is a powerful way to dispatch him from a distance.
Fire can be effective too. Simply throw a Molotov at him, then avoid his attacks while the fire does the work- although he may need one more blow to finish the job. Flaming Gasoline, however, won't cause him any harm unless he's already hostile, so you'll need to attack him somehow before kiting him through the flames.
Origins and likely identity
The Wolfman is one of many imperfect clones/replicas created by the Being. Different to those infected by the plague, these entities are instead are copied from generally dead/immobilised people, animals, or objects, recreated by the white fluid that runs in the root network from the Being throughout the Darkwood region. The white fluid often cannot tell objects, whether inorganic or organic, apart and as such tends to meld objects that are in close proximity, in this case it's highly implied to be the Hunter and one of his trophies, likely that of a wolf (but could also potentially have been a dog). While at first glance the Wolf does not appear to have the classic traits of being very pale or noticeably malformed, the Wedding Ring (fake) displays is white, with a bubbly imperfect surface.

Despite calling the Protagonist "Meat" and claiming to dislike plagued, contaminated flesh, he leaves the healthy villagers alone and instead focuses his cannibalistic desires solely on the Pretty Lady, an innocent woman who lost her humanity as she was made twisted and swollen by the plague's influence. His dedication is not the bloodlust of a hungry carnivore looking for sustenance, but the sick obsession of a psychopath with no regard for human life, who is willing to kill if he doesn't get what he wants.
The Wolfman's original human body was a Hunter, the corpse of which can still be found in the Hunter House in the Old Woods, bound in roots with the original wedding ring still on his hand. Why the Wolfman no longer lives in the cabin is unclear, but he sets up a sick parallel in the barn, replacing animal trophies with those of humans. As a human, the Hunter had married into the Chicken Lady's family, though which sister was his spouse is not 100% certain, as although the Wolfman is obsessed with the Pretty Lady, the ring is found in bedding that is implied to be where the Chicken Lady sleeps. It is unclear whether the Hunter hated the Chicken Lady as much as the Wolfman does. In Chapter 2, the first note that the Wolfman leaves for the Protagonist is written on the cover of a magazine with bullet holes, the front picture is that of a woman holding a chicken.
The Hunter does not appear in the Train Wreck sequence dream, suggesting that he was already gone or at least out of the picture when the Pretty Lady first became ill. How the Hunter died is uncertain, but if the coat that the Wolfman wears did belong to him, it's possible that someone shot him. Equally possible though is that the coat the Wolfman wears is just taken from one of his human victims.
There are many mysteries surrounding the Wolfman. One of which is the Strange box. It is unclear how the Wolfman knows about this box and the location of its key. The box contains pictures depicting the family of three (a man and his two daughters) that lived in the burnt houses in the Dry Meadow, and their dog that is implied to have succumbed to the plague after consuming essence (one picture depicts the father with a bandaged wound on his arm). The box and key belonged to this family. There is a possibility that the animal half that the Wolfman was derived from was this dog. A picture of a feral dog standing over an injured man can be found in the Hunter's house. The Hunter could have shot the dog and then taken it as a trophy, as he has done before as there are multiple dog trophies in the Hunter's House. A trophy with the head missing can be found in the Hunter's house.
Stock
The Protagonist has an initial Reputation of 50 when trading with Wolfman. Similar to most other vendors, items that can be sold to him are sold at half the buying price.
| Item | Buy | Stock | |
|---|---|---|---|
| Toolbox | 200 | 1 | |
| 9v Battery | 50 | 1 | |
| Bottle | 20 | 1 | |
| Flare | 60 | 2 | |
| Flashlight | 140-294 | 1 | |
| Gasoline | 40-68 | 1 | |
| Wire | 30 | 1 | |
| Matchstick | 6 | 12-19 | |
| Nail | 2 | 13-28 | |
| Red Egg | 70 | 1 | |
| Rag | 14 | 1-4 | |
| Small Caliber Magazine | 100 | 1 | |
| Metal Pipe | 60 | 1 | |
| Tape | 40 | 2-4 | |
| Watch | 300 | 1 | |
| Handgun Frame | 450 | 1 | |
| Weapon Parts | 450 | 1 | |
| Chain | 150 | 1 |
Epilogue
In the true ending, Wolfman, if not killed by the Protagonist beforehand, is said to have had an unknown fate.
If the Protagonist does not talk to him and chooses the Bliss ending, Wolfman is said to remain living in the woods, basking in the suffering of its other inhabitants. If the Protagonist does not give him the key, he will do the same, but forever unsatisfied and unfulfilled, due to his "deepest desire" being left unachievable by the Protagonist's actions.
- See Transcript
Dialogue
Greeting
- First Encounter in the Dry Meadow or the Old Woods Hideout
The figure hides its face under the hood. It smells of wet soil and fur.
As he leans towards me, I can hear him giggling under the hood.
The Wolf grabs my map and scribbles something on it.
- Second Encounter
The Wolf smiles, revealing a row of sharp teeth.
- First Encounter in the Silent Forest
The figure hides its face under the hood. It smells of wet soil and fur.
As he leans towards me, I can hear him giggling under the hood.
The Wolf smiles, revealing a row of sharp teeth.
- After waking up from The Church dream
- Get killed by the Black Chomper or Escape from the Church
The Wolf winks at me, baring his teeth slightly.
- Enter the trapdoor
The Wolf winks at me, baring his teeth slightly.
- If the Protagonist kills the Pretty Lady and then the Chicken Lady without showing him the Bloodstained Shawl first
- Talk again
- At the Barn Ruins
The greeting sounds like an angry growl.
The Wolf makes a quick leap and, bouncing against me with his swollen belly, he puts his paws on my shoulders. He ostentatiously licks his face.
I notice fresh bloodstains on his fur and feel streaks of his saliva dripping onto my coat. He leans towards me, as if he wanted to say something to my ear...
- Push the Wolf away
The Wolf takes two steps back. I can only see a row of filthy, sharp teeth underneath his hood.
He is apparently addressing the stuffed human corpses sitting by the walls.
The Wolf turns towards me, adjusting his coat.
- Nod
- Shake head
- Do nothing
The Wolf squeezes my arms and starts licking my face. Once from the left side, once from the right side.
His breath stinks of rot.
Suddenly the Wolf sends me back with a powerful push and reaches into his coat pocket. Some object hits the floor.
- Nod
- Shake head
- Random
Go to Doctor's house
- Nod
- Shake head
Showing Items
The Wolf snatches the photograph from my hand and studies it carefully. Finally he snorts, his thick, yellow spit landing on the photo.
The Wolf throws the photo to the ground.
- Battery / Fan Belt / Tire / Exhaust / Rearview Mirror / Steering Wheel (After receiving Piotrek's quest)
The Wolf suddenly stops, remains silent for a moment, then his eyes open in a split-second and he continues.
- Nod
The Wolf turns his back to me and starts tinkering with the part for Piotrek. After a moment, he hands it back to me.
- Shake head
The Wolf snorts with laughter, his putrid saliva landing on my face.
The Wolf throws the invitation back at me. It's wet with spit.
- Get killed by the Black Chomper or Escape from the Church
The Wolf grabs the box and starts sniffing it from every angle. I could swear I've heard his tail moving under his coat.
- Enter the trapdoor
Wolf examines the object indifferently, although I could swear I've heard his tail moving under his coat.
The Wolf snatches the box and the key from my hands.
Muttering under his breath, he attempts to open the box. After a while the lid gently slids open and the Wolf peeks inside carefully, squinting his eyes. He looks at the contents in silence, then lifts his gaze at me.
The Wolf takes out a few crumpled pieces of paper from the box and throws them in my face. As they fall to the ground, I also notice a shiny stone among them.
- Shake head (this dialogue is bugged)
The Wolf throws the plastic toy at me.
- Nod
The Wolf carefully studies the toy.
- Nod
The Wolf produces a gun from his pocket, throws it under my feet and then turns the game on.
- Shake head (this dialogue is bugged)
- Bloodstained Shawl (If the Protagonist kills the Pretty Lady but spares the Chicken Lady)
- If the Protagonist kills the Chicken Lady first
The Wolf winks at me.
- If the Protagonist kills the Pretty Lady first
As I produce the key, the Wolf's pupils widen with excitement.
The Wolf bursts out with laughter.
Wolf sinks his hands into the deep pockets of his coat.
The Wolf throws the head of a chicken under my feet.As I lift my gaze, I realize that the Wolf is gone.
Gossip
- Advice 1
- Advice 2
- Advice 3
- The grudge
The Wolf moves closer to me.
The Wolf grins, listening to the distant sound with great relish.
- The Cable
- If the Protagonist fixes the Cable and spares the Sow before or without showing him the Key Covered in Chicken Feces
The Wolf pierces me with his look and grins. A string of saliva lands on his hole-riddled jacket.
The Wolf puts his paw on me. I can feel his claws puncturing my skin.
- If the Protagonist fixes the Cable and spares the Sow after showing him the key
The Wolf pierces me with his look and grins. A string of saliva lands on his hole-riddled jacket.
- Shake head
The Wolf puts his paw on my arm.
- Nod
The Wolf grabs my shoulders.
I can feel his claws piercing my skin.
The Wolf looks me straight in the eyes, takes a deep breath and spits in my face. The stench of his saliva makes me dizzy.
- If the Protagonist kills the Sow
Suddenly, the Wolf slaps me on the cheek.
The Wolf bursts into laughter.
The Wolf checks his pocket, his paw trembling with excitement. He takes out some item and throws it to the ground.
- The explosion
Exit dialogue
- First Encounter at the Dry Meadow Hideout (if the Protagonist haven't found his camp on the first day)
The Wolf points to a location on my map.
- First Encounter at the Silent Forest Hideout (if the Protagonist haven't found his camp on the first day)
The Wolf grabs my map and scribbles something on it.
Trivia
- During the Alpha versions of the game, Wolfman would simply state "What the hell is this?" When shown the plastic chick. After the introduction of the Wedding, however, he now notes that it would be a nice gift to take to a fair.
- Before Alpha 6.0, Wolfman would simply indicate where the Protagonist could find him on the Dry Meadow, without mention towards an assignment.
- Before Alpha 7.2, Wolfman would give the Protagonist vague directions towards his camp as opposed to marking it on his map.
- Prior to Alpha 8.0, Wolfman could be shown the Photo of the Doctor, which was previously obtained from the Chicken Lady. This would cause him to request the Lynx from the Hunter's House in exchange for information about the doctor. This fetch quest was dropped later on, but the photo could still be shown to him, whereupon he refers to the Doctor as a "quack".
- Alpha 10 added a heavy, feral breathing noise to Wolfman. This can be heard when nearby him.
- As of Alpha 10, gifting the Chicken Lady's Key to Wolfman will result in gaining a hotbar upgrade. This item will be added to the Protagonist's inventory and must be 'used' to upgrade his hotbar.
- Killing Wolfman is one of the ways to obtain the Assault Rifle in chapter 1. Another Assault Rifle may be found in one of the two crates found near Wolf's Camp in the Silent Forest.
- A bloodstained bullet hole is visible on the left side of his jacket over his heart. As an injury like this would normally be fatal, it is almost sure that he was the one who shot the previous owner. It is also possible that someone attempted to shoot him, perhaps mistaking him for a monster(well... not a sane one at least), which might suggest he got the rifle on his back after killing the man that shot him.
- He clearly carries a Kalashnikov rifle (an AK-47) on his back, in his 2D portrait. He seems to rarely use it in-game, but if the Protagonist manages to kill him, they can obtain that rifle.
- The Wolf somehow already knows about the Protagonist searching for the Big Metal Key when they first meet. This could indicate he may be on talking terms with the Doctor. Alternatively it could be an oversight, or perhaps not the first time this sort of thing has happened.
- The Wolf can gift the Protagonist both a pistol and hunting rifle if certain actions are taken.
Bugs/Glitches
On the first day wolfman apears, if exiting and rejoining the save the trader will take his place meaning you can trade with the both of them after only completing one night.
It should also be noted that wolfman's trade stock is considered separate from when he appears in your hideout to his stock when found in his camp, making it possible to "double dip" on his stock if you trade with him in both instances.
| Characters | |
|---|---|
| Major characters | Bike Man • Chicken Lady • Child • Cripple • Doctor • Elephants • Mirror • Mushroom Granny • Musician • Piotrek • Protagonist • Snail • Talking Tree • The Three • Trader • Wolfman • The Being |
| Minor characters | Dial-eyed Man • Half-Dead Man • Half-Dead Woman • Hanuska • Infected Villager • Janek • Maciek • Madman • Man • Notable Villagers (Swamp) • Pig Farmer • Pretty Lady • Sleeper • Stasiek • Tunneler |