Hyrule Castle is the final dungeon of Breath of the Wild. Prior to the second Great Calamity, it was the government seat of Hyrule Kingdom,[1] ruled under King Rhoam.[2] It has since served as the location where Princess Zelda has kept Calamity Ganon sealed while Link was dormant under the Slumber of Restoration.[3][4]
When King Rauru sealed Ganondorf underground shortly after founding his kingdom, his people constructed Hyrule Castle above the site to keep the Demon King sealed, the castle remained intact and undestroyed for ages ever since, until it was damaged for the first time during the second Great Calamity 100 years prior to the Era of the Wilds.[5][6]
Entrance to the Castle
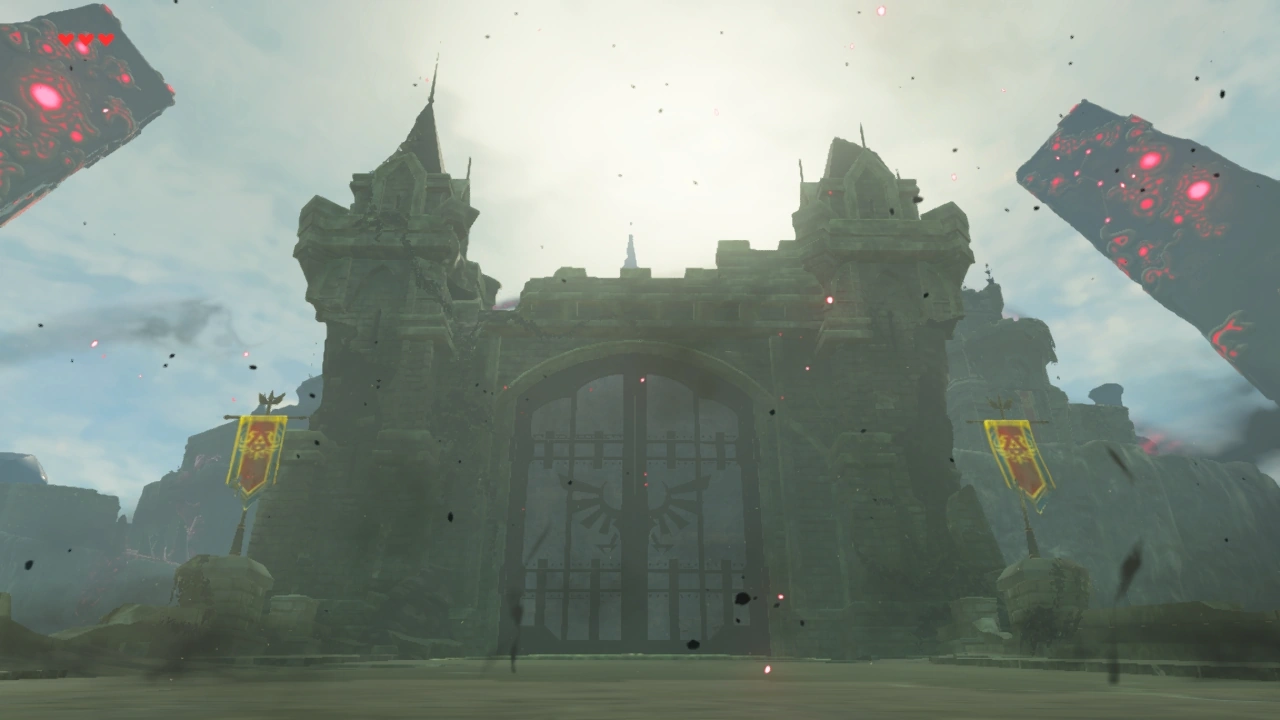
Hyrule Castle is surrounded on all sides by the Hyrule Castle Moat. The only way that Link can approach it by land is by crossing through the Hyrule Castle Gate from the Hyrule Castle Town Ruins to its south. This Gate hides a winding path that surrounds Hyrule Castle and ultimately ends at the Sanctum, where Calamity Ganon lies. It is possible for Link to approach Hyrule Castle by air with the Paraglider or by Swimming through the Moat. As Link nears Hyrule Castle, Calamity Ganon will manifest himself and swirl through the air above the Castle, before he is contained in a radiant burst of light from Princess Zelda in the Sanctum.
There are several entrances to the interior of Hyrule Castle, such as the Docks in the northern side of the castle grounds, as well as tunnels built into the earth supporting it. A break in the walls of the Lockup allow Link direct access to the Castle's prison and the Hyrule Castle Underground. Similarly, recesses in the structures of the Castle itself allow Link passage to various parts of its key areas, such as with the broken roof atop the Library.
Despite the accessibility of Hyrule Castle, the landscape is littered with various kinds of Guardians under Calamity Ganon's control. Decayed Guardians and Guardian Turrets can be found stationed along the ground and walls of the Hyrule Castle, and Guardian Skywatchers patrol the air around it. Positioned in formation along the ground just outside of the Hyrule Castle Moat are five Giant Columns, atop of which Link can find broken Guardians that can be searched for Ancient Materials. These Columns were used to store the legion of Guardians prior to the second Great Calamity.[7] Upon Calamity Ganon's return, the Giant Columns arose around the Castle, and he seized control of the Guardians inside.[8]
Due to the presence of Calamity Ganon's Malice, the Master Sword is perpetually empowered while Link is at Hyrule Castle. Pools of Malice can be found scattered throughout most of the Castle grounds, as well as within the Castle itself. The main entrance to Hyrule Castle itself is overflowing with Malice, forcing Link to ascend the grounds by other means. While in the vicinity of Hyrule Castle, the Sheikah Slate's Map displays a three-dimensional model of Hyrule Castle and its entrances, as well as the positions of Link and Calamity Ganon. A primary, winding road from the Hyrule Castle Gate leads to the Sanctum, where Calamity Ganon waits. The Bridge between Princess Zelda’s Room and Princess Zelda’s Study is the location of the 12th Recovered Memory, " Father and Daughter."
In a chamber connected to the southern end of the Library, Link can find a Great Frostblade embedded in a mound of rubble. This chamber leads into Hyrule Castle Corridors, eventually connecting to the Square Spiral Staircase. The upper floor of the Staircase leads back into the Hyrule Castle Corridors, which consists of a series of hallways that converge near the Dining Hall.
From the pathway between Lockup and the West Passage, Link can enter the Water Pump Room, which leads him out of the Hyrule Castle Underground. This Updraft in the Water Pump Room brings Link to a hallway. The right path of leads outside to the grounds of Hyrule Castle near Princess Zelda’s Room, while the left path leads back into the Hyrule Castle Corridors and the Guards' Chamber. The hallway leading to the Guards' Chamber ends in two doorways, one of which is blocked by Malice controlled by a Glowing Eyeball, which can summon Cursed Lizalfos to attack Link. Destroying the Glowing Eyeball will open the path forward, allowing Link to continue further into the Hyrule Castle Corridors, where he finds a Cooking Pot.
Here, Link will find two accessible doors, the first of which leads down into the Guards' Chamber, while the latter leads to the entrance along the road nearest the Hyrule Castle Gate. Another doorway is blocked by an immovable wall of Malice, prohibiting direct access to the Reception Room and Observation Room.
The other doorway in the initial path to the Guards' Chamber leads to the Round Spiral Staircase, which is blocked by another Glowing Eyeball. If destroyed, the Malice covering the Staircase will disappear, allowing Link access to the colonnade along the road near the First Gatehouse. This area once functioned as a garden.[9] A single Guardian Turret can be found inside the colonnade.
Path to the Sanctum
To the right of the Hyrule Castle Gate stands a tower which holds a stone Treasure Chest containing five Bomb Arrows. The roof of this tower also bears a stone Treasure Chest containing five Ice Arrows. The main road to the Sanctum continues to the west of this tower, beyond a Decayed Guardian on the roadside. The path along the road is interrupted by a strip of Malice covering the ground along the road, and there are steep cliffs on either side. A nearby doorway offers a detour into the Castle's interior, near the Guards' Chamber. From there, Link can return to the Hyrule Castle Courtyard just beyond the strip of Malice. Link can remove this Malice by striking the Glowing Eyeball on its far side, clearing the roadway. A Natural Hiding Spot can be found nearby, and if Link lifts this Rock, a Korok will appear and give him a Korok Seed.[10]
The aforementioned courtyard sits beneath a second tower, guarded by a Guardian Turret. On the floor inside the tower sits a Rusty Shield, and a Royal Bow can be found on the end of the wall north of the tower. The main road continues along a curved slope in front of the tower into the First Gatehouse. The main road continuing from the First Gatehouse is obstructed by a massive cluster of Malice. However, a side road branching from the main road across a small Bridge and underneath a colonnade. The side road continues along the path until it is obstructed by the remains of a landslide, where a Decayed Guardian watches from an angle. An unmarked branch of this road continues left, down a flight of stairs into the northern entrance of the Library. However, it is possible for Link to simply walk around the rubble and continue along the side road. Beyond the landslide sits a pool of Water beside the road. A metallic Treasure Chest containing five Bomb Arrows is hidden underwater. A Guardian Skywatcher patrols the road near the pool.
Beyond the pool of Water, the side road continues to another landslide. When Link approaches the landslide, an inactive Guardian will fall from above. Link can walk along the narrow strip of land around the landslide to continue along the side road which passes the Dining Hall. The road continuing from the Bridge beyond the Dining Hall meets back with the main road, on the other side of the massive collection of Malice. An Glowing Eyeball can be found on this side of the Malice, and destroying it will clear the main road for Link to travel between his position and the First Gatehouse. From here, the main road continues along to the Second Gatehouse nearby.
The main road beyond the Second Gatehouse curves around a series of stone walls. Along the wall on the inward curve of the road is a tower that holds a stone Treasure Chest with five Bomb Arrows stored inside. A second stone Treasure Chest on the roof of this tower holds five Shock Arrows. After the main road curves around the tower and its corresponding wall, it is once again obstructed by a thin strip of Malice connected to an Glowing Eyeball between two thin, short towers. Beyond this strip of Malice, the main road curves once more before turning straight for the entrance of the Sanctum. A ledge beneath the final curve hosts a cracked boulder, which can be bombed to unveil a Natural Hiding Spot. When Link lifts it, another Korok will appear and give him a Korok Seed.[10]
Unmarked Paths
Beyond the Bridge crossing between Princess Zelda’s Room and Princess Zelda’s Study, Link can find a small tower to the left-hand side of the side road. The roof of this tower holds a stone Treasure Chest with five Ice Arrows. At the bottom of this tower is a small, unmarked path trailing down the side of the Hyrule Castle Courtyard's grounds. At the end of this path stands a pool of Water, from which a metallic Treasure Chest can be retrieved with Magnesis to yield 10 Ice Arrows. A stone wall along the ledge of this path bears two towers. Two stone Treasure Chests can be found the roofs of both towers, both containing bundles of five Bomb Arrows. A larger pool of Water near the second tower hides a Treasure Chest containing five Ice Arrows. A break in the road along the stone wall leads to the entrance to Lockup and the Docks.
Across the dried remains of a Waterfall at the top of the slope near where the unmarked road begins sits a cracked rock, which hides a stone Treasure Chest containing five Bomb Arrows. A tower stands beneath a series of ledges from this Chest, and atop this tower's roof, Link can find a stone Treasure Chest that holds five Fire Arrows. Another cracked boulder sits along the ground closest to the cliff on the interior portion of the stone wall connected to this tower. Beneath the cracked boulder is a stone Treasure Chest that holds five Shock Arrows. A third cracked boulder sits on the ledge southeast of the stone wall. The stone Treasure Chest underneath holds Dinraal's Scale.
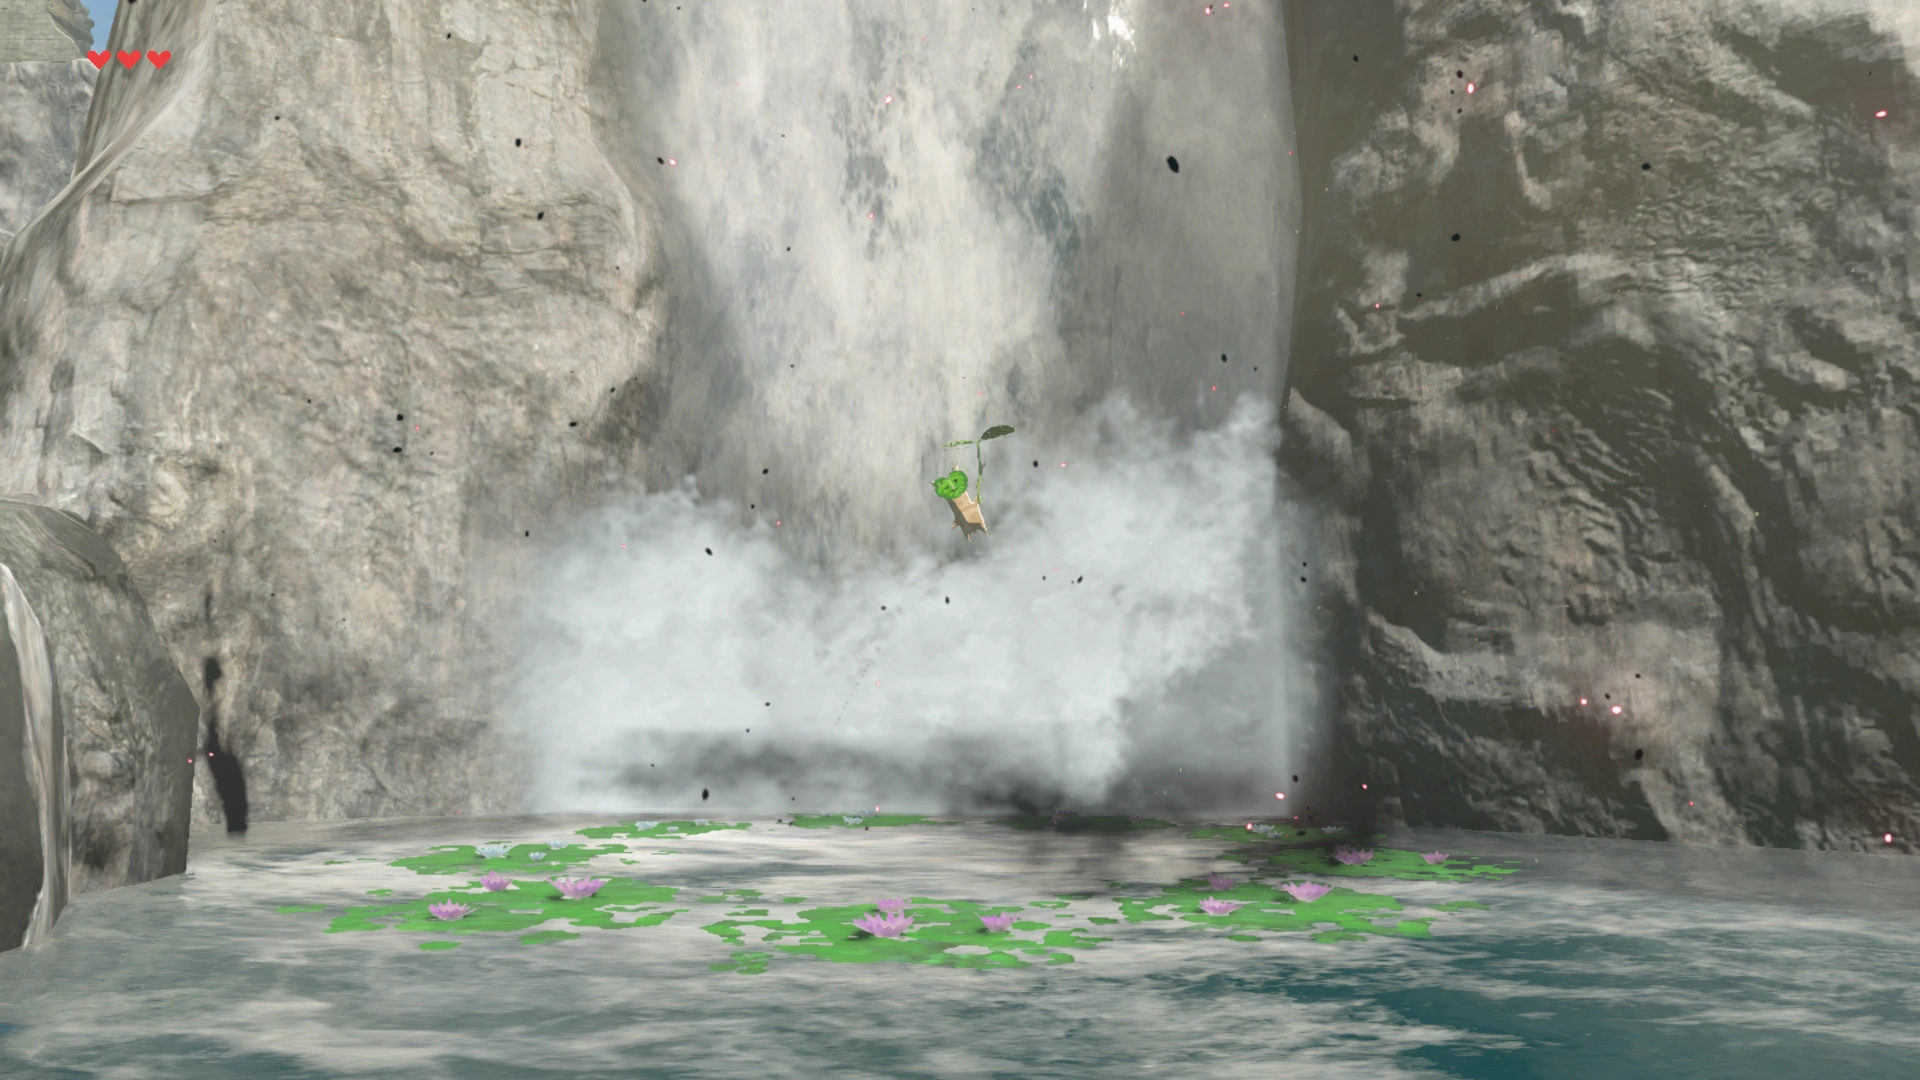
Following the path around the grounds of Hyrule Castle, Link can find the entrance to the East Passage. The ledge beneath the entrance to the East Passage holds a fourth cracked boulder, under which Link can find a Silver Rupee in a stone Treasure Chest. A stone wall sits on the ledge above the entrance to the East Passage, where a stone Treasure Chest can be found atop the roof of the wall's corresponding tower. This Treasure Chest contains three Ancient Arrows. The stone wall encompasses the exterior of the Library, where Link can find a fifth cracked boulder that hides Treasure Chest with a Ruby. The Water north of the cracked boulder features a Circle of Lily Pads, which Link can jump into to reveal a Korok.[10] Also in these waters is a metallic Treasure Chest that holds five Ice Arrows.
A land Bridge from the nearby tower continues to an empty ledge overlooking another tower. The stone Treasure Chest atop the roof of this tower holds five Shock Arrows. The wall north of this tower holds a giant stone slab which can be moved by using Stasis in conjunction with a Weapon. Underneath this slab is a stone Treasure Chest containing a Silver Rupee. In the vacant space created by this wall sits a sixth cracked boulder, which holds a stone Treasure Chest with a Gold Rupee. The southern extension of the tower's wall leads into a cliff, where another walled tower stands at the top. The stone Chest on this tower's roof contains five Fire Arrows. The wall from this tower leads up a rock ledge, the path of which meets with the road near the Dining Hall.
Astral Observatory
The Astral Observatory is the location of Link's battle against Calamity Ganon. The pair of them fall down into it from the floor of the Throne Room after Calamity Ganon escapes from his Cocoon.
Dining Hall
The Dining Hall is a long room within Hyrule Castle.
Docks
The Docks are located at the rear of Hyrule Castle. They serve as one of the potential entrances into the Castle.
First Gatehouse
The First Gatehouse is a building that Link must pass through on his way to the Sanctum.
Guards' Chamber
The Guards' Chamber is a large room inside Hyrule Castle.
Hyrule Castle Corridors
The Hyrule Castle Corridors connect the interior rooms of Hyrule Castle.
Hyrule Castle Courtyard
The Hyrule Castle Courtyard makes up most of the exterior of Hyrule Castle. It is enclosed by walls on all sides.
Hyrule Castle Gate
The Hyrule Castle Gate is the entrance to Hyrule Castle from the Hyrule Castle Town Ruins.
Hyrule Castle Underground
The Hyrule Castle Underground consists of three separate locations: the East Passage, Lockup, and the West Passage. It also houses the two Sub-Bosses found in Hyrule Castle.
East Passage
The East Passage is an abandoned tunnel located underneath Hyrule Castle. A Stone Talus (Rare) can be found within this cave.[11]
Lockup
Lockup is located in the northwest corner of Hyrule Castle. In the back room, Link can encounter a Stalnox.[12]
West Passage
The West Passage is another abandoned tunnel. Unlike the East Passage, it has been divided into two parts, connected by a Mine Cart rail.
King's Study
The King's Study is a secret room in the Library of Hyrule Castle. Inside, Link can read King Rhoam's Journal.
Library
The Library is a multi-level room on the east side of Hyrule Castle. In here, Link can find the Castle Library Book.
Observation Room
The Observation Room is a part of Hyrule Castle that overlooks the Hyrule Castle Town Ruins. It is initially inaccessible, though it can be reached by defeating the Glowing Eyeball in the Reception Room.
Princess Zelda's Room
Princess Zelda’s Room is a ruined room that has been left in disarray. They were previously the quarters of Princess Zelda. Link can find Zelda's Diary on her desk inside.
Princess Zelda's Study
Princess Zelda’s Study is a tower connected to Princess Zelda’s Room by a Bridge. Zelda's Research Notes can be read here.
Reception Room
The Reception Room is a central room in Hyrule Castle.
Round Spiral Staircase
The Round Spiral Staircase is a circular staircase that connects the interior of Hyrule Castle to its garden.
Sanctum
The Sanctum is the highest part of the Hyrule Castle. It is made up of four separate levels.
Bell Tower
The Bell Tower is located on the highest floor of the Sanctum
Champions' Hall
The Champions' Hall is the second floor of the Sanctum. The top of Ganon's Cocoon can be seen here.
Sanctum Observation Room
The Sanctum Observation Room makes up the third floor of the Sanctum.
Throne Room
The Throne Room is the first level of the Sanctum. On Link's Map, it is marked as the location of Calamity Ganon. By entering the Throne Room, Link's battle against Calamity Ganon will begin.
Second Gatehouse
The Second Gatehouse is a building that Link must pass through on the way to the Sanctum.
Square Spiral Staircase
The Square Spiral Staircase connects two different levels of the Hyrule Castle Corridors. It also houses several Weapons.
Water Pump Room
The Water Pump Room supplied Water throughout Hyrule Castle.[13] It connects the Hyrule Castle Underground to the rest of the Castle's interior.
Nomenclature
| Language | Name | Meaning | |
|---|---|---|---|
| Japanese | ハイラル城 | Hyrule Castle | |
| ChineseSI | 海拉鲁城堡 | ||
| ChineseTR | 海拉魯城堡 | ||
| Dutch | Kasteel Hyrule | ||
| FrenchCA | Château d'Hyrule | ||
| FrenchEU | Château d'Hyrule | ||
| German | Schloss Hyrule | ||
| Italian | Castello di Hyrule | ||
| Korean | 하이랄 성 | ||
| Russian | Замок Хайрул | ||
| SpanishEU | Castillo de Hyrule[14] | Same as English. | |
| SpanishLA | Castillo de Hyrule[15] | Same as English. | |
| This table was generated using translation pages. | |||
Gallery
-
 One of the Koroks found at Hyrule Castle
See Also
Notes
References
- ↑ "Hyrule Castle was the governing center of Hyrule, home to the king and the beautiful princess. Brave souls from nearby villages would all set their sights there, do great deeds, and return home draped in glory. Hyrule Castle, once strong and proud, was corrupted by the Calamity...and it's still in that state today." — Uma (Breath of the Wild)
- ↑ "I was King Rhoam Bosphoramus Hyrule. I was...the last leader of Hyrule. A kingdom which no longer exists." — Old Man (Breath of the Wild)
- ↑ "Remember... Try... Try to remember... You have been asleep for the past 100 years. The beast... When the beast regains its true power, this world will face its end. Now then... You must hurry, Link. Before it's too late..." — Princess Zelda (Breath of the Wild)
- ↑ "The words of guidance you have been hearing since your awakening are from Princess Zelda herself. Even now, as she works to restrain Ganon from within Hyrule Castle, she calls out for your help." — King Rhoam (Breath of the Wild)
- ↑ "He was imprisoned beneath Hyrule Castle for ages, but the magic holding him weakened when the castle was damaged during the calamity a century ago, and his power has steadily been growing since. Now he has revived as a threat beyond the knowledge of any." — Character Profiles (Tears of the Kingdom)
- ↑ "Deep beneath this land, our mighty first ruler imprisoned the Demon King. To ensure the king's magic would hold, we erected a castle here to protect this sacred site. Without the castle in place, the site may be disturbed, allowing the Demon King's hatred and rage to be revived. The preservation of this castle is therfore tied to the prosperity of the kingdom." — Gloom's Approach (Tears of the Kingdom)
- ↑ "Robbie has restored mobility to many of the Guardians we've excavated. ...But we have still yet to find all of the Guardians. Records mention a greater number of them—and even other types. They are said to be stored in five giant columns that rest beneath Hyrule Castle. The thing is... No matter how I search beneath the castle, I can't seem to locate these columns. They must be buried deep. Were they perhaps designed to sense the appearance of Calamity Ganon and to only activate upon his return?" — Zelda's Research Notes (Breath of the Wild)
- ↑ "Ganon was cunning, and he responded with a plan beyond our imagining. He appeared from deep below Hyrule Castle, seized control of the Guardians and the Divine Beasts, and turned them against us." — King Rhoam (Breath of the Wild)
- ↑ Creating a Champion, Dark Horse Books, pg. 240
- ↑ 10.0 10.1 10.2 "Yahaha! You found me!" — Korok (Breath of the Wild)
- ↑ "Hyrule Castle Underground
Stone Talus" — N/A (Breath of the Wild) - ↑ "Hyrule Castle Underground
Stalnox" — N/A (Breath of the Wild) - ↑ Creating a Champion, Dark Horse Books, pg. 240
- ↑ "Castillo de Hyrule" — Map (Breath of the Wild)
- ↑ "Castillo de Hyrule" — Map (Breath of the Wild)
Dungeons in The Legend of Zelda series
Parapa Palace · Midoro Palace · Island Palace · Maze Island Palace
Palace on the Sea · Three-Eye Rock Palace ![]() · Great Palace
· Great Palace ![]()
Light World
Sewer Passageway · Eastern Palace · Desert Palace · Tower of Hera · Hyrule Castle Tower ![]()
Dark World
Palace of Darkness · Swamp Palace · Skull Woods · Thieves' Town (Dungeon) · Ice Palace · Misery Mire (Dungeon) · Turtle Rock · Ganon's Tower ![]()
Palace of the Four Sword![]()
Main Dungeons
Tail Cave · Bottle Grotto · Key Cavern · Angler's Tunnel · Catfish's Maw · Face Shrine · Eagle's Tower · Turtle Rock · Wind Fish's Egg ![]()
Mini-Dungeons
Moblin Cave · Kanalet Castle · Ancient Ruins
Optional Dungeons
Color Dungeon (LADX | LANS) · Chamber Dungeon (LANS)
Child Dungeons
Inside the Deku Tree · Dodongo's Cavern · Inside Jabu-Jabu's Belly
Adult Dungeons'
Forest Temple · Fire Temple · Water Temple · Shadow Temple · Spirit Temple · Ganon's Castle ![]()
Mini-Dungeons
Main Dungeons
Woodfall Temple · Snowhead Temple · Great Bay Temple · Stone Tower Temple
Mini-Dungeons
Swamp Spider House · Pirates' Fortress · Oceanside Spider House · Beneath the Well · Ancient Castle of Ikana
Moon Dungeons ![]()
Main Dungeons
Spirit's Grave · Wing Dungeon · Moonlit Grotto · Skull Dungeon · Crown Dungeon · Mermaid's Cave · Jabu-Jabu's Belly · Ancient Tomb · Black Tower (Turret) ![]() · Room of Rites(OoS | OoA)
· Room of Rites(OoS | OoA)
Mini-Dungeons
Maku Road · Great Moblin's Keep · Ambi's Palace · Black Tower (Rescue Zelda) ![]() · Hero's Cave
· Hero's Cave![]()
Main Dungeons
Gnarled Root Dungeon · Snake's Remains · Poison Moth's Lair · Dancing Dragon Dungeon · Unicorn's Cave · Ancient Ruins · Explorer's Crypt · Sword & Shield Maze · Onox's Castle ![]() · Room of Rites(OoS | OoA)
· Room of Rites(OoS | OoA)
Mini-Dungeons
Chambers of Insight · Sea of Trees · Talus Cave · Death Mountain · Vaati's Palace ![]()
Anniversary Edition
Main Dungeons
Forsaken Fortress · Dragon Roost Cavern · Forbidden Woods · Tower of the Gods
Earth Temple · Wind Temple · Ganon's Tower
Mini-Dungeons
Whereabouts of the Wind — Lake Hylia · Cave of No Return · Hyrule Castle
Eastern Hyrule — The Coast · Village of the Blue Maiden · Eastern Temple
Death Mountain — Death Mountain Foothills · The Mountain Path · Tower of Flames
Near the Fields — The Field · The Swamp · Infiltration of Hyrule Castle
The Dark World — Lost Woods · Kakariko Village (Four Swords Adventures) · Temple of Darkness
Desert of Doubt — Desert of Doubt · Desert Temple · Pyramid
Frozen Hyrule — Frozen Hyrule · Temple of Ice · Tower of Winds
Realm of the Heavens — Realm of the Heavens · The Dark Cloud · Palace of Winds
Main Dungeons
Deepwood Shrine ![]() · Cave of Flames · Fortress of Winds · Temple of Droplets
· Cave of Flames · Fortress of Winds · Temple of Droplets ![]() · Palace of Winds · Dark Hyrule Castle
· Palace of Winds · Dark Hyrule Castle ![]()
Mini-Dungeons
Main Dungeons
Forest Temple · Goron Mines · Lakebed Temple · Arbiter's Grounds ![]() · Snowpeak Ruins
· Snowpeak Ruins
Temple of Time · City in the Sky · Palace of Twilight ![]() · Hyrule Castle
· Hyrule Castle
Mini-Dungeons
Lantern Caverns · Cave of Ordeals · Cave of Shadows (TPHD)
Dungeons
Temple of Fire · Temple of Wind · Temple of Courage · Ghost Ship · Goron Temple · Temple of Ice · Mutoh's Temple
Master Dungeon
Dungeons
Forest Temple · Snow Temple · Ocean Temple · Fire Temple · Sand Temple
Master Dungeon
Mini-Dungeon
Lost at Sea Station · Tunnel to the Tower · Take 'Em All On!![]()
Main Dungeons
Skyview Temple · Earth Temple · Lanayru Mining Facility · Ancient Cistern · Sandship · Fire Sanctuary · Sky Keep
Mini-Dungeons
Hyrule
Eastern Palace · Tower of Hera · House of Gales · Inside Hyrule Castle ![]()
Desert Palace ![]()
Lorule
Ice Ruins · Swamp Palace · Thieves' Hideout · Dark Palace
Skull Woods · Turtle Rock · Lorule Castle ![]()
Woodlands — Deku Forest (Level) · Buzz Blob Cave · Moblin Base · Forest Temple
Riverside — Secret Fortress · Abyss of Agony · Cove of Transition · Water Temple
Volcano — Blazing Trail · Hinox Mine · Den of Flames · Fire Temple
Ice Cavern — Frozen Plateau · Snowball Ravine · Silver Shrine · Ice Temple
Fortress — Sealed Gateway · Bomb Storage · Training Ground · The Lady's Lair
The Dunes — Infinity Dunes · Stone Corridors · Gibdo Mausoleum · Desert Temple
The Ruins — Illusory Mansion · Palace Noir · Lone Labyrinth · Grim Temple
Sky Realm — Floating Garden · Deception Castle · Dragon Citadel · Sky Temple
Forest Zone · Flooded Zone · Scorching Zone · Frozen Zone · Fortified Zone · Desert Zone · Shadow Zone · Baneful Zone
Main Dungeons
Divine Beast Vah Ruta · Divine Beast Vah Rudania · Divine Beast Vah Medoh · Divine Beast Vah Naboris · Hyrule Castle · Final Trial![]() (TCB)
(TCB)
Mini-Dungeons
Trial of the Sword (TMT ) · Yiga Clan Hideout
Ancient Shrines
Akh Va'quot ·
Bosh Kala ·
Chaas Qeta ·
Daag Chokah ·
Dagah Keek ·
Dah Kaso ·
Dah Hesho ·
Daka Tuss ·
Dako Tah ·
Daqa Koh ·
Daqo Chisay ·
Dila Maag ·
Dow Na'eh ·
Dunba Taag ·
Gee Ha'rah ·
Gorae Torr ·
Ha Dahamar ·
Hawa Koth ·
Hia Miu ·
Hila Rao ·
Ishto Soh ·
Ja Baij ·
Jee Noh ·
Jitan Sa'mi ·
Joloo Nah ·
Ka'o Makagh ·
Kaam Ya'tak ·
Kah Mael Shrine ·
Kah Okeo Shrine ·
Kah Yah Shrine ·
Kam Urog Shrine ·
Katah Chuki ·
Katosa Aug ·
Kay Noh ·
Kaya Wan ·
Kayra Mah ·
Ke'nai Shakah ·
Keeha Yoog ·
Keh Namut ·
Kema Kosassa ·
Kema Zoos ·
Keo Ruug ·
Ketoh Wawai ·
Korgu Chideh ·
Korsh O'hu ·
Kuh Takkar ·
Kuhn Sidajj ·
Lakna Rokee ·
Lanno Kooh ·
Maag Halan ·
Maag No'rah ·
Maka Rah ·
Mezza Lo ·
Mijah Rokee ·
Mirro Shaz ·
Misae Suma ·
Mo'a Keet ·
Mogg Latan ·
Monya Toma ·
Mozo Shenno ·
Muwo Jeem ·
Myahm Agana ·
Namika Ozz ·
Ne'ez Yohma ·
Noya Neha ·
Oman Au ·
Owa Daim ·
Pumaag Nitae ·
Qua Raym ·
Qaza Tokki ·
Qukah Nata ·
Raqa Zunzo ·
Ree Dahee ·
Rin Oyaa ·
Ritaag Zumo ·
Rok Uwog ·
Rona Kachta ·
Rota Ooh ·
Rucco Maag ·
Saas Ko'sah ·
Sah Dahaj ·
Sasa Kai ·
Sha Gehma ·
Sha Warvo ·
Shada Naw ·
Shae Katha ·
Shae Loya ·
Shae Mo'sah ·
Shai Utoh ·
Shai Yota ·
Shee Vaneer ·
Shee Venath ·
Sheem Dagoze ·
Sheh Rata ·
Sho Dantu ·
Shoda Sah ·
Shoqa Tatone ·
Shora Hah ·
Soh Kofi ·
Suma Sahma ·
Ta'loh Naeg ·
Tah Muhl ·
Tahno O'ah ·
Tawa Jinn ·
Tena Ko'sah ·
Tho Kayu ·
To Quomo ·
Toh Yahsa ·
Toto Sah ·
Tu Ka'loh ·
Tutsuwa Nima ·
Voo Lota ·
Wahgo Katta ·
Ya Naga ·
Yah Rin ·
Zalta Wa ·
Ze Kahso ·
Zuna Kai
Ancient Shrines (TCB)
Etsu Korima · Kamia Omuna · Kee Dafunia · Keive Tala · Kiah Toza · Kihiro Moh · Mah Eliya · Noe Rajee · Rinu Honika · Rohta Chigah · Ruvo Korbah · Sato Koda · Sharo Lun · Shira Gomar · Takama Shiri · Yowaka Ita
Main Dungeons
Wind Temple · Fire Temple · Water Temple · Lightning Temple · Hyrule Castle · Construct Factory · Gloom's Lair
Mini-Dungeons
Main Dungeons
Suthorn Ruins · Jabul Ruins · Gerudo Sanctum · Hyrule Castle · Eldin Temple · Faron Temple · Lanayru Temple · Null's Body
Mini-Dungeons
Eastern Temple · Cryptic Cavern · Wrecked Ship · Hidden Ruins · Ancient Ruins
Level 1 — Ordon Target Practice · Gerudo Stalfos: Defender · Arbiter's Grounds: Ranger
Level 2 — Goron Target Practice · Zora River: Defender · Skull Shooting
Level 3 — Kakariko Target Practice · Fruit Balloons · The Great Bridge: Defender
Level 4 — Zora River Target Practice · Hyrule Castle: Defender · Skulltula Forest: Ranger
Level 5 — Oocca Target Practice · Gerudo Moldorm: Defender · The Shootout
Level 6 — Ordon Target Practice 2 · Bridge of Eldin: Defender · Snowpeak Ruins: Ranger
Level 7 — Underground Target Practice · City in the Sky: Defender · Temple of Time: Ranger
Level 8 — Horseback Target Practice · Snowpeak Ruins: Defender · Darknut Battle
Finale — Ranch Target Practice · Sacred Grove: Defender · Fossil Stallord Battle