Weak for Life?! (乱馬 再起不能!?, Ranma saiki funo!??) is the 127th chapter of the Ranma ½ manga and the third chapter of the Ultimate Weakness Moxibustion Arc.
Summary
Mousse goes to tell Shampoo that he has defeated Ranma, but Cologne tells him that Shampoo has gone back to China for a visit. Cologne learns that the rumors of Ranma's weakness are true. At home, Kasumi is burning trash, and Happosai tosses the moxibustion chart into the fire.
Plot Overview

Having decided that he's finally defeated Ranma Saotome, Mousse runs back to the Cat Café in order to tell Shampoo the news. However, after Mousse has declared his victory to her, Cologne explains that Shampoo's gone back to China for a visit. Mousse then puts his glasses back on, but still mistakes Cologne for a mummified monkey. Once Cologne punishes Mousse for the insult, she looks at the Happy Gram she received and notes that it appears the news about Ranma being weak is true.
Meanwhile, Akane, Ranma and Ukyo have headed out to rural Japan and into a local temple where they ask the Priest if he has the chart for the cure of Ultimate Weakness Moxibustion. The Priest is shocked to her the name of the "Ultimate Weakness Moxibustion" and screams in terror. After Akane repeats the question to the Priest again, this time making sure not to mention the technique by name again, Ranma begins getting excited as he believes the chart must be at this temple. However, Ranma notices the Priest's fallen asleep, so he ends up forcing him awake.
The Priest wakes suddenly, declaring that the chart is no longer here as 100 years ago a thief broke into the temple and stole it. As Ranma begins to lose hope, the Priest tells him there's still a chance and hands him a piece of paper which he claims has a clue to the chart's location. Unfortunately, the Priest soon realises he's given them the wrong piece of paper as the trio start reading out loud a love letter which the Priest has received.
Ranma begins to tire of all these antics, but the Priest then hands him the correct piece of paper, this one being a wanted poster of the thief with his portrait attached. The longer the trio look at the poster the more the thief's portrait reminds them of Happosai. Ranma then happily declares that all he needs to do is take it away from the old lecher then he can be strong again, as Akane wonders why everything isn't this easy.
Some time later at the Tendo Dojo, Kasumi is busily burning some garbage and tells Happosai that if he has any trash he can burn it with the rest of the pile. As Happosai rummages through his many belongings, he finds the Moxibustion chart, but can't remember what it is, so decides he must not need it and after folding it into a paper plane throws it towards the fire.

Luckily, just before the chart lands, Ranma returns and grabs it midair, however, Happosai quickly moves in and overpowers takes the chart back. Happosai continues by declaring that he now remembers about the chart and tells Ranma that if he wants it he should take it if he can. Doggedly determined, Ranma retorts to the old lecher that he'll use every bit of strength he has left to get the chart, prompting Happosai to declare he'll use all his strength as well. As Happosai begins charging his Battle Aura, Akane and Ukyo look on and comment on how unfair Happosai's being using all his strength against the weakened Ranma.
The initial flurry swiftly ends in Ranma's defeat, but he refuses to give up and changes into his female form. Ranma then quickly dresses into a revealing sport outfit with the hope of luring Happosai in so that she can hit him with a mallet. However, Ranma's so weak she can't even move the mallet, giving Happosai free rein to grope her before throwing Ranma into a wall when she tries to fight back.
As Ranma lies on the ground, Happosai tells the "Once-Great Ranma" that all he has left is his girlish charms. Happosai continues by telling Ranma he's too weak to fend off his hot little hands, let alone the Moxibustion chart. The old lecher then takes his leave, with the chart in hand, and tells Ranma to enjoy his life as a weakling.
Seeing how depressed Ranma is, Akane tries to cheer him up with a playful slap on the back, however, this ends up sending Ranma flying into a nearby garden monument. As Ranma skulks away, Akane demands he snap out of it, but Ranma solemnly replies that he doesn't want her pity, leaving everyone in a stunned silence. That evening, Akane thinks to herself what a jerk Ranma is, before deciding that he can stay weak for all she cares.
The next morning, Kasumi rushes downstairs and worryingly exclaims that Ranma and Genma have gone. When they go to the pair's room, Kasumi and Soun decide the Saotomes must've packed up and slipped out last night. At that moment, Akane walks in and shocked at the scene, whilst Nabiki notes it must have been too awkward for them too stay. As Kasumi and Nabiki try to comfort the sobbing Soun, Akane turns around and declares that Ranma wouldn't run away after being beaten.
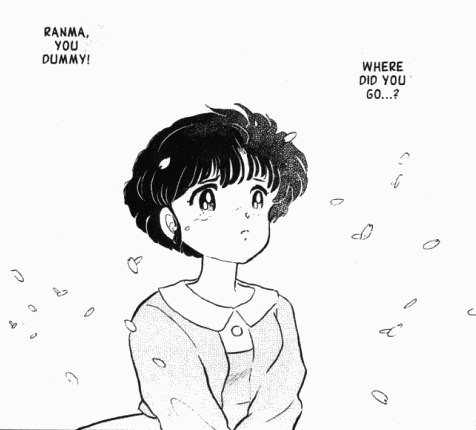
As Akane walks to school, she thinks about what a jerk Ranma is. She then tries to pretend she isn't worried about him, but can't stop herself wondering where he went.
Characters in Order of Appearance
- Mousse
- Cologne
- Shampoo (mentioned)
- Moxibustion Priest
- Akane Tendo
- Ranma Saotome
- Ukyo Kuonji
- Kasumi Tendo
- Happosai
- Soun Tendo
- Genma Saotome (mentioned)
- Nabiki Tendo
Quotes
- Ranma, you dummy! Where did you go...? - Akane wondering where Ranma went.
Trivia
- The face the Moxibustion Priest priest when Akane, Ranma and Ukyo go to ask him about the Moxibustion chart is a reference to the Edvard Munch painting, The Scream.
See Also
| Chapters | ||||||||||||||||||||
|---|---|---|---|---|---|---|---|---|---|---|---|---|---|---|---|---|---|---|---|---|
| Volume 1 | Volume 1 | 1 • 2 • 3 • 4 • 5 • 6 • 7 • 8 | ||||||||||||||||||
| Volume 2 | 9 • 10 • 11 • 12 • 13 • 14 • 15 • 16 • 17 | |||||||||||||||||||
| Volume 2 | Volume 3 | 18 • 19 • 20 • 21 • 22 • 23 • 24 • 25 • 26 | ||||||||||||||||||
| Volume 4 | 27 • 28 • 29 • 30 • 31 • 32 • 33 • 34 • 35 • 36 | |||||||||||||||||||
| Volume 3 | Volume 5 | 37 • 38 • 39 • 40 • 41 • 42 • 43 • 44 • 45 • 46 • 47 | ||||||||||||||||||
| Volume 6 | 48 • 49 • 50 • 51 • 52 • 53 • 54 • 55 • 56 • 57 • 58 | |||||||||||||||||||
| Volume 4 | Volume 7 | 59 • 60 • 61 • 62 • 63 • 64 • 65 • 66 • 67 • 68 • 69 | ||||||||||||||||||
| Volume 8 | 70 • 71 • 72 • 73 • 74 • 75 • 76 • 77 • 78 • 79 • 80 | |||||||||||||||||||
| Volume 5 | Volume 9 | 81 • 82 • 83 • 84 • 85 • 86 • 87 • 88 • 89 • 90 • 91 | ||||||||||||||||||
| Volume 10 | 92 • 93 • 94 • 95 • 96 • 97 • 98 • 99 • 100 • 101 • 102 | |||||||||||||||||||
| Volume 6 | Volume 11 | 103 • 104 • 105 • 106 • 107 • 108 • 109 • 110 • 111 • 112 • 113 | ||||||||||||||||||
| Volume 12 | 114 • 115 • 116 • 117 • 118 • 119 • 120 • 121 • 122 • 123 • 124 | |||||||||||||||||||
| Volume 7 | Volume 13 | 125 • 126 • 127 • 128 • 129 • 130 • 131 • 132 • 133 • 134 • 135 | ||||||||||||||||||
| Volume 14 | 136 • 137 • 138 • 139 • 140 • 141 • 142 • 143 • 144 • 145 • 146 | |||||||||||||||||||
| Volume 8 | Volume 15 | 147 • 148 • 149 • 150 • 151 • 152 • 153 • 154 • 155 • 156 • 157 | ||||||||||||||||||
| Volume 16 | 158 • 159 • 160 • 161 • 162 • 163 • 164 • 165 • 166 • 167 • 168 | |||||||||||||||||||
| Volume 9 | Volume 17 | 169 • 170 • 171 • 172 • 173 • 174 • 175 • 176 • 177 • 178 • 179 | ||||||||||||||||||
| Volume 18 | 180 • 181 • 182 • 183 • 184 • 185 • 186 • 187 • 188 • 189 • 190 | |||||||||||||||||||
| Volume 10 | Volume 19 | 191 • 192 • 193 • 194 • 195 • 196 • 197 • 198 • 199 • 200 • 201 | ||||||||||||||||||
| Volume 20 | 202 • 203 • 204 • 205 • 206 • 207 • 208 • 209 • 210 • 211 • 212 | |||||||||||||||||||
| Volume 11 | Volume 21 | 213 • 214 • 215 • 216 • 217 • 218 • 219 • 220 • 211 • 222 • 223 | ||||||||||||||||||
| Volume 22 | 224 • 225 • 226 • 226 • 228 • 229 • 230 • 231 • 232 • 233 • 234 | |||||||||||||||||||
| Volume 12 | Volume 23 | 235 • 236 • 237 • 238 • 239 • 240 • 241 • 242 • 243 • 244 • 245 | ||||||||||||||||||
| Volume 24 | 246 • 247 • 248 • 249 • 250 • 251 • 252 • 253 • 254 • 255 • 256 | |||||||||||||||||||
| Volume 13 | Volume 25 | 257 • 258 • 259 • 260 • 261 • 262 • 263 • 264 • 265 • 266 • 267 | ||||||||||||||||||
| Volume 26 | 268 • 269 • 270 • 271 • 272 • 273 • 274 • 275 • 276 • 277 • 278 | |||||||||||||||||||
| Volume 14 | Volume 27 | 279 • 280 • 281 • 282 • 283 • 284 • 285 • 286 • 287 • 288 • 289 | ||||||||||||||||||
| Volume 28 | 290 • 291 • 292 • 293 • 294 • 295 • 296 • 297 • 298 • 299 • 300 | |||||||||||||||||||
| Volume 15 | Volume 29 | 301 • 302 • 303 • 304 • 305 • 306 • 307 • 308 • 309 • 310 • 311 | ||||||||||||||||||
| Volume 20 | 312 • 313 • 314 • 315 • 316 • 317 • 318 • 319 • 320 • 321 • 322 | |||||||||||||||||||
| Volume 16 | Volume 31 | 323 • 324 • 325 • 326 • 327 • 328 • 329 • 330 • 331 • 332 • 333 | ||||||||||||||||||
| Volume 32 | 334 • 335 • 336 • 337 • 338 • 339 • 340 • 341 • 342 • 343 • 344 | |||||||||||||||||||
| Volume 17 | Volume 33 | 345 • 346 • 347 • 348 • 349 • 350 • 351 • 352 • 353 • 354 • 355 | ||||||||||||||||||
| Volume 34 | 356 • 357 • 358 • 359 • 360 • 361 • 362 • 363 • 364 • 365 • 366 | |||||||||||||||||||
| Volume 18 | Volume 35 | 367 • 368 • 369 • 370 • 371 • 372 • 373 • 374 • 375 • 376 • 377 | ||||||||||||||||||
| Volume 36 | 378 • 379 • 380 • 381 • 382 • 383 • 384 • 385 • 386 • 387 • 388 | |||||||||||||||||||
| Volume 19 | Volume 37 | 389 • 390 • 391 • 392 • 393 • 394 • 395 • 396 • 397 • 398 | ||||||||||||||||||
| Volume 38 | 399 • 400 • 401 • 402 • 403 • 404 • 405 • 406 • 407 | |||||||||||||||||||