| M.S. Solar • Rhombus Square • Rhombus Dungeon |
| Rookie Harbor • Autumn's Rise • Autumn's Fall |
| Bergen Trail • Bergen Village • Temple Mine |
| Maroon Valley • Ba'kii Kum • Faj'ro Temple |
| Gaia's Garden • Basin Keep • So'najiz Temple • Zir'vitar Temple • Grand Krys'kajo |
| Sapphire Ridge • Old Hideout |
| Vermillion Wasteland • Vermillion Dungeon • Vermillion Tower |
| Homestedt • Azure Archipelago • Ku'lero Temple |
Rhombus Square is a location in CrossWorlds. It is the capital of Shadoon; a large city of tall glass skyscrapers located on an island off the coast of the Croissant. The main city is only accessible to experienced players who have progressed along the Track of the Ancients to collect the four elements and complete the Trials of the Golden Bugs quest. Until then, it is only possible to visit the tutorial region, Newcomer's Bridge, and the teleportation hub, Cross Central. An additional pass is also needed to access the entire city.
| Rhombus Square |
|---|
|
Rhombus Square is the biggest city and capital of the human settlements on Shadoon. It is located in the sea near Rookie Harbor and constructed entirely out of glass and advanced metal alloys. In order for a Seeker to gain access to the city, he must first collect all elements on the Track of the Ancients. |
| -Encyclopedia entry |
Layout
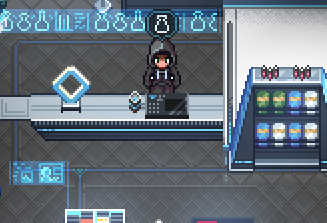
Newcomer's Bridge is a long stretch of buildings with an elevated walkway, located east of the main city. Individual stretches of the bridge are only connected by sections of the Rhombus Dungeon. CrossCentral is a large building containing a teleport hub, from which anywhere in the playground can be accessed. CrossCentral is connected to Newcomer's Bridge via sky rails, a virtual elevated transport system.
| Newcomer's Bridge |
|---|
|
The Newcomer's Bridge is located in the skyline of Rhombus Square and serves as the basic training for new Seekers. Located near the end of the bridge is the Rhombus Dungeon where the new recruits face their final test before taking the skyrails to Cross Central and leaving for the mainland. |
| -Encyclopedia entry |
| Cross Central |
|---|
|
Cross Central is the primary teleportation HUB for the human civilization on Shadoon. It is located on a large tower in the middle of Rhombus Square and offers instant teleportation to all human settlements. New Seekers who just completed the training on Newcomer's Bridge first enter Cross Central to teleport to Rookie Harbor and thus enter the main continent and start the Track of the Ancients. |
| -Encyclopedia entry |
The main city has several large, connected areas, and is not accessible until after obtaining the ![]() Meteor Shade. Of particular note are a shopping district in the east and the Arena in the west. The Vestorovich Manor is not immediately unlocked, and is only opened during the good ending storyline. Full access to the rest of the city is obtained at the beginning of Chapter 11, once Sergey gives the Full Rhombus Pass to Lea.
Meteor Shade. Of particular note are a shopping district in the east and the Arena in the west. The Vestorovich Manor is not immediately unlocked, and is only opened during the good ending storyline. Full access to the rest of the city is obtained at the beginning of Chapter 11, once Sergey gives the Full Rhombus Pass to Lea.
Connecting regions
- Rhombus Dungeon via Newcomer's Bridge and Newcomer's Bridge End
- Rookie Harbor via teleport from Cross Central
- Bergen Village via teleport from Cross Central; unlock from Ye old Inn teleporter
- Ba'kii Kum via teleport from Cross Central; unlock from Plaza teleporter
- Basin Keep via teleport from Cross Central; unlock from Rainy City Square teleporter
- Sapphire Ridge via teleport from Cross Central; unlock from The Cave Inn teleporter
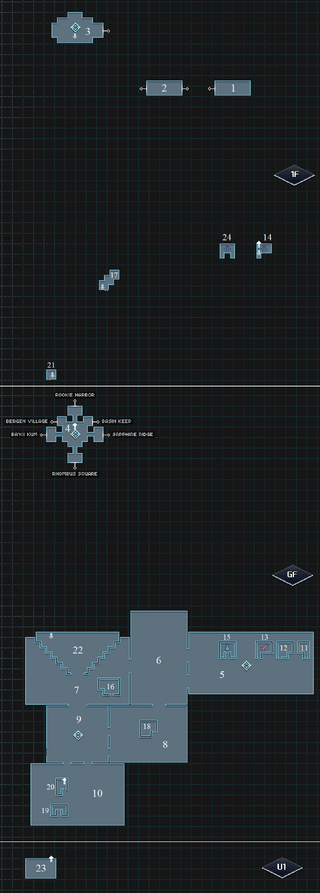
Map
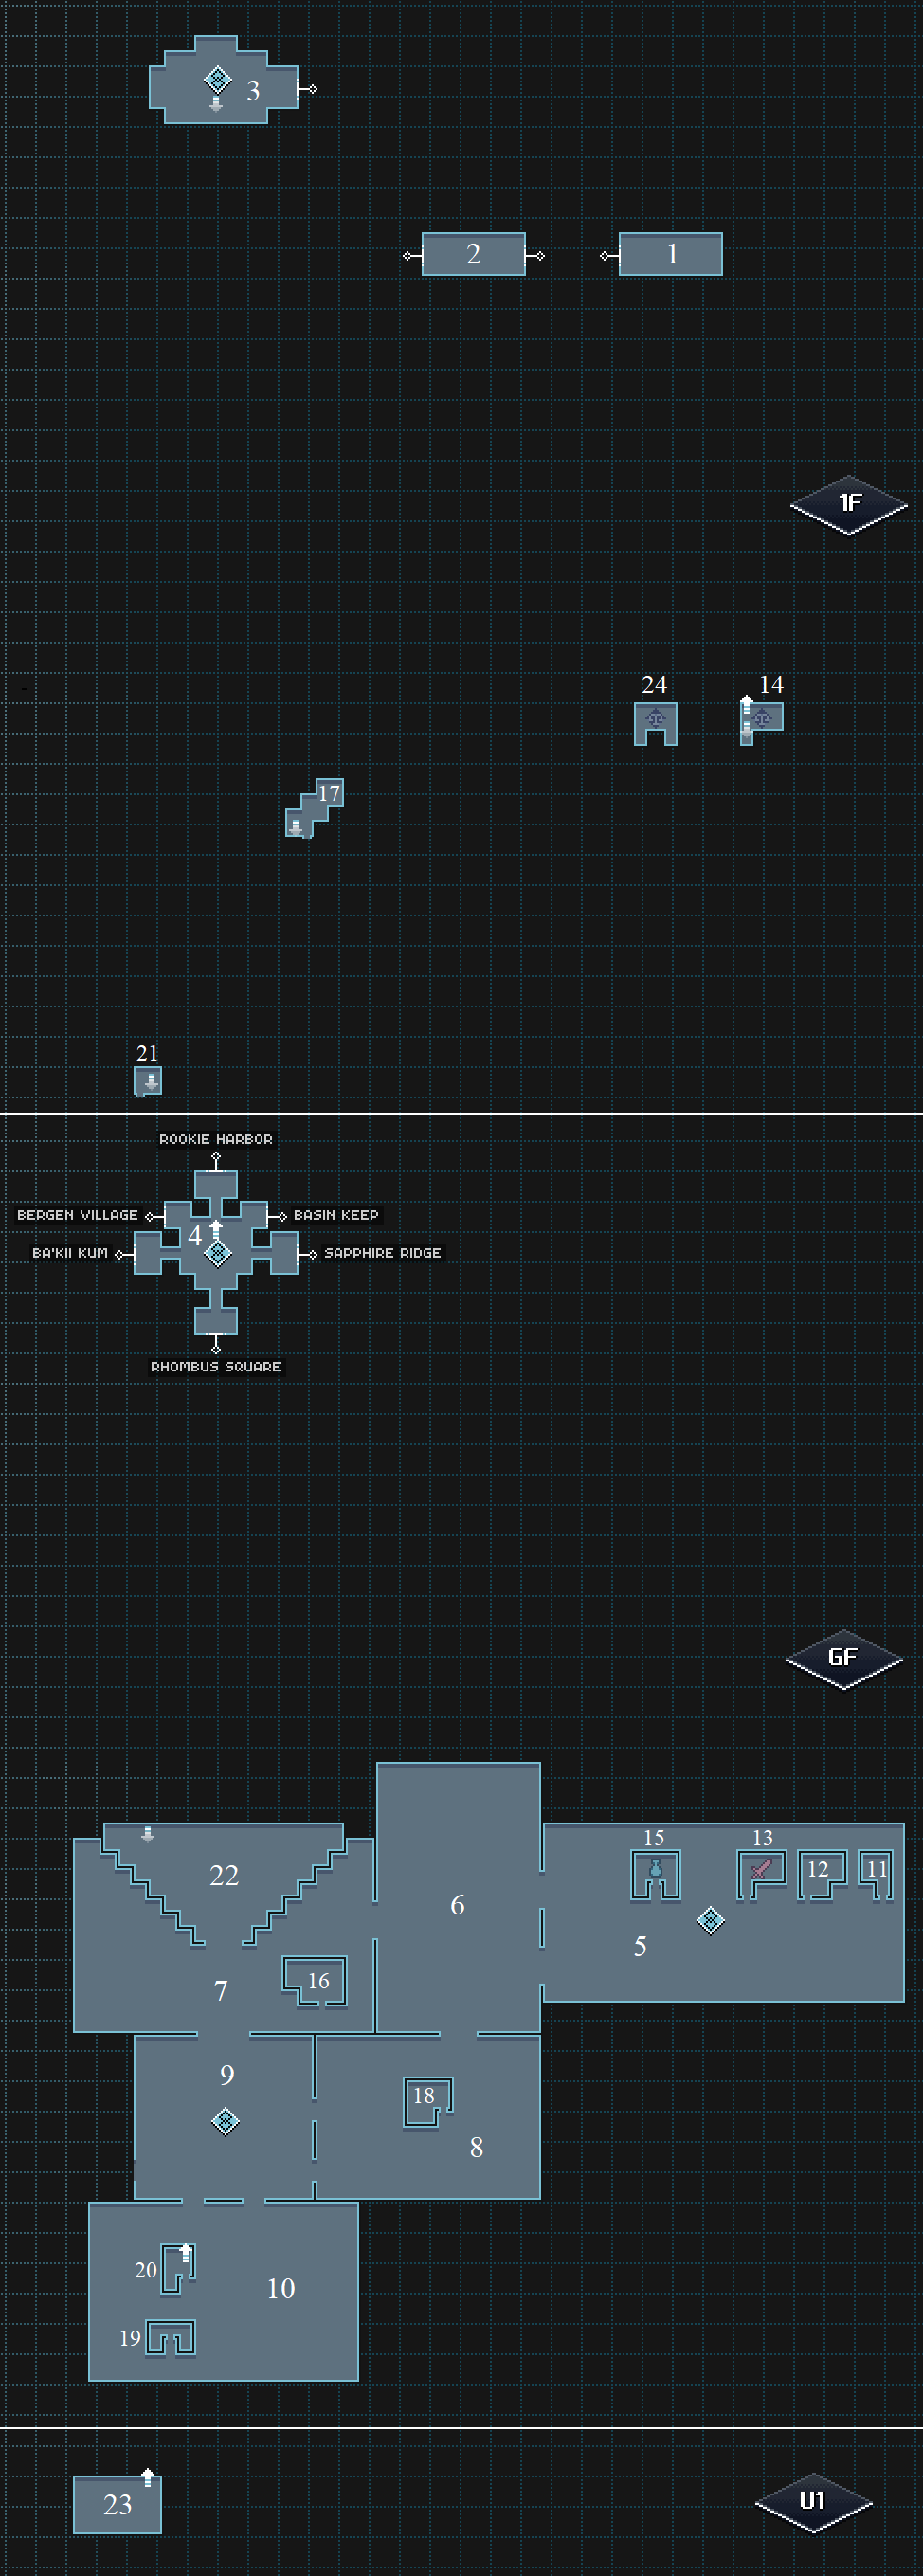
| # | Area Name | Floor |
|---|---|---|
| 1 | Newcomer's Bridge | 1F |
| 2 | Newcomer's Bridge End | 1F |
| 3 | CrossCentral Balcony
Landmark: Cross Central Balcony |
1F |
| 4 | Cross Central
Landmark: Cross Central |
GF |
| 5 | Shopping District
Landmark: Shopping District |
GF |
| 6 | Garden Boulevard | GF |
| 7 | Arena Plaza | GF |
| 8 | Lloyd Passage | GF |
| 9 | South Arch
Landmark: South Arch |
GF |
| 10 | Residential District | GF |
| 11 | Curios Trinkets | GF |
| 12 | Boost Lounge | GF |
| 13 | Gear Store GF | GF |
| 14 | Gear Store 1F | 1F |
| 15 | Buy Land GF | GF |
| 16 | Arena Cafe | GF |
| 17 | Arena Cafe 2nd Floor | 1F |
| 18 | Books 'n Worms | GF |
| 19 | Vesterovich Mansion | GF |
| 20 | Old Smith GF | GF |
| 21 | Old Smith 1F | 1F |
| 22 | Arena Lobby | GF |
| 23 | Training Arena | U1 |
| 24 | Buy Land F1 | 1F |
Treasures
Rhombus Square has 8 chests in total, none of which can be reached before the full city is unlocked at the end of the game.
| Acc. | Type | Contains | Location | Info |
|---|---|---|---|---|
| 1 | 2 × |
Garden Boulevard | Jump on top of the cars and cross the street to reach this | |
| 2 | 2 × |
Garden Boulevard | Walk from the south at the edge of the street to reach this | |
| 3 | 2 × |
Arena Plaza | From the Arena Cafe 2nd floor make your way north jumping on the pillars with flags | |
| 4 | 2 × |
Arena Plaza | From the Arena Cafe 2nd floor make your way south jumping on the pillars with flags and use a wave orb to reach the left side | |
| 5 | 3 × |
Lloyd Passage | Enter from the bottom of South Arch and walk all the way to the right and get to the 2nd floor. Wait for a truck to pass below and jump on top of it, jump on the platform to the north and make you way to the right. Use the High Jump Panel to reach this | |
| 6 | 1 × |
South Arch | From the previous chest make your way to the left and enter South Arch from on top of a platform, break the Blocks to make the chest accesible | |
| 7 | 1 × |
Residential District | GO on the first roof of the Smith's house and jump on the white pillar to access the top roof and to the left to reach this | |
| 8 | 1 × |
Residential District | Jump on the bush to reach it |
Arena
One of the main draws of Rhombus Square is the Arena. Here, players can compete in scored matches against previously-fought enemies and win Arena Coins, which can be traded for powerful equipment and cosmetic items. Details on the Arena can be found on its own page.
Enemies
As it is a city, enemies can only be encountered in Rhombus Square in special situations. Only enemies encountered outside of the Arena are shown here.
| Name | Sprite | Drops | Location |
|---|---|---|---|
| Practice Bot |  |
None |
|
Botanics
| Destroyable | Contents | |
|---|---|---|
 |
Sprout of Ages |
|
|
| ||
The Sprout of Ages rare destructible is in the South Arch. From the position where you can destroy the blocks to make the chest of the ![]() Very Large Ember accesible, jump north and walk into the southeast corner to reveal the Sprout
Very Large Ember accesible, jump north and walk into the southeast corner to reveal the Sprout
Traders
Traders in Rhombus Square offer some of the most powerful equipment in the game, as well as boosters which increase the level of enemies.
- Autumn's Rise Master – Located in Boost Lounge
| Offered Item | Credits | Requisite Items |
|---|---|---|
| 50000 |
- Autumn's Fall Master – Located in Boost Lounge
| Offered Item | Credits | Requisite Items |
|---|---|---|
| 50000 |
- Bergen Trail Master – Located in Boost Lounge
| Offered Item | Credits | Requisite Items |
|---|---|---|
| 50000 |
- Maroon Valley Master – Located in Boost Lounge
| Offered Item | Credits | Requisite Items |
|---|---|---|
| 50000 |
- Gaia's Garden Master – Located in Boost Lounge
| Offered Item | Credits | Requisite Items |
|---|---|---|
| 50000 |
- Sapphire Ridge Master – Located in Boost Lounge
| Offered Item | Credits | Requisite Items |
|---|---|---|
| 50000 |
- Rhombus Weapons – Located in Gear Store 1F
| Offered Item | Credits | Requisite Items |
|---|---|---|
| LV62 |
111000 | 2x |
| LV63 |
115300 | 3x |
| LV63 |
115555 | 3x |
| LV64 |
118900 | 4x |
| LV64 |
119100 |
- Rhombus Head – Located in Gear Store 1F
| Offered Item | Credits | Requisite Items |
|---|---|---|
| LV62 |
111977 | 4x |
| LV63 |
115980 | 3x |
| LV64 |
119700 | 4x |
- Rhombus Torso – Located in Gear Store 1F
| Offered Item | Credits | Requisite Items |
|---|---|---|
| LV62 |
113311 | 2x |
| LV63 |
116210 | 5x |
| LV64 |
120000 | 2x |
- Rhombus Legs – Located in Gear Store 1F
| Offered Item | Credits | Requisite Items |
|---|---|---|
| LV62 |
111111 | 4x |
| LV63 |
115700 | 5x |
| LV64 |
119700 | 4x |
- Antique Gear – Located in Gear Store 1F
| Offered Item | Credits | Requisite Items |
|---|---|---|
| LV61 |
100000 | |
| LV61 |
100000 | |
| LV61 |
100000 | |
| LV61 |
100000 | |
| 15000 |
- Special Gear #1 – Located in Gear Store 1F
| Offered Item | Credits | Requisite Items |
|---|---|---|
| LV66 |
123321 | LV52 |
| LV67 |
133700 | LV20 |
| LV68 |
156789 | LV59 |
| LV68 |
199999 | LV51 |
- Chester Boxman – Located in Gear Store 1F
| Offered Item | Credits | Requisite Items |
|---|---|---|
| LV67 |
150000 | LV22 |
| 50000 | ||
| LV66 |
196969 | LV52 |
- Rhombus Epic Metal – Located in Gear Store 1F
| Offered Item | Credits | Requisite Items |
|---|---|---|
| 10000 | 2x | |
| 10000 | 2x | |
| 10000 | 2x | |
| 10000 | 2x |
- Reset Monger – Located in Training Arena[1]
| Offered Item | Credits | Requisite Items |
|---|---|---|
| 15000 | 10x | |
| 15000 | 10x |
- ↑ This trader is a duplicate of the Reset Monger in Rookie Harbor, and therefore does not appear in the Trader Book.
- Veggie Global #1 – Located in Buy Land F1
| Offered Item | Credits | Requisite Items |
|---|---|---|
| 100 | 2x | |
| 100 | ||
| 100 | 2x |
- Veggie Global #2 – Located in Buy Land F1
| Offered Item | Credits | Requisite Items |
|---|---|---|
| 100 | ||
| 100 | ||
| 100 | 4x | |
| 100 | 2x |
- Fruit Global #1 – Located in Buy Land F1
| Offered Item | Credits | Requisite Items |
|---|---|---|
| 100 | 2x | |
| 100 | 2x | |
| 100 | 2x |
- Fruit Global #2 – Located in Buy Land F1
| Offered Item | Credits | Requisite Items |
|---|---|---|
| 100 | 2x | |
| 100 | 2x | |
| 100 | 4x | |
| 100 | 2x |
- Spice Global #1 – Located in Buy Land F1
| Offered Item | Credits | Requisite Items |
|---|---|---|
| 250 | ||
| 250 | ||
| 250 | ||
| 250 | ||
| 250 |
- Spice Global #2 – Located in Buy Land F1
| Offered Item | Credits | Requisite Items |
|---|---|---|
| 250 | ||
| 250 | ||
| 250 | ||
| 250 | ||
| 250 |
- Rhombus Elemental Buffs – Located in Buy Land F1
| Offered Item | Credits | Requisite Items |
|---|---|---|
| 600 | 3x | |
| 600 | 3x | |
| 600 | 3x | |
| 600 | 3x |
- Rhombus Wraps & Rolls – Located in Buy Land F1
| Offered Item | Credits | Requisite Items |
|---|---|---|
| 1450 | 3x | |
| 4200 | 6x | |
| 1450 | 3x | |
| 4200 | 6x |
- Rhombus Tea – Located in Buy Land F1
| Offered Item | Credits | Requisite Items |
|---|---|---|
| 1050 | ||
| 3400 | 3x | |
| 888 | 5x |
- Rhombus Sandwiches – Located in Buy Land F1
| Offered Item | Credits | Requisite Items |
|---|---|---|
| 950 | 2x | |
| 2100 | 4x | |
| 5000 | 7x |
- Rhombus Buffs – Located in Buy Land F1
| Offered Item | Credits | Requisite Items |
|---|---|---|
| 550 | 2x | |
| 1350 | 4x | |
| 550 | 2x | |
| 1350 | 4x |
- Rhombus Buffs – Located in Buy Land F1
| Offered Item | Credits | Requisite Items |
|---|---|---|
| 550 | 2x | |
| 1350 | 4x | |
| 550 | 2x | |
| 1350 | 4x |
- Rhombus Mixed Buffs – Located in Buy Land F1
| Offered Item | Credits | Requisite Items |
|---|---|---|
| 450 | ||
| 950 | 2x | |
| 450 | ||
| 950 | 2x |
- Rhombus Allround Buffs – Located in Buy Land F1
| Offered Item | Credits | Requisite Items |
|---|---|---|
| 999 | 3x | |
| 2500 | 6x |
Shops
In addition to the standard equipment and consumable shops, Rhombus Square has a shop selling backer consumables, a shop selling the Chest Finder, and an arena shop that sells powerful equipment and cosmetics for arena coins.
- Rhombus Items – Identical shops located in Buy Land GF and Arena Lobby.
| Item | Credits |
|---|---|
| 100 | |
| 300 | |
| 250 | |
| 222 | |
| 650 | |
| 650 | |
| 200 | |
| 200 | |
| 200 | |
| 200 | |
| 450 | |
| 450 | |
| 450 | |
| 450 | |
| 350 |
- Chef Backer Goods – Located in Buy Land GF.
| Item | Credits |
|---|---|
| 7777 | |
| 7777 | |
| 7777 | |
| 7777 | |
| 7777 | |
| 7777 | |
| 7777 | |
| 7777 | |
| 7777 | |
| 7777 | |
| 7777 | |
| 9999 |
- Rhombus Arsenal – Located in Gear Store GF.
| Item | Credits |
|---|---|
| LV50 |
71350 |
| LV59 |
104750 |
| LV50 |
70975 |
| LV59 |
104500 |
| LV50 |
71925 |
| LV59 |
105000 |
| LV50 |
71350 |
| LV59 |
104750 |
- Curios & More – Located in Curios Trinkets. Only one of each item can be purchased.
| Item | Credits |
|---|---|
| 33333 |
- Coin Shop – Located in Arena Lobby. Items cannot be sold. Only one of each item can be purchased. Items cost Arena coins rather than Credits.
| Item | Arena coins |
|---|---|
| LV65 |
5000 |
| LV65 |
5000 |
| LV65 |
5000 |
| LV65 |
5000 |
| LV65 |
5000 |
| LV65 |
5000 |
| LV65 |
5000 |
| LV65 |
5000 |
| LV65 |
5000 |
| 3000 | |
| 3000 | |
| 2000 | |
| 2500 | |
| 2500 | |
| 2500 | |
| 5500 | |
| 6000 | |
| 5500 | |
| 3000 | |
| 3000 | |
| 3000 |
- ↑ 1.0 1.1 1.2 These items are only available if you have the A New Home DLC. However, they can still be purchased during the main game.
Quests
Only one quest is available in Rhombus Square:
Trophies
- Rhombus Landmarks
- Find all landmarks in Rhombus Square.
- Rhombus Scavenger
- Obtain all chests in Rhombus Square; see #Chests.
"A New Home" DLC changes
| M.S. Solar • Rhombus Square • Rhombus Dungeon |
| Rookie Harbor • Autumn's Rise • Autumn's Fall |
| Bergen Trail • Bergen Village • Temple Mine |
| Maroon Valley • Ba'kii Kum • Faj'ro Temple |
| Gaia's Garden • Basin Keep • So'najiz Temple • Zir'vitar Temple • Grand Krys'kajo |
| Sapphire Ridge • Old Hideout |
| Vermillion Wasteland • Vermillion Dungeon • Vermillion Tower |
| Homestedt • Azure Archipelago • Ku'lero Temple |
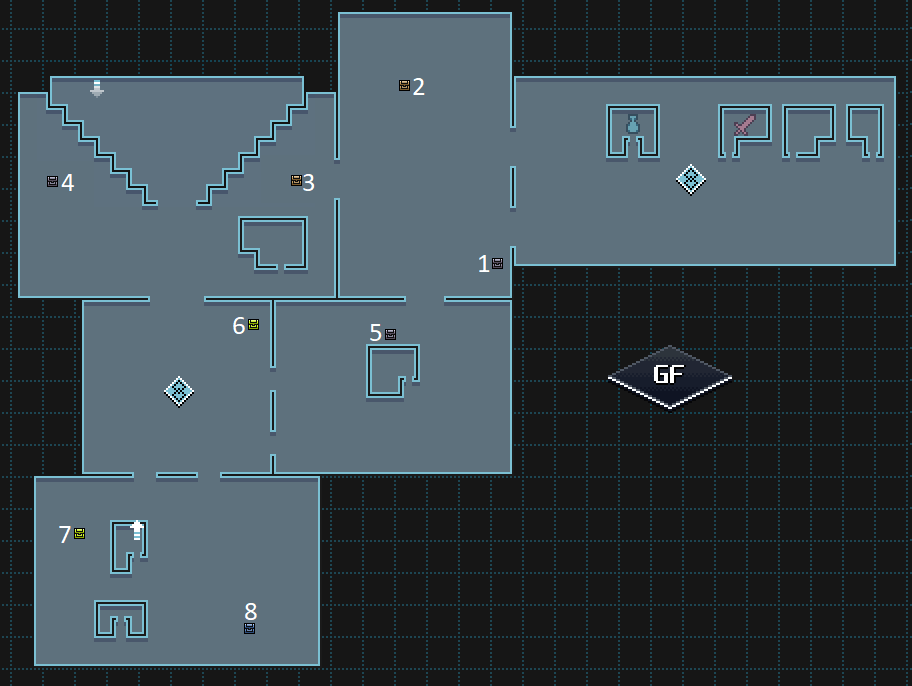
The A New Home DLC greatly expands upon Rhombus Square, leaving the area almost double the size as in the base game, and with significantly more content.
Layout
The DLC greatly expands upon Rhombus Square with the introduction of the ![]() Full Rhombus Pass. While most of the new areas can be accessed immediately, the Tremor Lab is unlocked during the Tremors of the Past quest and the Rhombus Parks Embassy is unlocked during the Wrath of Goat quest.
Full Rhombus Pass. While most of the new areas can be accessed immediately, the Tremor Lab is unlocked during the Tremors of the Past quest and the Rhombus Parks Embassy is unlocked during the Wrath of Goat quest.
Connecting Regions
- Azure Archipelago (via SW Beach)
Map
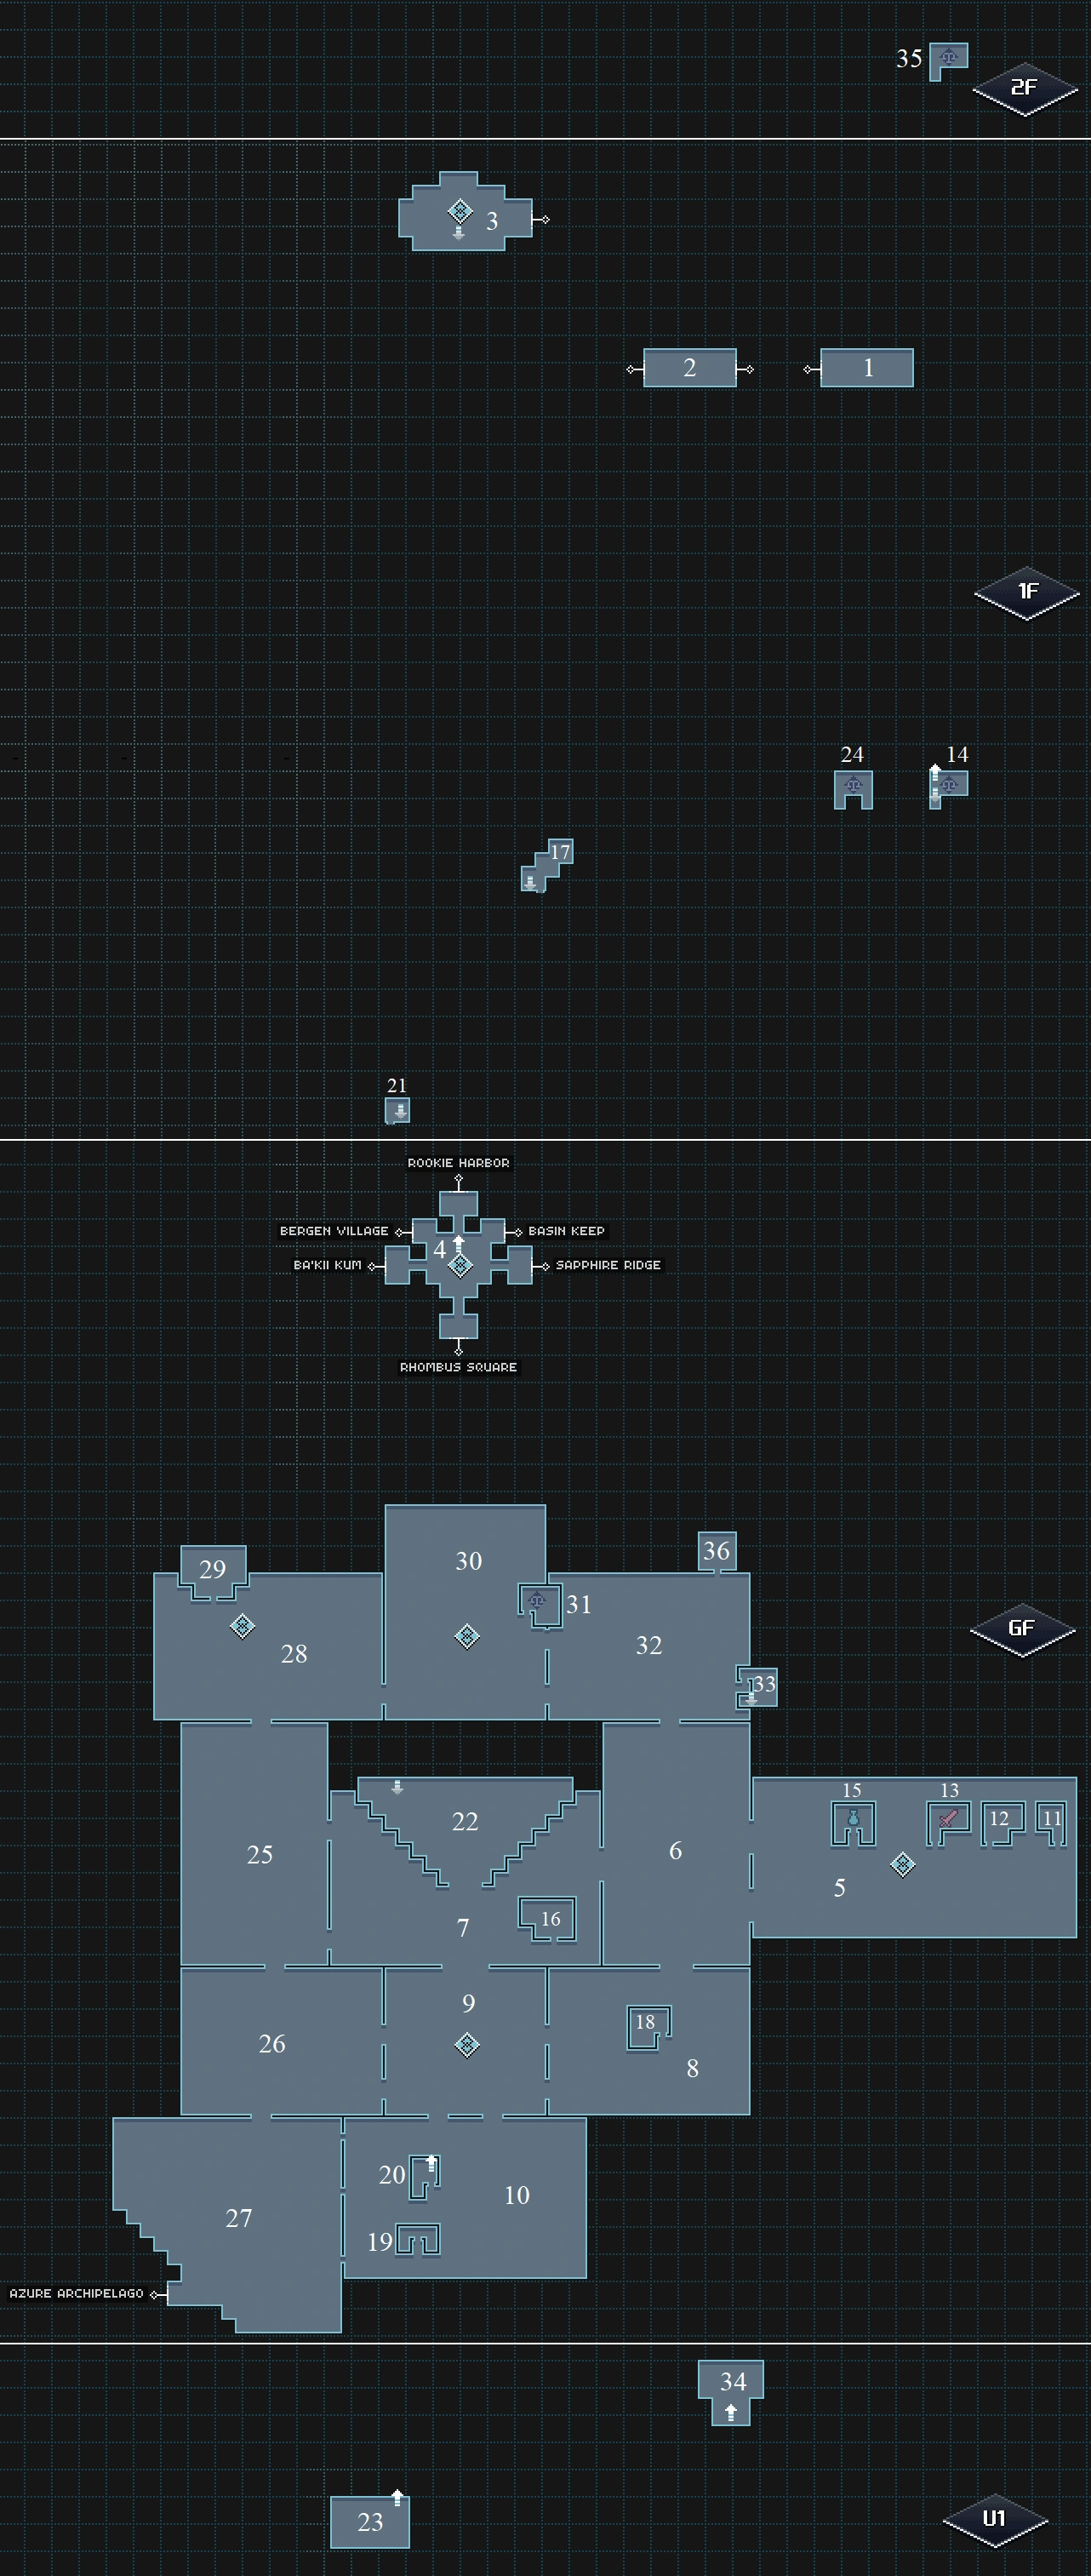
| # | Area Name | Floor |
|---|---|---|
| 1 | Newcomer's Bridge | 1F |
| 2 | Newcomer's Bridge End | 1F |
| 3 | CrossCentral Balcony
Landmark: Cross Central Balcony |
1F |
| 4 | Cross Central
Landmark: Cross Central |
GF |
| 5 | Shopping District
Landmark: Shopping District |
GF |
| 6 | Garden Boulevard | GF |
| 7 | Arena Plaza | GF |
| 8 | Lloyd Passage | GF |
| 9 | South Arch
Landmark: South Arch |
GF |
| 10 | Residential District | GF |
| 11 | Curios Trinkets | GF |
| 12 | Boost Lounge | GF |
| 13 | Gear Store GF | GF |
| 14 | Gear Store 1F | 1F |
| 15 | Buy Land GF | GF |
| 16 | Arena Cafe | GF |
| 17 | Arena Cafe 2nd Floor | 1F |
| 18 | Books 'n Worms | GF |
| 19 | Vesterovich Mansion | GF |
| 20 | Old Smith GF | GF |
| 21 | Old Smith 1F | 1F |
| 22 | Arena Lobby | GF |
| 23 | Training Arena | U1 |
| 24 | Buy Land F1 | 1F |
| 25 | Garden Terrace | GF |
| 26 | Alabaster Passage | GF |
| 27 | SW Beach | GF |
| 28 | Open PVP Fields
Landmark: Global Quest Hub |
GF |
| 29 | Global Quest Hub | GF |
| 30 | North Arch
Landmark: Business District |
GF |
| 31 | Tremor Office | GF |
| 32 | Cliff Exhibition | GF |
| 33 | Tremor Lab | GF |
| 34 | Rumbling Chamber | U1 |
| 35 | Gear Store 2F | 2F |
| 36 | Rhombus Parks Embassy | GF |
Treasures

| Acc. | Type | Contains | Location | Info |
|---|---|---|---|---|
| 1 | 2 × |
Garden Boulevard | Jump on top of the cars and cross the street to reach this | |
| 2 | 2 × |
Garden Boulevard | Walk from the south at the edge of the street to reach this | |
| 3 | 2 × |
Arena Plaza | From the Arena Cafe 2nd floor make your way north jumping on the pillars with flags | |
| 4 | 2 × |
Arena Plaza | From the Arena Cafe 2nd floor make your way south jumping on the pillars with flags and use a wave orb to reach the left side | |
| 5 | 3 × |
Lloyd Passage | Enter from the bottom of South Arch and walk all the way to the right and get to the 2nd floor. Wait for a truck to pass below and jump on top of it, jump on the platform to the north and make you way to the right. Use the High Jump Panel to reach this | |
| 6 | 1 × |
South Arch | From the previous chest make your way to the left and enter South Arch from on top of a platform, break the Blocks to make the chest accesible | |
| 7 | 1 × |
Residential District | GO on the first roof of the Smith's house and jump on the white pillar to access the top roof and to the left to reach this | |
| 8 | 1 × |
Residential District | Jump on the bush to reach it | |
| 9 | 1 × |
South Arch | Jump over the bushes from the North-East corner of Alabaster Passage, then proceed thru a secret entrance to the South Arch | |
| 10 | 1 × |
SW Beach | Jump over the bushes then circle counter-clockwise along the fence | |
| 11 | 1 × |
Garden Terrace | Cross the road then get to the second floor by stairs near the North-West | |
| 12 | 2 × |
Open PVP Fields | Take the stairs to the second floor near the road to the East, walk around the house, jump down to two NPCs and cross the road by shooting the Wave orb | |
| 13 | 1 × |
North Arch | After Obtaining the Silver Chest in Cliff Exhibition, continue to the left, walk through the secret entrance to the North Arch, jump down on the platform, make your way to the roof, jump down onto the pillar, continue to the left, jump onto the ceiling, jump down the balcony to the North-West, shoot the Wave orb, destroy both barriers across the road that are blocking the entrance to the chest | |
| 14 | 5 × |
Cliff Exhibition | From the hole in the fence near North-East corner, proceed to the North-West, shoot the sensor across the road, then get down onto cliffs from the second floor to the East, make your way up, shoot the Wave orb and proceed North | |
| 15 | 1 × |
Cliff Exhibition | jump down the truck near Tremor Lab |
Enemies
The new quests in Rhombus Square add several new enemies to the area. Only enemies encountered outside of the Arena are shown here, although it is worth noting that the DLC includes one enemy who can only be fought in the Arena, Lily.
| Name | Sprite | Drops | Location |
|---|---|---|---|
| Radical Hedgehag |  |
South Arch[2] | |
| Chillin' Hillkat |  |
South Arch[2] | |
| Fallfly |  |
South Arch[2] | |
| Gelleric |  |
South Arch[2] | |
| Angler |  |
South Arch[2] | |
| Argeby |  |
South Arch[2] | |
| Behesloth | 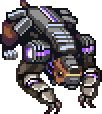 |
South Arch[2] | |
| Carkat |  |
None | North Arch[3], Highway Tunnel 1[3] |
| Goat Worker |  |
Rhombus Parks Embassy[4] | |
| Apollo 4 |  |
None | Open PVP Fields[5] |
| Tremmy (Boss) |  |
Rumbling Chamber[6] | |
| Hillcart (Boss) |  |
None | Highway Tunnel 2[3] |
| The Goatfather (Boss) |  |
None | Rhombus Parks Embassy[4] |
- ↑ 1.0 1.1 1.2 1.3 1.4 1.5 1.6 1.7 Additional drops not possible due to combat rank being disabled during this encounter
- ↑ 2.0 2.1 2.2 2.3 2.4 2.5 2.6 Spawns during the Lost and On the Run quest
- ↑ 3.0 3.1 3.2 Spawns during the Trouble on the Highway quest
- ↑ 4.0 4.1 Spawns during the Wrath of Goat quest
- ↑ Fought once while progressing the plot
- ↑ Spawns during the Tremors of the Past quest
Traders
The DLC introduces a large number of new traders to Rhombus Square, most of which offer ascended gear that scales with the player's level.
- Rhombus Elite Weapons – Located in Gear Store 2F
| Offered Item | Credits | Requisite Items |
|---|---|---|
| LVL↑ |
175000 | LV62 |
| LVL↑ |
175000 | LV63 |
| LVL↑ |
175000 | LV63 |
| LVL↑ |
175000 | LV64 |
| LVL↑ |
175000 | LV64 |
- Rhombus Elite Head – Located in Gear Store 2F
| Offered Item | Credits | Requisite Items |
|---|---|---|
| LVL↑ |
175000 | LV62 |
| LVL↑ |
175000 | LV63 |
| LVL↑ |
175000 | LV64 |
- Rhombus Elite Torso – Located in Gear Store 2F
| Offered Item | Credits | Requisite Items |
|---|---|---|
| LVL↑ |
175000 | LV62 |
| LVL↑ |
175000 | LV63 |
| LVL↑ |
175000 | LV64 |
- Rhombus Elite Legs – Located in Gear Store 2F
| Offered Item | Credits | Requisite Items |
|---|---|---|
| LVL↑ |
175000 | LV62 |
| LVL↑ |
175000 | LV63 |
| LVL↑ |
175000 | LV64 |
- Antique Elite Gear – Located in Gear Store 2F
| Offered Item | Credits | Requisite Items |
|---|---|---|
| LVL↑ |
169696 | LV61 |
| LVL↑ |
169696 | LV61 |
| LVL↑ |
169696 | LV61 |
| LVL↑ |
169696 | LV61 |
| 15000 |
- Elite Special Gear – Located in Gear Store 2F
| Offered Item | Credits | Requisite Items |
|---|---|---|
| LVL↑ |
180000 | LV66 |
| LVL↑ |
225000 | LV40 |
| LVL↑ |
199999 | LV67 |
| LVL↑ |
205000 | LV68 |
| LVL↑ |
210000 | LV68 |
- Grinder's Gear – Located in Gear Store 2F
| Offered Item | Credits | Requisite Items |
|---|---|---|
| LVL↑ |
222222 | LV65 |
| LVL↑ |
333333 | LV48 |
| LVL↑ |
200000 | LV25 |
| LVL↑ |
234567 | LV60 |
| LVL↑ |
242069 | LV67 |
- Galaxy Gear – Located in Gear Store 2F
| Offered Item | Credits | Requisite Items |
|---|---|---|
| LVL↑ |
250000 | |
| LVL↑ |
250000 | |
| LVL↑ |
250000 | |
| 2x LVL↑ |
400000 | LV60 |
| LVL↑ |
250000 | LV35 |
| LVL↑ |
250000 | LV49 |
- Arena Gear #1 – Located in Arena Lobby
| Offered Item | Credits | Requisite Items |
|---|---|---|
| LVL↑ |
155000 | LV65 |
| LVL↑ |
155000 | LV65 |
| LVL↑ |
155000 | LV65 |
| LVL↑ |
155000 | LV65 |
| LVL↑ |
155000 | LV65 |
- Arena Gear #2 – Located in Arena Lobby
| Offered Item | Credits | Requisite Items |
|---|---|---|
| LVL↑ |
155000 | LV65 |
| LVL↑ |
155000 | LV65 |
| LVL↑ |
155000 | LV65 |
| LVL↑ |
155000 | LV65 |
- Tremoire – Located in Tremor Office after starting the Tremors of the Past quest
| Offered Item | Credits | Requisite Items |
|---|---|---|
| LV44 |
44444 | LV36 |
| LV58 |
99999 | LV44 |
| LVL↑ |
166669 | LV68 |
| LVL↑ |
222222 | LV57 |
- ↑ 1.0 1.1 Available after completing Tremors of the Past
- Veggie Global #3 – Located in Buy Land F1
| Offered Item | Credits | Requisite Items |
|---|---|---|
| 100 | 2x | |
| 100 | 2x |
- Fruit Global #3 – Located in Buy Land F1
| Offered Item | Credits | Requisite Items |
|---|---|---|
| 100 | 2x | |
| 100 | 2x |
- Spice Global #3 – Located in Buy Land F1
| Offered Item | Credits | Requisite Items |
|---|---|---|
| 250 | ||
| 250 | ||
| 250 | ||
| 250 |
- Ancient Loot – Located in Buy Land F1
| Offered Item | Credits | Requisite Items |
|---|---|---|
| 5800 | 3x | |
| 6300 | 4x | |
| 6500 | 4x | |
| 7200 | 3x | |
| 7500 | 4x | |
| 7700 | 4x |
- ↑ 1.0 1.1 1.2 Available after collecting the
 Ancient Shade
Shops
The DLC introduces one new shop to Rhombus Square, and some Rhombus shops get new items.

- Goat Zira's Shop – Located in Cliff Exhibition after completing the Wrath of Goat quest. Items cannot be sold here.
| Item | Credits |
|---|---|
| 100 | |
| 300 | |
| 250 | |
| 222 | |
| 4500 | |
| 4500 |
- Rhombus Arsenal – Located in Gear Store GF.
| Item | Credits |
|---|---|
| LV50 |
71350[1] |
| LV59 |
104750 |
| LV50 |
70975[1] |
| LV59 |
104500 |
| LV50 |
71925[1] |
| LV59 |
105000 |
| LV50 |
71350[1] |
| LV59 |
104750 |
| LVL↑ |
150000[2] |
| LVL↑ |
150000[2] |
| LVL↑ |
150000[2] |
| LVL↑ |
150000[2] |
- Coin Shop – Located in Arena Lobby. Items cannot be sold. Only one of each item can be purchased. Items cost Arena coins rather than Credits.
| Item | Arena coins |
|---|---|
| LV65 |
5000 |
| LV65 |
5000 |
| LV65 |
5000 |
| LV65 |
5000 |
| LV65 |
5000 |
| LV65 |
5000 |
| LV65 |
5000 |
| LV65 |
5000 |
| LV65 |
5000 |
| 4000 | |
| 4000 | |
| 4000 | |
| 4000 | |
| 4000 | |
| 4000 | |
| 4000 | |
| 4000 | |
| 4000 | |
| 6000 | |
| 6000 | |
| 6000 | |
| 6000 | |
| 6000 | |
| 3000 | |
| 3000 | |
| 2000 | |
| 2500 | |
| 2500 | |
| 2500 | |
| 5500 | |
| 6000 | |
| 5500 | |
| 3000 | |
| 3000 | |
| 3000 |
Quests
A New Home adds several quests to Rhombus Square.
Role in the Plot
In CrossWorlds
New CrossWorlds players pass through the Newcomer's Bridge areas of Rhombus Square while completing the tutorials located in the Rhombus Dungeon, although it is mentioned that this section is skippable for experienced players. After the tutorials, they travel through CrossCentral to reach Rookie Harbor.
Near the end of the Track of the Ancients, Seekers obtain the ![]() Meteor Shade, which grants them access to Rhombus Square proper. This is an entirely optional area of end-game content.
Meteor Shade, which grants them access to Rhombus Square proper. This is an entirely optional area of end-game content.
A new region of the Track of the Ancients, Azure Archipelago, is implemented later (during the A New Home DLC). Access to this area is only possible through Rhombus Square.
In CrossCode
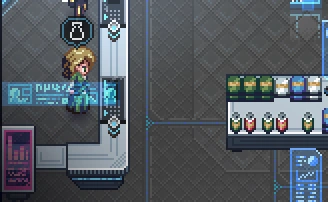
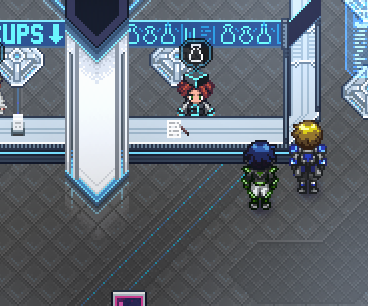
After Lea escapes from the M.S. Solar, Sergey teleports her to Newcomer's Bridge, right after the second stage of the Rhombus Dungeon. Here, she meets Emilie, who challenges her to a race on the last portion of the dungeon. After the dungeon, Lea is confronted by Apollo, who accuses her of cheating due to her overly high level. Joern soon arrives and defuses the situation. Lea and Emilie then continue through CrossCentral to Rookie Harbor.
After obtaining the ![]() Meteor Shade, Lea's friends invite her to come explore Rhombus Square with them, but she can choose to skip this and go directly to the Old Hideout.
Meteor Shade, Lea's friends invite her to come explore Rhombus Square with them, but she can choose to skip this and go directly to the Old Hideout.
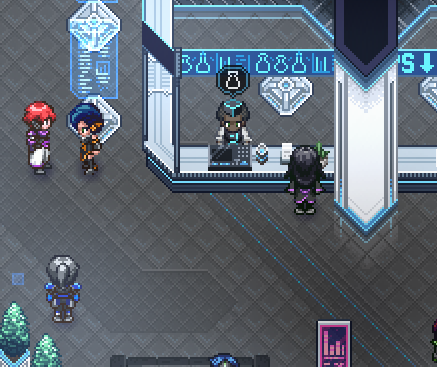
Near the end of the game, Lea runs into Albert and Ivan having a chat in Rhombus Square. After realizing who Ivan is, Sergey gets in contact with Albert and arranges a meeting. Lea returns to Rhombus Square and visits Ivan in his mansion, where he subjects her to a Turing test. Details of this are given on the Endings page.
In the A New Home DLC, Lea must pass through Rhombus Square to reach the newly unlocked area, Azure Archipelago. After exploring the archipelago, she returns to Rhombus Square for her fourth duel against Apollo, which takes place in the Open PVP Fields.
Other notable information
- CrossCentral provides a teleport hub with links to seven locations, as well as direct access to the main city. The teleport links can only be unlocked from the other side by entering the large landmark teleporters found in the Playground.
- CrossCentral is also referred to in-game as CrossStation, although this may be specifically the sky rail terminal located on its roof.
- One of the Strange Logs can be found here, in a bookshelf in Old Smith 1F.
- One of the Captain's Reports can be found here, in Alabaster Passage on a ledge to the northwest across a road.
- In Shopping District, a drifting car playing loud eurobeat music will occasionally pass by on the highway.