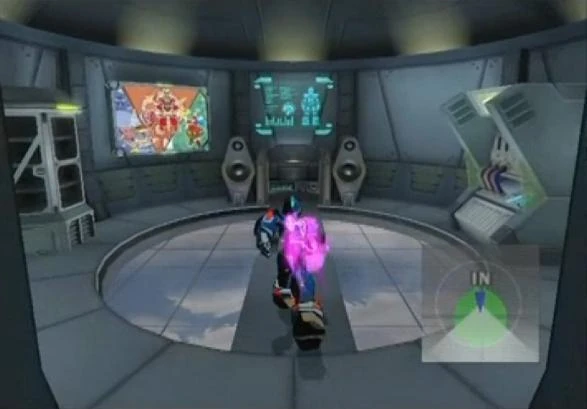
Sky Room (スカイルーム Sukai Rūmu) is a room from Central Tower in Mega Man X: Command Mission where the player can see extra contents from the game. The room is available after rescuing Nana in Chapter 3, and can be entered by talking with her since Chapter 4. The player can view the contents by using the storage cabinet and the jukebox in the room. The computer terminal allows the player to view game statistics and change the color of X's scarf. The room also has a poster for decoration that can be changed. Most of the content is unlocked by using the Deployment Center, completing challenges, and defeating the Tails Clan.
Storage cabinet
A storage cabinet to the left of the room where the player can view figures, sketches and game information.
Figures
Figures are collectible items that represent various characters and other elements in the game. They are the only collectible content from the Sky Room that can also be viewed in the menu screen, but the player can't change their angle and zoom them outside the Sky Room.
The Normal and Password Figure sets can be bought in Central Tower. The Figure sets from Part 1 to 8 are obtained by buying them in the two vending machines from in Air City South Square and Air City East Square, and Part 9 and 10 in the end of the Special Sealed Area. Each Figure costs two Figure Tokens, which are found throughout the stages. The two Password sets are obtained by inserting a password in the green vending machine in Access Tunnel E-1. The Deluxe set is obtained by using the Deployment Center, and the six Special sets by completing challenges.
The Nintendo Game Cube version of the game contains 36 exclusive figures that are obtained by using Treasure Tokens in the vending machine in Air City 3rd Street. Treasure Tokens are obtained by using the Treasure Navi, which requires a Game Boy Advance connected in the Game Cube.
| Figure series | Figure 1 | Figure 2 | Figure 3 | Figure 4 | Figure 5 | Figure 6 |
|---|---|---|---|---|---|---|
| Part 1 - Shadow's Betrayal | X | Epsilon, Cape | Shadow | Hippopressor | Bat Bone | Patrol Dog |
| Part 2 - The Bounty Hunters | Spider | Wild Jango | Aile | R | Rowdy Reploid | Citizen Reploid |
| Part 3 - Massimo's Vow | Massimo | Nana | D-Shark | Silver Horn | Super Tripuffer | Dober Man |
| Part 4 - Generator Revealed | Marino | Cinnamon | Dr. Psyche | Gaudile | Mad Nautilus | Killer Mantis |
| Part 5 - Transform! Go Axl | Axl | Mach Jentra | Security Reploid | Fire Glob | Mega Mantor | Tripuffer |
| Part 6 - Spider's End | Zero | Incentas | Pararoid | Degraver | Liquid Glob | Rush Loader |
| Part 7 - Take the Supra-FM! | Botos | D-Rex | Triclaw Killer | Gold Blader | Mega Tortoise | Meltdown |
| Part 8 - Mysterious Forms | Ferham | Wolfloid | Zwei Hammer | Gun Bit | Gift Box | Bladey |
| Part 9 - Epsilon's Ambition | Epsilon | Scarface | Einhammer | Radar Killer | Plasma Glob | Zennydropper |
| Part 10 - Showdown with Redips | Great Redips | Redips | Red Hubcap | Aircraft Carrier | Red Stinger | Redips Guard |
| Deluxe - Giga City Islands | Central Tower | Tianna Undersea Camp | Lagrano Ruins | Vanallia Desert | Ulfat Factory | Melda Ore Plant |
| Special 1 - Mettaur Special | Mettaur Commander | Mettaurcure | Mettaur | Mettaur Counter | Silver Mettaur | Gold Mettaur |
| Special 2 - Preon Special | Preon Spark | Preon Gunner | Preon Chaser | Preon Nurse | Preon Pod | Preon Shielder |
| Special 3 - Preon Special II | Preon Soldier | Preon Tank | Preon Doc | Preon Elite | Preon Gunner | Preon Pressure |
| Special 4 - Preon Special III | Preon S Epsilon | Preon S Ferham | Preon S Botos | Preon S Face | Preon Hybrid | Preon Bitmaster |
| Special 5 - Mini Mech Set | Rabbid | Wild Rescue Dog | Batfighter | Gulpfast | Sinedropper | Metaroid |
| Special 6 - Retro Mech Set | Deerball | Blowfish | Big Monkey | Cannon Driver | B Blader | Wild Dog |
| Password 1 - Premium Collection | X | Zero | Marino | Axl | X Fire | Cinnamon |
| Password 2 - Secret Collection | X, Victory | Cinnamon | Axl, Action Trigger | Zero | Massimo | Marino |
| Treasure 1 - Central Tower (Game Cube exclusive) |
Force Metal Clerk | Teleport Center Staff | Item Store Clerk | Juvenile Reploid | Weapons Store Clerk | Intelligence Reploid |
| Treasure 2 - Hunter's Hideout (Game Cube exclusive) |
Nana, Operator | Talkative Gaudile | Resistance Male | Guard Reploid | Resistance Female | Mission Reploid |
| Treasure 3 - Meet the Girls (Game Cube exclusive) |
Cumin | Jasmine | Saffron | Nurse Reploid | Engineer Reploid | Mechanic Reploid |
| Treasure 4 - It's a Guy Thing (Game Cube exclusive) |
Rider Reploid | Staff Reploid | Public Reploid | Maintenance Reploid | Factory Reploid | Business Reploid |
| Treasure 5 - Boss Series (Game Cube exclusive) |
Eject Epsilon | Rafflesian | Duckbill Mole | Incentas Thunder | Depth Dragoon | Ninetails |
| Treasure 6 - Ultra Rare Set (Game Cube exclusive) |
Ultimate Armor | Absolute Zero | Incentas Water | Good Shadow | Prisoner Nana | Belladonna |
Sketches
Contains 100 sketches and concept images of the game.
| # | Name | Requirement |
|---|---|---|
| 1 | - | Available from the beginning |
| 2 | Scarf Design | Deployment Center: Lagrano Ruins |
| 3 | X Ninja Version | Challenge: Achieved over 100 Critical Strikes! |
| 4 | X Flying Version | Challenge: Used Action Trigger over 100 times! |
| 5 | X's Armor | Challenge: Achieved over 150 consecutive hits! |
| 6 | X's Guns | Challenge: Achieved MAX attack over 9.999! |
| 7 | X's Weapons | Item Box in Central Tower: Special Sealed Area |
| 8 | Zero's Weapons | Item Box in Central Tower: Special Sealed Area |
| 9 | Cinnamon Weapons | Item Box in Central Tower: Special Sealed Area |
| 10 | Massimo's Weapons | Item Box in Central Tower: Special Sealed Area |
| 11 | Shadow | Deployment Center: Gimialla Mine |
| 12 | Silver Horn | Deployment Center: Tianna Camp |
| 13 | Psyche Mech | Deployment Center: Gaudile Laboratory |
| 14 | Inhabitants | Deployment Center: Central Tower |
| 15 | Rafflesian | Challenge: Collected all Video files! |
| 16 | Proto Crow Boss | Deployment Center: Ulfat Factory |
| 17 | Nana | Deployment Center: Central Tower |
| 18 | Nana Sketch | Challenge: Purchased over 40 Main Weapons! |
| 19 | Prisoner Nana | Deployment Center: Tianna Camp |
| 20 | R Sketch | Deployment Center: Central Tower |
| 21 | Psyche Sketch | Challenge: Collected all Disk files! |
| 22 | Mouse Mech | Challenge: Party fought over 100 battles! |
| 23 | Support Mech | Challenge: X's level over 30! |
| 24 | Proto Crab Mech | Challenge: Collected all Posters! |
| 25 | Gaudile | Deployment Center: Gaudile Laboratory |
| 26 | Cinnamon | Deployment Center: Gaudile Laboratory |
| 27 | Aile | Deployment Center: Central Tower |
| 28 | Marino Sketch | Deployment Center: Gaudile Laboratory |
| 29 | D-Rex | Deployment Center: Central Tower |
| 30 | Blowfish | Deployment Center: Tianna Camp |
| 31 | Head of Security | Deployment Center: Tianna Camp |
| 32 | Rabbid | Deployment Center: Gaudile Laboratory |
| 33 | Killer Mantis | Deployment Center: Gaudile Laboratory |
| 34 | Hippopressor | Deployment Center: Lagrano Ruins |
| 35 | Pararoid | Deployment Center: Gaudile Laboratory |
| 36 | Patrol Dog | Deployment Center: Lagrano Ruins |
| 37 | Construction Roid | Deployment Center: Melda Ore Plant |
| 38 | Einhammer | Deployment Center: Central Tower |
| 39 | Preon Army | Challenge: Defeated over 100 Preon Series! |
| 40 | Mad Nautilus | Deployment Center: Gaudile Laboratory |
| 41 | Dr. Psyche | Deployment Center: Gaudile Laboratory |
| 42 | Axl Expressions | Deployment Center: Ulfat Factory |
| 43 | Redips Soldier | Item Box in Central Tower: Special Sealed Area |
| 44 | Botos | Deployment Center: Vanallia Desert |
| 45 | Ferham Faces | Deployment Center: Melda Ore Plant |
| 46 | Scarface | Deployment Center: Melda Ore Plant |
| 47 | Redips | Deployment Center: Melda Ore Plant |
| 48 | Evil Shadow | Deployment Center: Gimialla Mine |
| 49 | Flying Mechs | Item Box in Central Tower: Special Sealed Area |
| 50 | Real Massimo | Deployment Center: Tianna Camp |
| 51 | Marino Design 1 | Deployment Center: Gimialla Mine |
| 52 | Marino Design 2 | Deployment Center: Gimialla Mine |
| 53 | Epsilon | Item Box in Central Tower: Special Sealed Area |
| 54 | Great Redips | Item Box in Central Tower: Special Sealed Area |
| 55 | Mega Man? | Challenge: Collected all field items! |
| 56 | Duckbill Mole | Challenge: Collected all Music files! |
| 57 | Dragoon | Item Box in Central Tower: Special Sealed Area |
| 58 | Tails Front | Item Box in Central Tower: Special Sealed Area |
| 59 | Tails Back | Item Box in Central Tower: Special Sealed Area |
| 60 | Command Center | Deployment Center: Central Tower |
| 61 | Undersea Tunnel | Deployment Center: Tianna Camp |
| 62 | Undersea Passage | Deployment Center: Tianna Camp |
| 63 | Water Curtain | Challenge: Obtained over 10000 EXP points! |
| 64 | POW Camp Passage | Deployment Center: Tianna Camp |
| 65 | Guard Room | Deployment Center: Tianna Camp |
| 66 | Guard Room 2 | Deployment Center: Tianna Camp |
| 67 | Undersea Cell | Deployment Center: Tianna Camp |
| 68 | Tree Trunk Room | Challenge: Purchased over 100 Items! |
| 69 | Glass Passageway | Challenge: Collected all Figure Tokens! |
| 70 | EV Laboratory | Deployment Center: Gaudile Laboratory |
| 71 | Outside Lab | Deployment Center: Gaudile Laboratory |
| 72 | Lab Passageway | Deployment Center: Gaudile Laboratory |
| 73 | Dug Out Passage | Deployment Center: Gaudile Laboratory |
| 74 | Laboratory Room | Deployment Center: Gaudile Laboratory |
| 75 | Laboratory Sketch | Deployment Center: Gaudile Laboratory |
| 76 | Control Device | Deployment Center: Ulfat Factory |
| 77 | Control Room | Deployment Center: Ulfat Factory |
| 78 | Smelting Furnace | Deployment Center: Ulfat Factory |
| 79 | Mine Passageway | Deployment Center: Gimialla Mine |
| 80 | Desert Entrance | Deployment Center: Vanallia Desert |
| 81 | Plant Passageway | Deployment Center: Melda Ore Plant |
| 82 | Melda Room | Deployment Center: Melda Ore Plant |
| 83 | Missile | Deployment Center: Melda Ore Plant |
| 84 | Missile Silo | Deployment Center: Melda Ore Plant |
| 85 | Ruins Passageway | Item Box in Central Tower: Special Sealed Area |
| 86 | Display Device | Item Box in Central Tower: Special Sealed Area |
| 87 | Coliseum | Item Box in Central Tower: Special Sealed Area |
| 88 | Ruins | Deployment Center: Lagrano Ruins |
| 89 | Giga City | Challenge: Collected all deployment members! |
| 90 | Containership | Deployment Center: Central Tower |
| 91 | Save Process | Challenge: Completed 50 saves! |
| 92 | Force Metals | Challenge: Completed 25 play hours! |
| 93 | Monitor Room | Deployment Center: Ulfat Factory |
| 94 | The Chair | Item Box in Central Tower: Special Sealed Area |
| 95 | Transforming Mech | Item Box in Central Tower: Special Sealed Area |
| 96 | Force Metal Ore | Challenge: Got 50 Force Metal recipes! |
| 97 | Cmnd Rm Design | Deployment Center: Central Tower |
| 98 | Base Design | Deployment Center: Central Tower |
| 99 | Teleport Device | Challenge: Used over 100.000 Zenny! |
| 100 | Market | Deployment Center: Central Tower |
Files
Files containing information about Giga City and a resume of the game's story. Info files are obtained in the Deployment Center, while Story files are unlocked as the player progress in the game.
Info Files
| File | Information | Location |
|---|---|---|
| Origin of Force Metal | In the year 22XX, a meteor landed in the Pacific Ocean. Its fragments yielded Force Metal, a mysterious mineral that does not exist on Earth and which has the power to strengthen Reploids and amplify their intellect-pulses. | Default |
| Building Giga City | The government was intrigued by Force Metal potential, and built Giga City on the ocean near the meteor site for the explicit purpose of mining Force Metal. Soon R&D efforts were devoted toward creation of advanced Reploids that used Force Metal. | Deployment Center: Central Tower |
| Turning Maverick | Force Metal infusions amplified the intellect-pulses of Reploids and heightened their physical prowess. However, it was soon pointed out that over-amplification could become a burden and even lead to Maverick symptoms. | Deployment Center: Tianna Camp |
| Birth of Epsilon | Most of the trial models for advanced Force-Metal infused Reploids ended in failure. "Epsilon" was a rare example of success - this Reploid boasted excellent physical prowess and heightened intelligence. | Deployment Center: Gaudile Laboratory |
| Epsilon's Uprising | One day, Epsilon, after declaring himself Commander, announced the independence of Giga City. He banished all humans from the island, and demanded that the government recognize Giga City as an independent Reploid state. | Deployment Center: Ulfat Factory |
| The Task Force | In response to the Epsilon uprising, the government immediately formed the Task Force, with Colonel Redips at the helm. Under Redips' command, numerous agents were sent to Giga City. But most agents who infiltrated Giga City were never heard from again. It is thought that some of these agents went Maverick and became Epsilon sympathizers. | Deployment Center: Gimialla Mine |
| Searching Giga City | The data from later probe missions suggested that the Force Metal that exists across Giga City was causing Reploids to go Maverick. For the next covert operation into Giga City, they needed high-performance Reploids that did not use Force Metal, so they chose X and Zero. | Deployment Center: Lagrano Ruins |
| About Giga City | Giga City is a man-made island built on the Pacific Ocean to mine Force Metal and carry out research and development on its properties and uses. The layout of Giga City consists of a collection of research facilities. | Deployment Center: Lagrano Ruins |
| Lagrano Ruins | The lighthouse-shaped building in the center of the island is what is left of a Reploid laboratory. When Epsilon went berserk, it was destroyed, and now only its ruins remain. Cut off from the rest of Giga City, these ruins are unknown to the main populace. | Deployment Center: Lagrano Ruins |
| Central Tower | This is the administrative sector of Giga City. From here, humans once oversaw the operations of the city. After the uprising, Epsilon abandoned this sector, calling it "a symbol of human arrogance." | Deployment Center: Central Tower |
| Tianna Camp | There are several abandoned plates which have been mined dry of their Force Metal. The largest abandoned plate is called the Lost Mine. In it, a giant drill still sits, pointing idly toward the depths of the sea. Inside the drill are the abandoned quarters of the laborers. Now, the rebellion has turned the facility into a POW camp. | Deployment Center: Tianna Camp |
| Gaudile Laboratory | There were plans to revive nature in this sector using Force Metal. Of course, "nature" refers not to ordinary plants, but to man-made mechaplants. Mechaplants produce oxygen through photo-synthesis, and absorb polluted air. After Epsilon's uprising, research on these was halted and the area was abandoned. Gaudile is making use of the area as his research laboratory. | Deployment Center: Gaudile Laboratory |
| Ulfat Factory | This is a Mechaniloid production factory. It was used to design Reploids for mining and other tasks until the Rebellion uprising, after which it switched to producing combat Reploids. The drill is used to extract magma instead of Force Metal. This magma is what powers the factory. | Deployment Center: Ulfat Factory |
| Gimialla Mine | This pile of rocks was brought to replenish the Energen ore, the power source of reploids. But eventually the increased usage of Force Metal made Energen ore obsolete, and the cavity inside was turned into a Force Metal laboratory. Since Epsilon's uprising the laboratory has come under the control of the Rebellion. | Deployment Center: Gimialla Mine |
| Vanallia Desert | The Onovan Desert region is constantly plagued by sandstorms and tornadoes. It was originally a dome-shaped plate designed to test the specifications of reploids by placing them in various environmental conditions. However, when the environment control device went berserk, it turned into a barren desert. The surface is sand, and the underground facility was built to observe test runs. | Deployment Center: Vanallia Desert |
| Melda Ore Plant | Force Metal mined in Giga City is brought here for refining and to be converted for use in generators. It traverses the surface of the sea to collect the Force Metal from each of the plates. The temperature of the refinery itself is kept low to absorb the heat given off when Force Metal is refined. | Deployment Center: Melda Ore Plant |
| Grave Ruins Base | This sector is used to test the abilities and durability of Reploids designed in Giga City. It is possible to create a variety of scenarios through application of extreme heat, cold, or dry conditions. At the time of the Rebellion uprising, Epsilon made this his headquarters. There is a rumor that when this test plant was used to assess prototype Reploids, many of those who failed to make the grade were destroyed. | Item Box in Central Tower: Special Sealed Area |
Story Files
| File | Information |
|---|---|
| Chapter 1-1 | In year 22XX, the mysterious mineral "Force Metal" is discovered from the remains of a meteor which landed in the Pacific Ocean. In order to mine and collect the precious Force Metal, which revolutionized Reploid engineering, the giant man-made island of Giga City was constructed. |
| Chapter 1-2 | One day, the Reploids in one area of the island suddenly went berserk. The government deemed these Reploids Maverick, and deployed teams of agents to Giga City to gather information and to solve the crisis. However, the investigation teams fail as fast as they can be sent in. Eventually, the government's final hope rests on the Maverick Hunters X, Zero and Shadow. |
| Chapter 1-3 | X and his friends successfully infiltrate Giga City. In search of a makeshift base, they enter a building, and suddenly come under attack. They face the suspected leader of the uprising, Epsilon, who tells X of his vision, in hopes of persuading him and his companions to join the cause... |
| Chapter 1-4 | X and friends are betrayed by Shadow, and find themselves in grave danger. Zero attempts an attack, and soon faces the overwhelming might of the Rebellion Cadres. What is the fate of the lost Zero? Is he dead or alive? X is damaged and loses consciousness. |
| Chapter 2-1 | Betrayed by Shadow and unaware of Zero's fate, X awakens angry, and with a renewed determination to get to the bottom of things. But when X reaches the city of New Hope, he finds that he is wanted on charges of illegal entry. |
| Chapter 2-2 | X continues his mission, but is suddenly attacked by the bounty hunter, Spider. He manages to fight him off, but realizes the many difficulties that he faces by going it alone. Then, X meets Aile, a member of a group called the Resistance, who pleads for his help. |
| Chapter 2-3 | Aile asks X to rescue the Resistance leader, Chief R. He entrusts X with his ID, which is the key to R's cell. Then, he sacrifices himself to hold back incoming enemy forces, giving X a chance to escape. |
| Chapter 2-4 | Although Spider worked for the Rebellion as a bounty hunter, when he sees X holding Aile's ID, he has a change of heart. Aile was Spider's former partner. Thanks to the fleeting chance created by Aile's self-sacrifice, X and Spider join forces and successfully rescue Chief R. |
| Chapter 3-1 | X and friends regain control of their base after rescuing Chief R. However, the functions of the base cannot be restored without the help of Nana, the operator. X's group heads to the Tianna POW Camp to rescue Nana. |
| Chapter 3-2 | X meets Steel Massimo in the mine-turned-POW camp. Massimo is an unrivaled warrior anti-Rebellion hero. Massimo tells X that he has come to the camp in search of someone. |
| Chapter 3-3 | X and friends rescue Nana, who was held deep within the POW camp. During the escape, Massimo disappears without warning, and Nana notices something strange about the info on Massimo in the database. Just who is this Massimo character? |
| Chapter 3-4 | The Reploid who called himself Massimo was not who he claimed to be. Massimo meets the real Massimo again, this time in the underground reaches of the POW camp, where he has nearly met his end at the hands of Silver Horn. Massimo becomes true heir to the will of Massimo, and amazingly defeats Silver Horn. Massimo has become the heir to the heroic legacy and is an imposter no more. |
| Chapter 4-1 | The help of Professor Gaudile was needed to strengthen the base in preparation for the coming battle with the Rebellion. However, the pacifist professor has isolated himself in the comfort of his laboratory. X goes to enlist his help. |
| Chapter 4-2 | At the same time, the Rebellion sends Dr. Psyche to coerce Professor Gaudile into cooperating. X, who has also come to persuade Gaudile, now must face Psyche. Moreover, it seems that yet another visitor has arrived at the lab... It is Marino, the thief who has her eyes on one of the Professor's creations. X, Psyche, and the thief... The three confront one another in the laboratory. But just what has Marino discovered in the far reaches of the lab? |
| Chapter 4-3 | Dr. Psyche captures Gaudile's precious female Reploid, Cinnamon. And it is she who is in fact the Professor's greatest creation. Marino, who had her prize stolen out from under her nose by Psyche, agrees to help X rescue Cinnamon. |
| Chapter 4-4 | Cinnamon is determined to no longer be a burden and instead help X and friends fight. Her resolve not only inspires Gaudile, who refused to accept the need to fight, but Marino, the normally ice-cold thief, as well. Here X makes many new friends: Cinnamon, Gaudile, and Marino. |
| Chapter 5-1 | Thanks to X's new ally, Gaudile, the transmitter function of the base is restored. X contacts Colonel Redips, who tells X that Zero may still be alive. X and friends immediately head for the Rebellion weapons factory where Zero's signal was last picked up. |
| Chapter 5-2 | X heads to the factory on the trail of Zero, but instead meets an old comrade, Axl. Axl says that he came to Giga City in an attempt to uncover the secret of his own creation. |
| Chapter 5-3 | Inside the factory, X finds Zero challenging Mach Jentra on his own. X and Axl both chase down Zero. The Class S Hunters are now reunited. |
| Chapter 5-4 | The Class S Hunters work together to shut down the out-of-control factory. The three are happy about their reunion, but it appears that Zero, who was already once betrayed by Shadow, is having doubts about the meaning of friendship. |
| Chapter 6-1 | Zero becomes unable to trust the Reploids of Giga City. He rejects his Resistance allies and storms out of the base alone. Then, X receives a transmission from Colonel Redips, who tells them about the Rebellion's secret laboratory. |
| Chapter 6-2 | X finds the traitor, Shadow, awaiting him in the secret laboratory. Shadow, whose power is boosted by Supra-Force Metal, gives X a run for his money. Zero comes running to the scene, and just when they think they have defeated Shadow for good, Zero is hit with a final surprise strike. Spider unexpectedly takes the hit for Zero. Zero is taken aback by what Spider did for him, despite the fact that Zero never recognized him as a friend. |
| Chapter 6-3 | The secret laboratory was all a set up. X and friends are trapped in a room by the Rebellion Cadre, Incentas. The room is set to self-destruct. Just when all seems lost, Spider makes the decision to sacrifice his own life to save his friends. |
| Chapter 6-4 | Zero, after seeing the heroic sacrifice made by Spider to save his friends, understands the gravity of the Resistance cause, and agrees to fight along with them. Zero solemnly swears never to rest until the Rebellion is defeated. |
| Chapter 7-1 | A Rebellion radar jammer completely cuts off transmissions with Colonel Redips. In order to shut down the jammer, X and friends must face the pernicious dangers of the barren desert. |
| Chapter 7-2 | On the way to the desert facility, X and friends come up against the Rebellion Cadre, Ferham. They are caught off guard and sucked down into the sand. |
| Chapter 7-3 | X's party takes the underground passages to the jammer facility. The Rebellion Cadre, Botos, awaits them in the room containing the jammer. |
| Chapter 7-4 | The insolent Botos flees in desperation. The Resistance fighters almost catch him, but instead only manage to obtain some Supra-Force Metal. This is a vital clue to the Rebellion's plans, but just what is this Supra-Force Metal? |
| Chapter 8-1 | Analysis reveals that Supra-Force Metal contains incredibly high energy levels. X and friends, who now suspect that the Rebellion is refining Supra-Force Metal, head straight to the Refinement Plant. |
| Chapter 8-2 | At the heavily-guarded Refinement Plant, X finds a missile armed with a Supra-Force Metal warhead. X realizes that if the Supra-Force Metal warhead is detonated, Reploids across the world could turn Maverick. In order to stop the Rebellion's dastardly plan, X and friends attempt to confiscate the Supra-Force Metal. |
| Chapter 8-3 | After finding out that in order to access the Supra-Force Metal, they'll need the keys from the Cadres. X and friends engage Ferham in a heated battle. However, when they defeat Ferham and she tumbles to the Lower Section of the Missile Silo Base, they find that the key was already removed from her body. What is Botos planning to do with the forbidden key? |
| Chapter 8-4 | Using both keys, Botos is able to obtain the Supra-Force Metal. With such power at his disposal, Botos begins to plot against even the Commander himself, but he is suddenly attacked and toppled by an unknown enemy, and the Metal is snatched away. Who could this be? X shudders to think. |
| Chapter 9-1 | With the Supra-Force Metal stolen by an unknown enemy, the mystery around this incident grows ever deeper. But X has no time to sleuth - suddenly, the base comes under attack. |
| Chapter 9-2 | The Rebellion Cadre, Scarface, is the perpetrator of the assault on the base. He claims that he has come to reclaim the Supra-Force Metal. Fortunately, X manages to fend him off. |
| Chapter 9-3 | By tracking Scarface's route of retreat, the Resistance is able to locate a building which they suspect is the Rebellion base. X and friends storm the location in order to face Epsilon. |
| Chapter 9-4 | Soon, X and his friends locate Epsilon. During the fight, Epsilon describes the ideals that he is fighting for. His conviction nearly makes X doubt his own actions, but in the end the fearsome Epsilon is put to rest. Epsilon's uprising is finally put down. Finally, our heroes feel that they have reached the end of their long journey. |
| Chapter 10-1 | As if to signal the end of the entire incident, a government vessel flies in. X thinks for sure that it has arrived to take them home. But the plane begins firing on the Resistance fighters who had gathered for the welcome! The plane was there to "erase" X and his allies. But why?! X and friends manage to escape, and they head to the Defense Department to seek out the truth. |
| Chapter 10-2 | On the top floor of the Defense Department, X meets Colonel Redips, the highest-ranking military commander. And in Redips' hand is the missing Supra-Force Metal. Everything was a set-up orchestrated by Redips. In order to steal the Supra-Force Metal from Epsilon, Redips changed form and infiltrated Giga City, all the while manipulating X and his friends. |
| Chapter 10-3 | This was a betrayal that X could not forgive. X shows his anger at Redips, who betrayed the very friends who gave him their trust. But with the Supra-Force Metal in hand, Redips declares himself Great Redips, and the Resistance fighters are powerless against him. It seems that our heroes have nary a chance in this final confrontation, until Ferham suddenly appears, catching Redips off guard and snatching the Force Metal away from him |
| Chapter 10-4 | Ferham expresses her wish for the disposal of the remaining Supra-Force Metal. She says that Epsilon did not mean for the Supra-Force Metal to be abused by the likes of Redips. Ferham throws herself into space along with the Supra-Force Metal. X's fight is finally over. The government declares Redips a Maverick. But determination of Maverick status for Epsilon is deferred. |
Posters
A poster decorating the room.
| Title | Image | Description | Unlock |
|---|---|---|---|
| Giga Citizens | 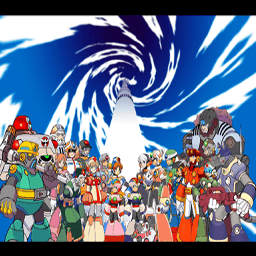 |
NPCs from Giga City | Available at default |
| Fearsome Foe |  |
X with bosses in the background | Deployment Center: Vanallia Desert |
| Secret Assembly | 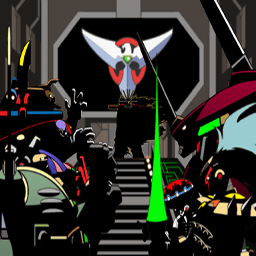 |
The Rebellion Army members in the shadows | Deployment Center: Melda Ore Plant |
| The Deadly Trio! | 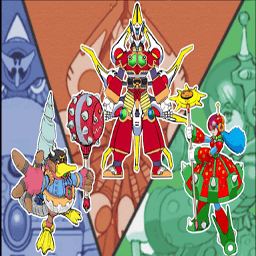 |
Duckbill Mole, Ninetails, and Rafflesian | Challenge: Collected all Normal Figures! |
| Swarming Armada |  |
Federation aircrafts from Chapter 10 | Challenge: Talked to citizens over 100 times! |
| Viva La Resistance! | 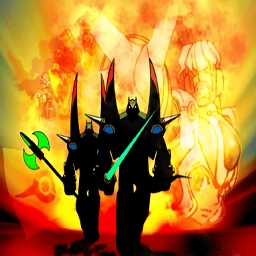 |
The original and new Steel Massimo in front of Chief R, Aile, and a Resistance flag | Challenge: Completed 10 play hours! |
| Preon Invasion | 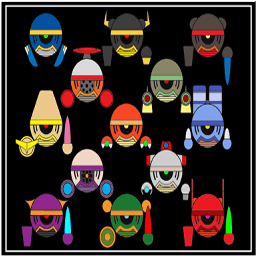 |
13 stylized Preon heads | Deployment Center: Gimialla Mine |
| Meet Marino | 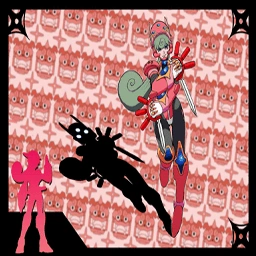 |
Marino wielding the Beam Sword on a Hayohn background | Deployment Center: Gaudile Laboratory |
| Cinnamon's Secret | 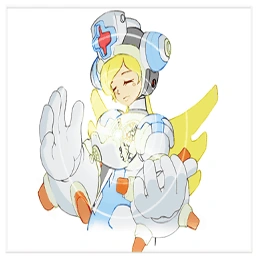 |
Cinnamon showing the Force Metal Generator | Challenge: Used more than 100.000 FME! |
| Hunter Base |  |
Nana and Professor Gaudile in the Hunter Base | Challenge: Completed all deployments! |
Jukebox
The jukebox in the center of the room contains 51 musics and 57 video clips.
Musics
| No. | Music | Location |
|---|---|---|
| 01 | Land of Oblivion | Default |
| 02 | Steal Hope Back | Deployment Center: Central Tower |
| 03 | Subterrania | Deployment Center: Tianna Camp |
| 04 | Forest Treasure | Deployment Center: Gaudile Laboratory |
| 05 | Unknown Energy | Deployment Center: Ulfat Factory |
| 06 | A Friend in Danger | Deployment Center: Gimialla Mine |
| 07 | Desert Maze | Deployment Center: Vanallia Desert |
| 08 | Glacial Activity | Deployment Center: Melda Ore Plant |
| 09 | Ancient Capital | Item Box in Central Tower: Special Sealed Area |
| 10 | Final Judgement | Item Box in Central Tower: Special Sealed Area |
| 11 | Hunter Base | Deployment Center: Tianna Camp |
| 12 | Central Tower | Deployment Center: Central Tower |
| 13 | Maverick Hunter 1 | Deployment Center: Lagrano Ruins |
| 14 | Maverick Hunter 2 | Deployment Center: Vanallia Desert |
| 15 | Final Battle | Deployment Center: Tianna Camp |
| 16 | Boss Battle | Deployment Center: Vanallia Desert |
| 17 | Event Battle | Deployment Center: Central Tower |
| 18 | Epsilon, First Movement | Item Box in Central Tower: Special Sealed Area |
| 19 | Epsilon, Second Movement | Item Box in Central Tower: Special Sealed Area |
| 20 | Redips, First Movement | Item Box in Central Tower: Special Sealed Area |
| 21 | Redips, Second Movement | Item Box in Central Tower: Special Sealed Area |
| 22 | Redips, Third Movement | Item Box in Central Tower: Special Sealed Area |
| 23 | Meet Ninetails! | Item Box in Central Tower: Special Sealed Area |
| 24 | Fight, X! | Deployment Center: Lagrano Ruins |
| 25 | Standby, Zero | Deployment Center: Gimialla Mine |
| 26 | Enter Axl | Deployment Center: Ulfat Factory |
| 27 | Steel Massimo | Deployment Center: Tianna Camp |
| 28 | Marino the Thief | Deployment Center: Gaudile Laboratory |
| 29 | Help me! Cinnamon | Deployment Center: Gaudile Laboratory |
| 30 | Spider Magic | Deployment Center: Central Tower |
| 31 | Darkness and Despair | Deployment Center: Lagrano Ruins |
| 32 | Brush with Danger | Deployment Center: Central Tower |
| 33 | Peace and Tranquillity | Deployment Center: Gaudile Laboratory |
| 34 | Sympathy and Sorrow 1 | Deployment Center: Central Tower |
| 35 | Sympathy and Sorrow 2 | Deployment Center: Gimialla Mine |
| 36 | Resolution | Deployment Center: Tianna Camp |
| 37 | Beaming with Joy | Deployment Center: Ulfat Factory |
| 38 | Strength and Valor | Deployment Center: Melda Ore Plant |
| 39 | Rebellious Ambitions | Deployment Center: Melda Ore Plant |
| 40 | Mysterious Ways | Deployment Center: Vanallia Desert |
| 41 | They Call me Botos! | Deployment Center: Vanallia Desert |
| 42 | Talking | Deployment Center: Gaudile Laboratory |
| 43 | Resistance Lines | Deployment Center: Ulfat Factory |
| 44 | Mission To Rebel | Deployment Center: Vanallia Desert |
| 45 | A Rebel's Fate | Deployment Center: Melda Ore Plant |
| 46 | Mystery Metal | Deployment Center: Melda Ore Plant |
| 47 | Do You Copy? | Deployment Center: Vanallia Desert |
| 48 | Giga City Memories | Deployment Center: Lagrano Ruins |
| 49 | Trajectory of Battle 1 | Deployment Center: Lagrano Ruins |
| 50 | Trajectory of Battle 2 | Challenge: Deployed over 50 times! |
| 51 | PARTS | Item Box in Central Tower: Special Sealed Area |
Video clips
The first video is available from the beginning, while the others must be unlocked. Videos 1-2 to 8-5 are obtained in the Deployment Center, in the same area they take place, Video 10-5 is a reward for completing the game, and Videos 9-1 to 10-4 and 10-6 are obtained in Item Boxes from Central Tower's Special Sealed Area.
| No. | Chapter | Video | Duration |
|---|---|---|---|
| 01 | 1-1 | Infiltration | 0:52 |
| 02 | 1-2 | Analysis | 1:18 |
| 03 | 1-3 | Hippopressor | 0:12 |
| 04 | 1-4 | Epsilon | 1:40 |
| 05 | 1-5 | The Cadre | 1:51 |
| 06 | 2-1 | Secret Resistance Base | 0:40 |
| 07 | 2-2 | X: Wanted Dead or Alive | 0:52 |
| 08 | 2-3 | The Bounty Hunter | 1:08 |
| 09 | 2-4 | Enter Aile | 2:02 |
| 10 | 2-5 | Vow to Aile | 0:17 |
| 11 | 2-6 | The Bargain with Jango | 0:55 |
| 12 | 2-7 | Spider Returns | 1:28 |
| 13 | 2-8 | Wrath of Jango | 0:13 |
| 14 | 2-9 | Spider Reformed | 0:39 |
| 15 | 2-10 | Spider Joins the Fight | 1:18 |
| 16 | 3-1 | Enter Massimo | 1:05 |
| 17 | 3-2 | Nana and Silver Horn | 1:12 |
| 18 | 3-3 | Entrusted with a Legacy | 1:09 |
| 19 | 3-4 | Battle with Silver Horn | 2:02 |
| 20 | 4-1 | Enter Marino | 0:33 |
| 21 | 4-2 | Dr. Psyche | 0:44 |
| 22 | 4-3 | Cinnamon and Marino | 1:30 |
| 23 | 4-4 | Enter Gaudile | 1:41 |
| 24 | 4-5 | Cinnamon's Secret | 0:50 |
| 25 | 4-6 | Marino in a Tight Spot | 1:15 |
| 26 | 4-7 | Battle with Psyche | 0:51 |
| 27 | 5-1 | Enter Axl | 2:09 |
| 28 | 5-2 | Jentra | 1:10 |
| 29 | 5-3 | X and Zero Meet Again | 1:55 |
| 30 | 5-4 | Battle with Jentra | 0:45 |
| 31 | 5-5 | Duboar Berserk | 0:53 |
| 32 | 5-6 | Axl Transforms | 1:41 |
| 33 | 6-1 | Zero Goes It Alone | 1:15 |
| 34 | 6-2 | A Strange Light | 0:25 |
| 35 | 6-3 | Shadow Arrives | 1:20 |
| 36 | 6-4 | Zero and Shadow | 1:08 |
| 37 | 6-5 | Sneak Attack | 2:04 |
| 38 | 6-6 | Battle with Incentas | 1:22 |
| 39 | 6-7 | The End of Spider | 1:25 |
| 40 | 7-1 | Ferham | 2:09 |
| 41 | 7-2 | Enter Botos | 1:31 |
| 42 | 7-3 | Botos Escapes | 1:18 |
| 43 | 8-1 | Battle with Botos | 1:26 |
| 44 | 8-2 | Battle with Ferham | 0:27 |
| 45 | 8-3 | Ferham Falls | 0:23 |
| 46 | 8-4 | Fated For Betrayal | 0:53 |
| 47 | 8-5 | Stolen Supra-Force Metal | 0:17 |
| 48 | 9-1 | Battle with Scarface | 0:32 |
| 49 | 9-2 | The Throne | 1:34 |
| 50 | 9-3 | Battle with Epsilon | 0:40 |
| 51 | 9-4 | The End of Epsilon | 1:47 |
| 52 | 10-1 | Air Strike | 1:53 |
| 53 | 10-2 | Transforming Redips | 1:51 |
| 54 | 10-3 | Battle with Redips | 1:57 |
| 55 | 10-4 | Space | 0:13 |
| 56 | 10-5 | Final Confrontation | 1:30 |
| 57 | 10-6 | Scores Settled | 1:22 |
Computer terminal
The computer terminal has game data such as 36 challenges to unlock content, the total amount of battles, number of times Final Strike was activated, how much Zenny was obtained and used, battle data of each playable character and how many items where acquired in each area. The player can also customize the color of X's scarf.
Challenges
| Challenge | Reward |
|---|---|
| Defeated over 100 enemies! | Preon Special (Special Figure set) |
| Defeated over 500 enemies! | Preon Special II (Special Figure set) |
| Defeated over 1000 enemies! | Preon Special III (Special Figure set) |
| Defeated over 100 Preon Series! | Preon Army (Sketch #39) |
| Defeated over 100 Mettaurs! | Mettaur Set (Special Figure set) |
| Party fought over 100 battles! | Mouse Mech (Sketch #22) |
| Party fought over 500 battles! | Yellow Scarf |
| Obtained over 10000 EXP points! | Water Curtain (Sketch #63) |
| Obtained over 100000 EXP points! | Mini Mech Set (Special Figure set) |
| X's level over 30! | Support Mech (Sketch #23) |
| Cleared the game! | Final Showdown (Video #56 "Final Confrontation") |
| Talked to citizens over 100 times! | Armada (Poster "Swarming Armada") |
| Deployed over 50 times! | Trajectory 2 (Music #50 "Trajectory of Battle 2") |
| Completed all deployments! | Hunter Base (Poster "Hunter Base") |
| Collected all deployment members! | Giga City (Sketch #89) |
| Collected all Disk files! | Psyche Sketch (Sketch #21) |
| Collected all Music files! | Duckbill Mole (Sketch #56) |
| Collected all Video files! | Rafflesian (Sketch #15) |
| Collected all Figure Tokens! | Glass Passageway (Sketch #69) |
| Collected all Normal Figures! | Trio (Poster "The Deadly Trio!") |
| Collected all field items! | Mega Man? (Sketch #55) |
| Collected all Posters! | Proto Crab Mech (Sketch #24) |
| Collected all Sketches! | Purple Scarf |
| Purchased over 100 Items! | Tree Trunk Room (Sketch #68) |
| Purchased over 40 Main Weapons! | Nana Sketch (Sketch #18) |
| Used over 100.000 Zenny! | Teleport Device (Sketch #99) |
| Used more than 100.000 FME! | Cinnamon (Poster "Cinnamon's Secret") |
| Got 50 Force Metal recipes! | Force Metal Ore (Sketch #96) |
| Completed 50 saves! | Save Process (Sketch #91) |
| Completed 10 play hours! | Justice (Poster "Viva La Resistance!") |
| Completed 25 play hours! | Force Metals (Sketch #92) |
| Achieved over 100 Critical Strikes! | X Ninja Version (Sketch #3) |
| Used Action Trigger over 100 times! | X Flying Version (Sketch #4) |
| Activated over 100 Final Strikes! | Retro Mech Set (Special Figure set) |
| Achieved over 150 consecutive hits! | X's Armor (Sketch #5) |
| Achieved MAX attack over 9.999! | X's Guns (Sketch #6) |
X's Scarf
| Color | Requirement |
|---|---|
| Red Scarf | X's standard color |
| Blue Scarf | Available from beginning |
| Yellow Scarf | Challenge: Fight over 500 battles |
| Green Scarf | Deployment Center: Central Tower |
| Purple Scarf | Challenge: Obtain all Sketches |
Trivia
- The Super Tripuffer figure is located in Massimo's Vow, which is based on Chapter 3, and the Tripuffer figure is in Transform! Go Axl from Chapter 5. Tripuffer actually appears in Chapter 3, while Super Tripuffer appears in Chapter 5.
- The Retro Mech Set has enemies that appeared in previous games, but one of them, Wild Dog, first appeared in Mega Man X: Command Mission. Wolfloid, a stronger variety of the Wild Dog that appears in Chapter 8, appeared in Mega Man X6.
| Mega Man X: Command Mission | |
|---|---|
| Main characters | |
| X • Zero • Axl • Steel Massimo • Marino • Cinnamon • Spider | |
| Other characters | |
| Chief R • Nana • Aile • Professor Gaudile | |
| Rebellion Army | |
| Epsilon • Botos • Ferham • Scarface • Wild Jango • Silver Horn • Dr. Psyche • Mach Jentra • Incentas | |
| Other Bosses | |
| Hippopressor • Shadow • Depth Dragoon • Colonel Redips • Great Redips Duckbill Mole • Rafflesian • Tails Clan • Ninetails | |
| Locations | |
| Giga City • Lagrano Ruins • Central Tower • Tianna Camp • Gaudile Laboratory • Ulfat Factory • Gimialla Mine Vanallia Desert • Melda Ore Plant • Grave Ruins Base • Far East HQ • Orbital Elevator: Babel | |
| Related Items | |
| Action Trigger • Hyper Mode •Final Strike • Force Metal • Deployment Center • Sky Room Enemies • Item Box • Items • Script (NPC Dialogue) | |