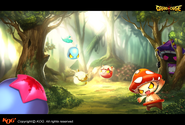
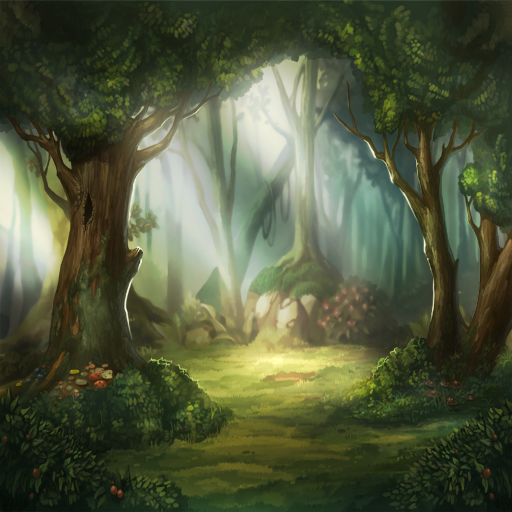
Trial Forest is the initial training grounds for the warriors of the Grand Chase. It is the first dungeon that players have access to, and is very straight-forward. It is the first dungeon in Bermesiah.
Trial Forest is one of two tests to be made into a Grand Chase Knight.
Normal (Level 0-2)
|
|
1
|
2
|
3
|
4
|
5
|
6
|
7
|
8
|
9
|
10
|
11
|
| A
|

|

|

|

|

|
[[Image:m_ {{{A6}}}.PNG]]
|
[[Image:m_ {{{A7}}}.PNG]]
|
[[Image:m_ {{{A8}}}.PNG]]
|
[[Image:m_ {{{A9}}}.PNG]]
|
[[Image:m_ {{{A10}}}.PNG]]
|
[[Image:m_ {{{A11}}}.PNG]]
|
| B
|
[[Image:m_ {{{B1}}}.PNG]]
|
[[Image:m_ {{{B2}}}.PNG]]
|
[[Image:m_ {{{B3}}}.PNG]]
|
[[Image:m_ {{{B4}}}.PNG]]
|
[[Image:m_ {{{B5}}}.PNG]]
|
[[Image:m_ {{{B6}}}.PNG]]
|
[[Image:m_ {{{B7}}}.PNG]]
|
[[Image:m_ {{{B8}}}.PNG]]
|
[[Image:m_ {{{B9}}}.PNG]]
|
[[Image:m_ {{{B10}}}.PNG]]
|
[[Image:m_ {{{B11}}}.PNG]]
|
| C
|
[[Image:m_ {{{C1}}}.PNG]]
|
[[Image:m_ {{{C2}}}.PNG]]
|
[[Image:m_ {{{C3}}}.PNG]]
|
[[Image:m_ {{{C4}}}.PNG]]
|
[[Image:m_ {{{C5}}}.PNG]]
|
[[Image:m_ {{{C6}}}.PNG]]
|
[[Image:m_ {{{C7}}}.PNG]]
|
[[Image:m_ {{{C8}}}.PNG]]
|
[[Image:m_ {{{C9}}}.PNG]]
|
[[Image:m_ {{{C10}}}.PNG]]
|
[[Image:m_ {{{C11}}}.PNG]]
|
| D
|
[[Image:m_ {{{D1}}}.PNG]]
|
[[Image:m_ {{{D2}}}.PNG]]
|
[[Image:m_ {{{D3}}}.PNG]]
|
[[Image:m_ {{{D4}}}.PNG]]
|
[[Image:m_ {{{D5}}}.PNG]]
|
[[Image:m_ {{{D6}}}.PNG]]
|
[[Image:m_ {{{D7}}}.PNG]]
|
[[Image:m_ {{{D8}}}.PNG]]
|
[[Image:m_ {{{D9}}}.PNG]]
|
[[Image:m_ {{{D10}}}.PNG]]
|
[[Image:m_ {{{D11}}}.PNG]]
|
| E
|
[[Image:m_ {{{E1}}}.PNG]]
|
[[Image:m_ {{{E2}}}.PNG]]
|
[[Image:m_ {{{E3}}}.PNG]]
|
[[Image:m_ {{{E4}}}.PNG]]
|
[[Image:m_ {{{E5}}}.PNG]]
|
[[Image:m_ {{{E6}}}.PNG]]
|
[[Image:m_ {{{E7}}}.PNG]]
|
[[Image:m_ {{{E8}}}.PNG]]
|
[[Image:m_ {{{E9}}}.PNG]]
|
[[Image:m_ {{{E10}}}.PNG]]
|
[[Image:m_ {{{E11}}}.PNG]]
|
| F
|
[[Image:m_ {{{F1}}}.PNG]]
|
[[Image:m_ {{{F2}}}.PNG]]
|
[[Image:m_ {{{F3}}}.PNG]]
|
[[Image:m_ {{{F4}}}.PNG]]
|
[[Image:m_ {{{F5}}}.PNG]]
|
[[Image:m_ {{{F6}}}.PNG]]
|
[[Image:m_ {{{F7}}}.PNG]]
|
[[Image:m_ {{{F8}}}.PNG]]
|
[[Image:m_ {{{F9}}}.PNG]]
|
[[Image:m_ {{{F10}}}.PNG]]
|
[[Image:m_ {{{F11}}}.PNG]]
|
| G
|
[[Image:m_ {{{G1}}}.PNG]]
|
[[Image:m_ {{{G2}}}.PNG]]
|
[[Image:m_ {{{G3}}}.PNG]]
|
[[Image:m_ {{{G4}}}.PNG]]
|
[[Image:m_ {{{G5}}}.PNG]]
|
[[Image:m_ {{{G6}}}.PNG]]
|
[[Image:m_ {{{G7}}}.PNG]]
|
[[Image:m_ {{{G8}}}.PNG]]
|
[[Image:m_ {{{G9}}}.PNG]]
|
[[Image:m_ {{{G10}}}.PNG]]
|
[[Image:m_ {{{G11}}}.PNG]]
|
| H
|
[[Image:m_ {{{H1}}}.PNG]]
|
[[Image:m_ {{{H2}}}.PNG]]
|
[[Image:m_ {{{H3}}}.PNG]]
|
[[Image:m_ {{{H4}}}.PNG]]
|
[[Image:m_ {{{H5}}}.PNG]]
|
[[Image:m_ {{{H6}}}.PNG]]
|
[[Image:m_ {{{H7}}}.PNG]]
|
[[Image:m_ {{{H8}}}.PNG]]
|
[[Image:m_ {{{H9}}}.PNG]]
|
[[Image:m_ {{{H10}}}.PNG]]
|
[[Image:m_ {{{H11}}}.PNG]]
|
| I
|
[[Image:m_ {{{I1}}}.PNG]]
|
[[Image:m_ {{{I2}}}.PNG]]
|
[[Image:m_ {{{I3}}}.PNG]]
|
[[Image:m_ {{{I4}}}.PNG]]
|
[[Image:m_ {{{I5}}}.PNG]]
|
[[Image:m_ {{{I6}}}.PNG]]
|
[[Image:m_ {{{I7}}}.PNG]]
|
[[Image:m_ {{{I8}}}.PNG]]
|
[[Image:m_ {{{I9}}}.PNG]]
|
[[Image:m_ {{{I10}}}.PNG]]
|
[[Image:m_ {{{I11}}}.PNG]]
|
| I
|
[[Image:m_ {{{J1}}}.PNG]]
|
[[Image:m_ {{{J2}}}.PNG]]
|
[[Image:m_ {{{J3}}}.PNG]]
|
[[Image:m_ {{{J4}}}.PNG]]
|
[[Image:m_ {{{J5}}}.PNG]]
|
[[Image:m_ {{{J6}}}.PNG]]
|
[[Image:m_ {{{J7}}}.PNG]]
|
[[Image:m_ {{{J8}}}.PNG]]
|
[[Image:m_ {{{J9}}}.PNG]]
|
[[Image:m_ {{{J10}}}.PNG]]
|
[[Image:m_ {{{J11}}}.PNG]]
|
| I
|
[[Image:m_ {{{K1}}}.PNG]]
|
[[Image:m_ {{{K2}}}.PNG]]
|
[[Image:m_ {{{K3}}}.PNG]]
|
[[Image:m_ {{{K4}}}.PNG]]
|
[[Image:m_ {{{K5}}}.PNG]]
|
[[Image:m_ {{{K6}}}.PNG]]
|
[[Image:m_ {{{K7}}}.PNG]]
|
[[Image:m_ {{{K8}}}.PNG]]
|
[[Image:m_ {{{K9}}}.PNG]]
|
[[Image:m_ {{{K10}}}.PNG]]
|
[[Image:m_ {{{K11}}}.PNG]]
|
Alternate (Level 0-2)
|
|
1
|
2
|
3
|
4
|
5
|
6
|
7
|
8
|
9
|
10
|
11
|
| A
|

|

|

|

|

|

|

|
[[Image:m_ {{{A8}}}.PNG]]
|
[[Image:m_ {{{A9}}}.PNG]]
|
[[Image:m_ {{{A10}}}.PNG]]
|
[[Image:m_ {{{A11}}}.PNG]]
|
| B
|
[[Image:m_ {{{B1}}}.PNG]]
|
[[Image:m_ {{{B2}}}.PNG]]
|
[[Image:m_ {{{B3}}}.PNG]]
|
[[Image:m_ {{{B4}}}.PNG]]
|
[[Image:m_ {{{B5}}}.PNG]]
|
[[Image:m_ {{{B6}}}.PNG]]
|
[[Image:m_ {{{B7}}}.PNG]]
|
[[Image:m_ {{{B8}}}.PNG]]
|
[[Image:m_ {{{B9}}}.PNG]]
|
[[Image:m_ {{{B10}}}.PNG]]
|
[[Image:m_ {{{B11}}}.PNG]]
|
| C
|
[[Image:m_ {{{C1}}}.PNG]]
|
[[Image:m_ {{{C2}}}.PNG]]
|
[[Image:m_ {{{C3}}}.PNG]]
|
[[Image:m_ {{{C4}}}.PNG]]
|
[[Image:m_ {{{C5}}}.PNG]]
|
[[Image:m_ {{{C6}}}.PNG]]
|
[[Image:m_ {{{C7}}}.PNG]]
|
[[Image:m_ {{{C8}}}.PNG]]
|
[[Image:m_ {{{C9}}}.PNG]]
|
[[Image:m_ {{{C10}}}.PNG]]
|
[[Image:m_ {{{C11}}}.PNG]]
|
| D
|
[[Image:m_ {{{D1}}}.PNG]]
|
[[Image:m_ {{{D2}}}.PNG]]
|
[[Image:m_ {{{D3}}}.PNG]]
|
[[Image:m_ {{{D4}}}.PNG]]
|
[[Image:m_ {{{D5}}}.PNG]]
|
[[Image:m_ {{{D6}}}.PNG]]
|
[[Image:m_ {{{D7}}}.PNG]]
|
[[Image:m_ {{{D8}}}.PNG]]
|
[[Image:m_ {{{D9}}}.PNG]]
|
[[Image:m_ {{{D10}}}.PNG]]
|
[[Image:m_ {{{D11}}}.PNG]]
|
| E
|
[[Image:m_ {{{E1}}}.PNG]]
|
[[Image:m_ {{{E2}}}.PNG]]
|
[[Image:m_ {{{E3}}}.PNG]]
|
[[Image:m_ {{{E4}}}.PNG]]
|
[[Image:m_ {{{E5}}}.PNG]]
|
[[Image:m_ {{{E6}}}.PNG]]
|
[[Image:m_ {{{E7}}}.PNG]]
|
[[Image:m_ {{{E8}}}.PNG]]
|
[[Image:m_ {{{E9}}}.PNG]]
|
[[Image:m_ {{{E10}}}.PNG]]
|
[[Image:m_ {{{E11}}}.PNG]]
|
| F
|
[[Image:m_ {{{F1}}}.PNG]]
|
[[Image:m_ {{{F2}}}.PNG]]
|
[[Image:m_ {{{F3}}}.PNG]]
|
[[Image:m_ {{{F4}}}.PNG]]
|
[[Image:m_ {{{F5}}}.PNG]]
|
[[Image:m_ {{{F6}}}.PNG]]
|
[[Image:m_ {{{F7}}}.PNG]]
|
[[Image:m_ {{{F8}}}.PNG]]
|
[[Image:m_ {{{F9}}}.PNG]]
|
[[Image:m_ {{{F10}}}.PNG]]
|
[[Image:m_ {{{F11}}}.PNG]]
|
| G
|
[[Image:m_ {{{G1}}}.PNG]]
|
[[Image:m_ {{{G2}}}.PNG]]
|
[[Image:m_ {{{G3}}}.PNG]]
|
[[Image:m_ {{{G4}}}.PNG]]
|
[[Image:m_ {{{G5}}}.PNG]]
|
[[Image:m_ {{{G6}}}.PNG]]
|
[[Image:m_ {{{G7}}}.PNG]]
|
[[Image:m_ {{{G8}}}.PNG]]
|
[[Image:m_ {{{G9}}}.PNG]]
|
[[Image:m_ {{{G10}}}.PNG]]
|
[[Image:m_ {{{G11}}}.PNG]]
|
| H
|
[[Image:m_ {{{H1}}}.PNG]]
|
[[Image:m_ {{{H2}}}.PNG]]
|
[[Image:m_ {{{H3}}}.PNG]]
|
[[Image:m_ {{{H4}}}.PNG]]
|
[[Image:m_ {{{H5}}}.PNG]]
|
[[Image:m_ {{{H6}}}.PNG]]
|
[[Image:m_ {{{H7}}}.PNG]]
|
[[Image:m_ {{{H8}}}.PNG]]
|
[[Image:m_ {{{H9}}}.PNG]]
|
[[Image:m_ {{{H10}}}.PNG]]
|
[[Image:m_ {{{H11}}}.PNG]]
|
| I
|
[[Image:m_ {{{I1}}}.PNG]]
|
[[Image:m_ {{{I2}}}.PNG]]
|
[[Image:m_ {{{I3}}}.PNG]]
|
[[Image:m_ {{{I4}}}.PNG]]
|
[[Image:m_ {{{I5}}}.PNG]]
|
[[Image:m_ {{{I6}}}.PNG]]
|
[[Image:m_ {{{I7}}}.PNG]]
|
[[Image:m_ {{{I8}}}.PNG]]
|
[[Image:m_ {{{I9}}}.PNG]]
|
[[Image:m_ {{{I10}}}.PNG]]
|
[[Image:m_ {{{I11}}}.PNG]]
|
| I
|
[[Image:m_ {{{J1}}}.PNG]]
|
[[Image:m_ {{{J2}}}.PNG]]
|
[[Image:m_ {{{J3}}}.PNG]]
|
[[Image:m_ {{{J4}}}.PNG]]
|
[[Image:m_ {{{J5}}}.PNG]]
|
[[Image:m_ {{{J6}}}.PNG]]
|
[[Image:m_ {{{J7}}}.PNG]]
|
[[Image:m_ {{{J8}}}.PNG]]
|
[[Image:m_ {{{J9}}}.PNG]]
|
[[Image:m_ {{{J10}}}.PNG]]
|
[[Image:m_ {{{J11}}}.PNG]]
|
| I
|
[[Image:m_ {{{K1}}}.PNG]]
|
[[Image:m_ {{{K2}}}.PNG]]
|
[[Image:m_ {{{K3}}}.PNG]]
|
[[Image:m_ {{{K4}}}.PNG]]
|
[[Image:m_ {{{K5}}}.PNG]]
|
[[Image:m_ {{{K6}}}.PNG]]
|
[[Image:m_ {{{K7}}}.PNG]]
|
[[Image:m_ {{{K8}}}.PNG]]
|
[[Image:m_ {{{K9}}}.PNG]]
|
[[Image:m_ {{{K10}}}.PNG]]
|
[[Image:m_ {{{K11}}}.PNG]]
|
Note: Only in KGC, when using Asin or Lime.
Dialogue
Beginning
Knight Master: Welcome to the Grand Chase Team. If you follow me and get through the Trial Forest, you will become a full fledged member. I personally got through this with a wooden sword in my rookie days, but I will give you a bit more help. Pay close attention to the helpful text on your screen. Good Luck.
Second Room
Knight Master: You can't use this function during a tutorial.
(A goblin attacks, then runs away)
Knight Master: That was so quick even I didn't have any time to react, let's continue after you regain your health.
Boss
Knight Master: You made it alive. You remember everything that you were taught? Clear this stage and you will clear the Trial Forest! Don't let your guard down!
Post Boss Battle
Knight Master: Not bad, but you've only gone through the basics! If you want to become stronger, you must train harder. You can learn advanced techniques in Practice Mode, I suggest you give it a try.
Old Dialogue
Asin's Story
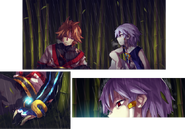
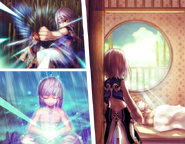
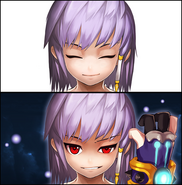
 Asin: It was a relentless windy and rainy night, the night I met a man whose body had been thoroughly broken… I saved him, but it was my life that was changed forever. He trained me in the ways of the fighter, taught me to trample those who would disrespect me... The day that he died...marked my own rebirth as "Asin," born again as the bearer of his name. Are you the one my master always spoke of? Indeed, we shall see how strong you really are… As an existence that will make me stronger…Hahahhahahaha
Lime's Story
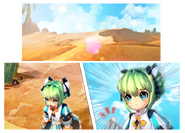
 Lime: Ah… it's been 3 days since I lost touch with the order of the Holy Knights. I'm already all out of water! But this is not a set back. This too, is certainly a sign from heaven. A…..ah! Are you an angel come to take me away? Oh! It's not an illusion. Those are people.. I'm must get to them. What I tell ya! Justice always prevails.
Gallery
Asin's Story
The then unnamed
Asin meets Asin Tairin
Asin Tairin trains the future
Asin'Are you the one my master always spoke of?'
Lime's Story
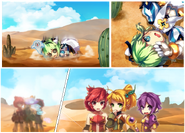
Lime is lost in a desert-like area
'What I tell ya! Justice always prevails.'
Others
Trivia
- Until the Eternal update, Trial Forest previously had no dialogue for all characters except Asin and Lime which explains their motivation for joining the Chase. On the same update, Asin's and Lime's dialogues were removed and replaced by a short tutorial.
- A removed quest dialogue stated that Ryan was here drinking water that was fused with Kaze'aze's blood. However, he was met in Elven Forest.


 Asin: It was a relentless windy and rainy night, the night I met a man whose body had been thoroughly broken… I saved him, but it was my life that was changed forever. He trained me in the ways of the fighter, taught me to trample those who would disrespect me... The day that he died...marked my own rebirth as "Asin," born again as the bearer of his name. Are you the one my master always spoke of? Indeed, we shall see how strong you really are… As an existence that will make me stronger…Hahahhahahaha
 Lime: Ah… it's been 3 days since I lost touch with the order of the Holy Knights. I'm already all out of water! But this is not a set back. This too, is certainly a sign from heaven. A…..ah! Are you an angel come to take me away? Oh! It's not an illusion. Those are people.. I'm must get to them. What I tell ya! Justice always prevails.
