| “ | Rumor has it that blueprints for an awesome new weapon exist in a mysterious place not far outside the city. Problem is those dastardly bloons control the cave. Problem? Wait that's not a problem! | ” |
| ~ "Bloonchipper Blueprint" goal description |
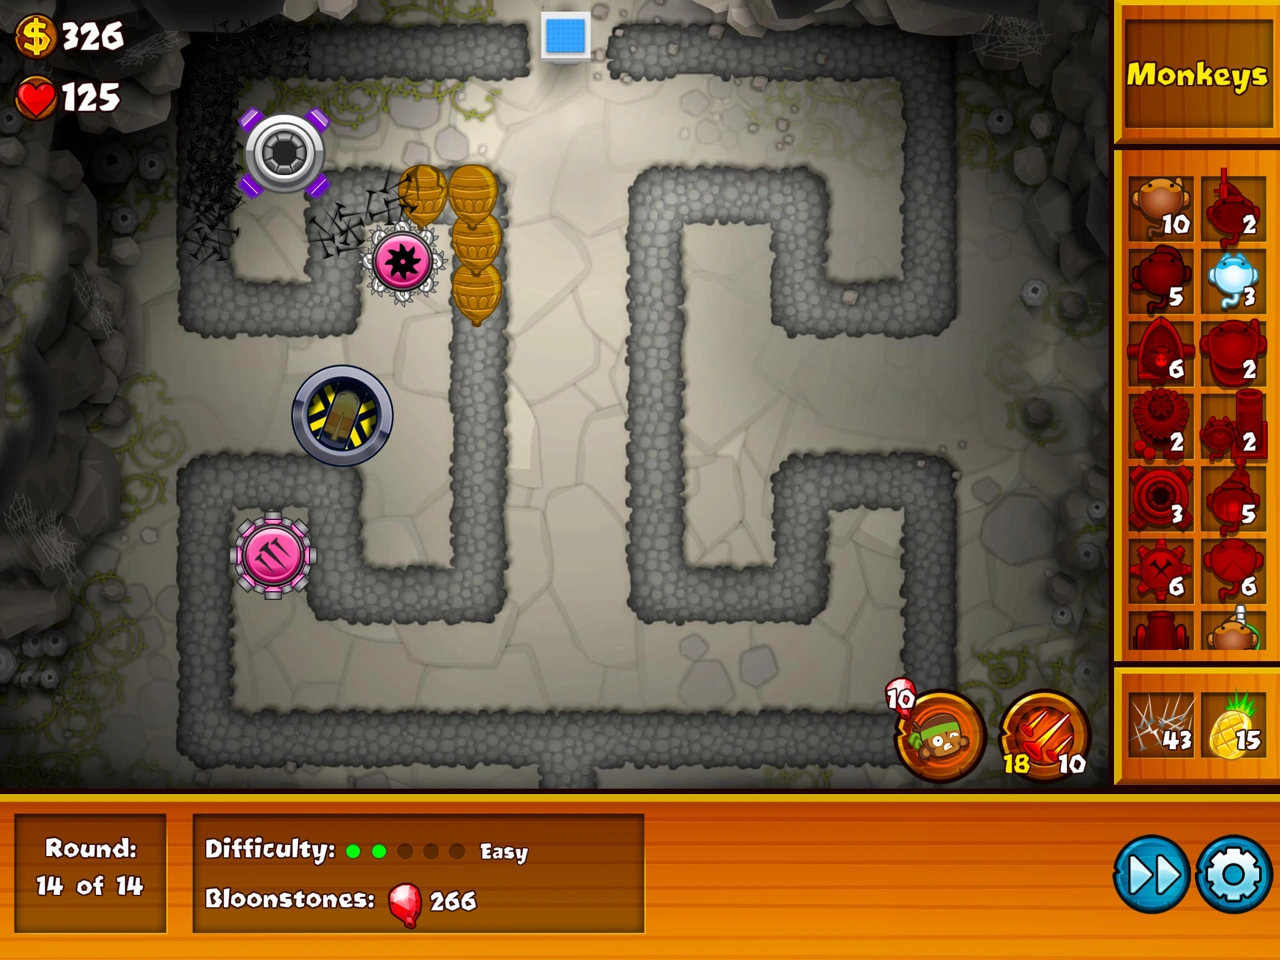
Bloonprint Hideout is a Special Mission in Bloons Monkey City Mobile that must be beaten to unlock the Bloonchipper. It has 14 rounds, and is set in a Mountains Terrain. The bloons get stronger by rank every few rounds. Unlike most special missions, the bloon spawns are the same for each attempt. In addition, no lead, camo, or regen bloons can spawn. The rounds go like this: Round 1 gives a line of Red Bloons, Round 2-3 gives a line of Blue Bloons, Round 4-5 gives Green Bloons, Round 6-7 gives Yellow Bloons, Round 8-9 gives Pink Bloons, Round 10 gives Black and White Bloons (white appears on the left, black on the right), Round 11 gives Zebra Bloons, Round 12 gives Rainbow Bloons, Round 13 gives a very loose line of Ceramic Bloons, and Round 14 contains a single MOAB which moves along the left lane. This special mission is quite difficult, due to the fact that there are multiple paths diverging from the entrance and the only other intersection point is at the exit of which lives are lost if bloons go through. The other problem is the very little cash that the whole mission has in total.
Strategies
Strategy BY Calb966 @ 04-21-2024
I did what @GamingPlayer did, but only the part with the x/3 dart monkeys. I put six on the left and five on the right near the first turn, and upgraded them one at a time, then on wave 14 I sold all of the dart monkeys on the right and spammed them on the left, also upgrading to 1/3 for a few of them. I beat it without losing lives, or spending bloonstones.
Strategy by sleazysickle @ 2024-04-03 (Steam ver.)
I completed it with around 10 lives lost, 1650 starting cash, no bloonstones required.
Towers Required:
- 1x Monkey Heli 1/x
- 2x Glue Gunner 2/1
- 1x Ninja Monkey 3/1
- 1x Tack Shooter 2/x
- 1x Spike Factory x/x
- 10x Road Spikes (2 Shacks)
I started by placing a Monkey Heli, and i bought Quad Darts ASAP, and after, placed a spike factory below the bloonprint.
Before Round 6, I placed a Tack Shooter on the left, first 180 degree bend, and upgraded it to a 1/x, and later placed a 2/1 glue near the entrance, to the right, on last targetting.
Before Round 10, i placed a 1/1 glue in the same position on the left, and placed a 2/1 ninja monkey in the middle of the parallel sections of the lane.
At Round 12, i sold the glues, and placed all my road spikes on the entrance, on the left lane.
Play on normal speed, and try to fall back with the heli only when needed.
Strategy by ZhengTann @ 2022-07-28 (Steam ver.)
Can be completed with no lives lost and 0 Bloonstones. Requires:
- 1x Bomb Shooter x/3,
- 1x Glue Gunner 2/1,
- 4x 0/1 Dartling Guns.
Rounds 1-12: Start by slowly building up your population of four 0/1 Dartling Guns as close as possible to the top right corner of the map, and aim towards the opposite (bottom left corner). Swivel your aim to ensure you pop any stragglers.
Round 13: Place a 2/1 Glue Gunner very near the entrance of the map, close enough that the glue blob does not miss. Make sure you don't aim your Dartling Guns at the entrance - aim at the first S-bend of the left path so that all Ceramics get glued and are corroding before Dartling Guns pop them. Prioritise stragglers that reached the last stretch of the map, then Pinks/Yellows because those move the fastest.
Round 14: Sell your Glue Gunner to place a 0/3 Bomb Shooter between the first S-bend of the left path and the entrance. Use whatever cash left to place cheap towers or spikes to the left of the bloonprints/exit. Direct your Dartling Guns to follow and shoot the MOAB and the subsequent bloons.
Best played at normal/slow speed for no lives lost.
Strategy by Terry.dai @ 2017-07-24
I completed it at level 14 and starting with $1650 without any Supply Crates or Monkey Boosts.
Build a Heli and upgrade it to 1/0 , and then build Spike Factory at the bloonprint. then build a 2-1 glue at the right side and let it can attack the entry point. then two 0-1 ice at the right side (2 corners). and then upgrade the glue to 2-2 and target the last aim.
At level 10-13, Heli should focus on the left side and help the right side if needed.
Before the level 14, sell all except the Heli, you should have $5600+.
Build 2 ice on left side (2 corners), a 2-1 glue, and a 1-2 Spike Factory on the top left.
Use the Road-Spike to eat the MOAB directly before it reach the ice tower.
Have fun.
Strategy by TrollerMcgee (Very easy, NLL)
Just spam x/3 dart monkeys on both sides, or if you don't have the money, put one where it can reach both sides. This will easily pop everything as long as you have 15+ dart monkeys.
Strategy by Qwertyxp2000 the second
I had completed this mission when I had $2450 starting cash. Use a combination of 2/1 Glue Gunners and 3/x Tack Shooters and place them equally and separately on the two lanes. Don't forget to have a lot of Road Spikes ready; have at least 75 Road Spikes at ready beforehand. Before starting Round 14, sell all towers that affect the right lane, sell the Glue Gunners, add a MOAB Mauler or two and add a Spike Factory. Umm... I did spend ![]() 20 to buy myself the Spike Factory and many more Road Spikes.
20 to buy myself the Spike Factory and many more Road Spikes.
This is an adequate strategy of just simply passing.
Strategy by GamingPlayer
All you do is buy 11 0/0 dart monkeys in the front where the bloons make their first turn near the start, but I spammed 12 because I have a free dart monkey, with 6 on the right turn and 6 on the left turn.
Make sure to have at least one of them upgraded to sharp shots. Next, upgrade each of them to sharp shots. Then, continue upgrading them in the same manner to 1/3, where you get triple darts first, then the range, and Enhanced Eyesight if you need to. Spam road spikes if you need to. Make sure that you spam sets road spikes if the road spikes would be used up when popping the bloon. On the round of the MOAB, sell everything, getting a 2/1 Ice Monkey where Qwertyxp2000 got a Spike Factory. Get a 2/x Glue Gunner near the Ice Monkey, setting it on strong so that it will splash damage to the ceramics, and then bloons inside the ceramics, so that all layers of the bloon are glued. Get a MOAB Mauler where Qwertyxp2000 placed the x/3 Bomb Shooter, and get a 1/1 Heli-Pilot on follow touch. Move the Heli-Pilot to where the MOAB is coming. You can sell the MOAB Mauler if the MOAB layer is destroyed, and you should get lots of money for a spike factory or enough money for you to spam at least 9 sets of road spikes. Last, spam all the road spikes on the end of the track so bloons won't get through if they manage to. This should cost you ![]() 0. If it doesn't work, just repeat it, but with 2 2/1 Ice Monkeys.
0. If it doesn't work, just repeat it, but with 2 2/1 Ice Monkeys.
Strategy by A plant
This requires 6 x/3 Dart Monkeys, 2 2/1 Glue Gunners and 2 2/x Dartling Guns.
Start by placing Dart Monkeys at the top near the bloonprint. Upgrade them to x/3, but I recommend to not upgrade the left side. Now place the Glue Gunners in the center of both of the paths. Upgrade them to 2/1. This should get you until the last round. On the last round, sell all the towers, place as many 0/3 Dart Monkeys at the bottom left, 2 2/1 Glue Gunners in the middle left side, and both of the Dartling Guns at the top. Upgrade them to 2/0. This is how I beat the mission.
Strategy by Teacup Terry
This requires a Heli Monkey and two Spike factories. You can also use a free dart monkey. Place the Heli monkey and level it up to Pursuit and nothing else. Set it to Pursuit. Once you have enough, buy a Spike Factory on the M.O.A.B. Side and another Spike Factory on the right side. Level them up 1/2 (first the M.O.A.B side, then other side) Use a lot of monkey boosts. That's how I beat the mission.
Strategy by Coronae_Arcania
So I managed to pass it (with a total of 4 lives left over) with 9 0/3 Dart Monkeys (4 on left, 5 on right) all the way to Round 13, then dumped everything on the right and got two 2/3 Bomb Towers. Throw down as many road spikes on the left path near the end as you can, pray, and as long as you started with at least 125 lives, you should be able to make it. Most importantly, not a single bloon should have escaped in previous rounds. Anyway, that's my strategy, so good luck!
Strategy by IReportU
This strategy required 2 Dartling Gunners 0/2, 2 Glue Gunners 2/1, 3 Bomb Shooters switched to "Strong" targeting and a $2040 cash injection when I start again (Maybe a Supply Crate will do the job, and if you're lucky enough, you won't lose a single life). I started with $2050 (City level 20 and no Supply Crates used). First of all, place 2 Dartling Gunners near the blueprint, which may let them shoot darts along the roads. DO NOT purchase the Focused Firing. Just let the gun spread wide. Upgrade the left one to 0/2 and the right one to 0/1 (Remember to put a 2/1 Glue Gunner near the first curve which bloons appear, it really help you a lot). This should be done before round 12. Start putting Bomb Shooters in the left path (I also used a free Dart Monkey) and upgrade them to 0/3. Set to "Strong". A Glue Gunner placed among those Bomb Shooter should help you to deal with Ceramics. If you managed to win the round in your first try, then congratulations! If not, just simply build more MOAB Maulers. Good luck!
Strategy by EventLesStew
The bloonprint hideout special mission is required to unlock the bloonchipper You need to do something for the first 13 rounds and a different defence for the MOAB at round 14
Special tiles needed to beat:
- Engineer rescue
Towers needed
- 3 spike factories
- 6 dart monkeys
- 3 engineers
- 4 bomb towers
- Road spikes
- 1 super monkey
Needed upgrades
- 1/1 Spike Factory
- 1/0 engineer
- 2/3 dart monkey (enhanced eyesight for range;))
- 0/3 bomb towers
Now set up a defence like this:
Rounds 1-13
- !=dart monkey
- []=engineer
                      ! !
                      ! !
                      ! !
                    [][][]
Upgrade dart monkeys to 2/3 and engineers to 1/0
In Round 14, put spike factories near the exit to the left since the MOAB spawns and goes in the left and place a super monkey and 4 0/3 MOAB Maulers there. Upgrade spike factories to 1/0 and one of them to 1/1.
Good luck:)
Strategy by Minimashor
I messed around with a bunch of strategies but what ended up working for me was to line up 8 0/3 dart monkeys right up the middle to deal with everything up to zebra bloons. Once you have that, get as many 1/1 snipers as possible and set to strong for the ceramics. If you don't have a lot of snipers available, upgrade snipers to 2/1.
Strategy by Anonymous
Simply spamming 0-3 Dart Monkeys will hold off the Ceramic Bloons on Round 13. Use 100 Road Spikes to damage the MOAB on Round 14, then attack using 2-1 Dartling Gunners. No Cash Drops were used, and I can't remember how much money I had left, but you should be able to do this at rank 10+.
Strategy by SPR_GMR15
I beat this tile at Level 12 or 13 using these:
- At least 6 Dart Monkeys (1-3)
- 2 Spike Factories (2-1)
- Red Hot Spikes or Road Spikes (For Round 14)
 20 (For Revive)
- Any towers of your choice
First, put at least three Dart Monkeys. One in Middle, in Left, in Right. Make sure the middle one is in triple darts. Put more for upcoming rounds and upgrade it all to (0-3) or put some range if you want. This will work well until Round 13 because there will be a BIG Chance you will lose here. Revive if you can. Round 14 is a MOAB in left side so put some Hot Spikes or Road Spikes in its path to weaken it, sell towers affecting the right (including the middle). Put anything and done.
Strategy by JoshuaCG
Beaten at Level 14
Reqs:
- 4 1-0 Engineers
- 2 1-0 Heli Pilots
Wave 1-2: Start by placing all 4 Engineers at the entrance in a square formation, making sure it can reach at least 3 different "spots" on the path by placing them in the middle at the bottom.
Wave 2-8: Slowly Upgrade all 4 Engineers to 1-0 then save up your money
Wave 9-13: Buy 2 Heli Pilots and get them to 1-0 (Upgrade before placing the next) (Must use follow touch on wave 13 otherwise place above engineers)
Wave 14: Sell the Engineers and place them back (Upgrade to 1-0) on the left side to get as much coverage on the track as possible, and use follow touch to hover the Heli Pilots over the MOAB
Using this Strategy, I was able to beat it with 36 lives remaining
Strategy by Genio250
Needed: 4-2 Ninja, 3-1 Sniper.
Start with a Ninja in the center of the two paths that go to the center, above the entrance, upgrade it to Double Shot as soon as you can; also buy Seeking Shuriken.
With that you should have a Bloonjitsu before round 10.
That will keep you alive until round 14, meanwhile place a Sniper and upgrade it to 1-1.
And the end of round 13, sell the Ninja and upgrade the Sniper to Deadly Presicion.
If your knowledge makes your Sniper make the MOAB drop yellows, sell it fast and buy a Ninja 4-2 in the exit.
If pixel perfect you can win with no lives lost.
Strategy by aleislost
Build a row of Dart Monkeys in the vertical middle, upgrade all of them to 0/3 as the game goes
When every Dart Monkey is set, build a Wizard 2/0 at the bottom center
Build a 1/1 engineer at the top center
At Round 14 use a Monkey Boost at the beginning
Strategy by Ravenfield Iceberg
Build a 1-0 Engineer monkeys on each side. During rounds build four Dart monkeys, two on each side, and then slowly upgrade them to Long range darts and Triple darts (1-3). On about round 10, build a Dartling gunner and prioritize the zebras and ceramics. In the last wave, sell the engineer and darts on the right side and add a 0-3 Bomb range. This should ensure the fall of the MOAB.
Strategy by ViyWolf
Used: Heli Pilot 1-0 x1, Engineer 1-1 x2, Spike Factory 1-2 x1, Sniper 1-1 x2, I beat this at lvl 14 with a few lives lost but probably preventable.
Place a heli pilot and upgrade to 1-0. Use as needed. Place engineers on each side of the track and upgrade to 1-0. Then, place a spike factory at the end and upgrade to 0-1. Place snipers and upgrade to 1-0 or 1-1 if you have enough, set to strong. Upgrade engineers to 1-1 if you have the money, and spikes to 1-1 if you have enough. Before round 14, sell all engineers and move spike factory to the left side. Upgrade to 1-2. Place extra monkeys on left side if you have the money.
EZ and cheap strategy by HungryMule89
Used: Dart Monkey 0-3 x10. Starting Cash: $1750 (Lv. 15) (DON’T PUT ON AUTO-START!)
Start on Round 1 by adding two 0-3 dart monkeys (one on left side, one on right side). Then start building up 0-3 dart monkeys in the middle until round 14. In the break between Round 13 and Round 14, sell all your dart monkeys except for the one on the left. On Round 14, there is a MOAB. It will travel on the left path, so buy all your dart monkeys again with the 0-3 upgrades and put them on the left side. (If you have 10 dart monkeys, there will probably be one that’s not bought after you sold all your dart monkeys. That’s ok.) There WILL be some life loss, but you will not need to revive. The dart monkeys will absolutely maul the MOAB, and the Bloonchipper is yours! 👏
Strategy by ???
No lives lost
No red hot spikes, monkey boosts, bonus monkeys, or supply crates used
4 dartling guns (research 1/1, MK level 2)
1 glue gunner (research 1/1, MK level 2)
- Place a dartling gunner near the right side of the bloonprint pedestal, upgrade to 1/1
- Place a glue gunner near track split, strong targeting, upgrade to 1/1
- Place another dartling gunner near the left side of the bloonprint pedestal, upgrade to 1/1
- Place the remaining dartlings near the first two, upgrade to 1/1
Strategy Tips
- Target the dartlings to the entrance, and if any bloons survive, target the ones further up the path instead.
- Target unglued, fast bloons first, only target glued ones if they are close to the bloonprint and slow Bloons if they have high total health (eg. Ceramics & Rainbows).
- It's best to run the game on normal speed to react to fast bloons better.
- It's almost vital to have the Dartling Gun MK level 2 pierce boost in this strat and it will help if you use dartlings in other strats.
- This strategy uses a tower combination available in Monkey Teams and can be used to farm whatever the event offers.
Rounds
- Round 1: 100 Red (RBE: 100)
- Round 2 and 3: 100 Blue (RBE: 200)
- Round 4 and 5: 100 Green (RBE: 300)
- Round 6 and 7: 100 Yellow (RBE: 400)
- Round 8 and 9: 100 Pink (RBE: 500)
- Round 10: 25 Black, 25 White (RBE: 550)
- Round 11: 30 Zebra (RBE: 690)
- Round 12: 20 Rainbow (RBE: 940)
- Round 13: 8 Ceramic (RBE: 832)
- Round 14: 1 MOAB (RBE: 554)
Trivia
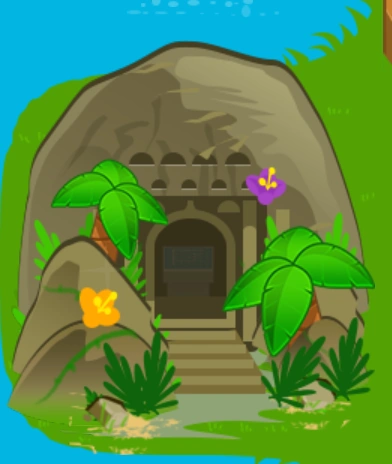
- The tile appears as a sort of decorated cave.
- Despite the fact that this is a Caves Terrain tile, Monkey Aces, Mortar Monkeys, and Heli Pilots can all be built here, even though those towers are normally restricted in such terrains.
- A Wind Spire can be built on a Bloonprint Hideout tile.
- This is the only special tower mission tile that does not use its own tower.
- 'Bloonprint' is a portmanteau of 'blueprint', which is a technical drawing containing the instructions for making an architecture/engineering design, and 'bloon'. It's also a reference to the Bloonchipper's blueprint, as the blue map on the end of the track actually is the Bloonchipper's blueprint.
- Uncaptured Bloonprint Hideout tiles appear exactly the same as captured ones.
| ||||||||||||||||||||||||||||||||||||||||
| |||||||||||||||||||||