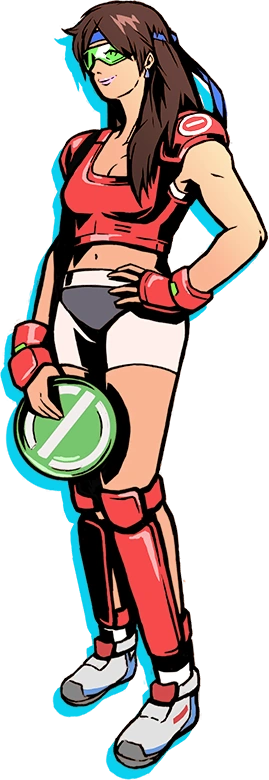
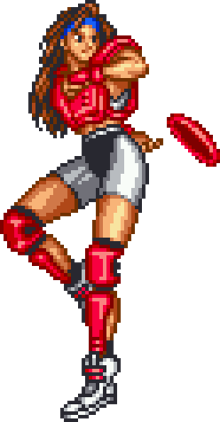
Hiromi Mita (三田 浩美) is a playable character from the Windjammers series. She's a former professional tennis player and a representative from Japan.
Features and Analysis
In Windjammers Hiromi Mita is the first character offered in the game's selection screen, and is quite misleadingly recommended for beginners. However, she requires advanced mastery of the game to be able to deliver all of her qualities: she is undermined by the weakest power in the game and by the shortest dash. However, her effects are very strong and her super custom is the best in the game because it is difficult to catch because of the many patterns it can adopt.
We might as well advise against this character for beginners and reserve it for more seasoned players, even if her speed of movement is enough (quite misleadingly) to flatter the first sensations of the game. She remains an excellent character with a style that is difficult to exploit and is perhaps even the most demanding of all the characters.
Summary
- + Best movement speed in the game.
- + Excellent super custom.
- + Deceptive and ambiguous effects if used closely.
- + Good aggression potential, takes advantage easily on a toss.
- + Quick Dash.
- + Good propensity to perform reversals and supersonic shots.
- + Fort on Beach (tournament standard).
- + Strong comeback potential (strong gain in power and dexterity if late in points).
- - Difficult to handle.
- - Cannot effectively stagger shots due to lack of power.
- - Smallest hitbox in the game regardless of the action performed (neutral, dash, toss).
- - Has difficulty defending.
- - Leaves little room for error.
Attack
One would think, given her power characteristic, that Mita is not an offensive character. But as much to say it clearly: the chances of winning with her diminish as you defend. Normal returns or counter-attacks are generally not enough to win points. You have to have a resolutely offensive attitude. Use her strengths and set aside her shortcomings: opt for frequent net shifts, offensive lob and fake super strategies aimed at suffocating the opponent. Apply yourself on the toss and do not hesitate to use your super custom.
After a toss, do not hesitate to use Mita's high walking speed to move around the frisbee and do not systematically lock the character on the frisbee to recover it. You have to catch the frisbee from the end of Mita's hitbox and finally move the frisbee on Mita and take an optimal position for a wide angle effect (47) or a lengthening effect (78).
Defense
Her shortcomings in power are felt especially in defense: her movement is very fast, but the dashes (sometimes essential for last-second reactions) are very short, and above all, the propensity to be pushed into the cages is high. Similarly, Mita's hitboxes are the smallest in the game, forcing her to move around a bit to retrieve some Frisbees where other characters can stand still and press A to perform a toss.
If the opponent charges a super, it is wise to take a very light step forward (a very quick forward touch on the joystick) in order to greatly reduce the chances of going into goal. Remember to regain the upper hand as soon as possible offensively by means of a toss which will allow Mita to obtain the appropriate positioning to express himself.
A seasoned Mita player will very often be able to walk in order to get the frisbee in order to get a toss and take the offensive advantage: it is not recommended to use the character's slides which often force her to use her shots normal without supershot.
Shots
Normals and Lobs
Mita's normal shots are weak. You will have to rely on supersonic shots coupled with the character's other weapons to lead a match (however, fake super or classic offensive lob strategies are still effective). On the other hand, the lob will be an instrument that will have to be used quite often in defense, more than for another character, in order to get out of situations where the game is suffered as quickly as possible.
Mita's normals gain greatly in effectiveness using the supersonic shot: Mita having a tolerant window to achieve them, it is advisable to use this tool as much as possible in attack as in defense.
Effects
In the middle of the field
E"wide angle" effect
(↙)←↖ or (↖)←↙ - This is the "trademark" effect of lightweights on small pitches. It is performed starting from the back and blocking the high or low rear diagonal (depending on where you want to send the frisbee). The main purpose of the effect is, from the top of the court, to throw the Frisbee into the low corner (or vice versa). Mita's wide angle has the particularity of being more flexible than Yoo's: the stroke to be made before the frisbee is offset to the maximum is very short, which makes the effect particularly useful in midfield and at the net , but also particularly weak from the baseline where the frisbee will return to the opponent's 5-point goal before reaching the nets, making it very easy to catch. Question positioning, no need to be glued to the wall to perform the effect optimally unlike Miller: it is even better to be a little closer to the center to aim the skylight with the effect. It is also possible to purposely launch the effect too close to the wall to cause a rebound which will send the frisbee into the opposite corner of the field, creating a counter-foot if the opponent is not careful enough. This effect is probably the one that Mita must use most often due to her ability to uncross quickly from an offensive position. Coupled with a supershot, it often forces the opponent to perform a slide to catch it, preventing them from performing a toss to regain the advantage.
Ebell effect
(←)↖↑ or (←)↙↓ - Another effective effect in attack which loses effectiveness in defense due to her propensity to return towards the opponent if launched from too far. her primary purpose is to send the Frisbee to the high or low skylight from quarter court. This effect makes it possible to go along the wall, creating an ambiguous situation: it is thus possible to make the Frisbee bounce or not by slightly varying the positioning of the character during the realization of the effect (fig 1 and 2)' '. The boomerang effect can also be used from the baseline near the wall: done in the direction of the field, it gives the opponent the impression of going towards the center of the field before falling back into the corner. This usage should be situational as it only serves to surprise a sleeping opponent and is otherwise easy to read.
Uncrossing effect
(↖)↑↗ or (↙)↓↘ - As the name suggests, this effect is mainly used to reach corners from the middle of the field. The interest of the effect is that it falls back rather abruptly towards the corner, only revealing her threatening character at the end of the race: it thus makes it possible to surprise an opponent who is too confident. This is also a usable effect on Clay on serve: he will sometimes bounce between bumpers, especially if Mita is behind on points.
On the wall/on the bumpers
Shaving effect ("the sticky")
(↓)↘→ or (↑)↖← close to the high wall, (↑)↗→ or (↓)↙← close to the low wall - The Frisbee comes into contact with the wall and runs along it until the aim. Note that the frisbee will not always stick to the wall and that it can sometimes be slightly offset as the frisbee travels. It seems that to achieve the best sticky, the character should not be exactly glued to the wall but very slightly off-center, by a pixel or two.
Rebound effect
(→)↗↑ close to the high wall and (→)↘↓ on the low wall - A frisbee bouncing effect on the wall. The trajectory taken by the frisbee is a little more horizontal than a normal diagonal. The further the character is from the wall, the wider the angle of the Frisbee will be. This effect can be used to perform a counterpoint by feigning a sticky.
Ewide rebound effect
(↗)↑↖ close to high wall and (↘)↓↙ close to low wall - Another bounce effect, more vertical. On small pitches, it will cause two bounces. It is mostly used on large pitches, where it is roughly equivalent to the standard rebound effect on a small pitch.
Great
Since Mita's power is very low, she hardly charges supers. It is advisable not to systematically charge supers after a toss because they can cause Mita to lose the offensive advantage on a reversal super lob, which would force her to return to a defensive position, or an opposing toss. Most often it is recommended to use net, spin or diagonal supershots.
Supers can sometimes be useful and can vary the game, which is precisely the goal of the attacking character in order to force the error of the opponent.
Super custom
Mita's super custom is certainly the most difficult to read of all. It's even a point (with the effects curves) that makes Mita a formidable character when she triggers a super shot: even knowing the patterns of a super lob or a super spin, the opponent remains disturbed (and more than against another character) in this expectation of the super custom which can sometimes be difficult to read depending on Mita's placement.
- The classic pattern is regular and is in herself only a kind of sinusoid. It is significantly harder to stop if Mita is in the middle of the field, in which case the super will end up in the high corner if thrown down and vice versa on small pitches. This pattern therefore works very well when used in consort with super spins along the wall. Indeed, the super spins require the opponent to quickly dash on the frisbee to receive it while the custom requires to read the pattern and then dash in the other direction or forward. A sequence of consistent supers will therefore be able to condition the opponent and make him dash impulsively before reading the pattern of the custom, then cashing in a 3 point on a counter-foot. On the other hand, the basic pattern is not very useful from a defensive position because it comes back towards the opponent if it is placed on their baseline (which is very often the case).
- The alternate pattern unfolds along a wall, preferably by pressing the opposite direction to the wall the character is walking along. The frisbee makes bigger and bigger arches to land in the five-point goal. We notice in general, this does not always seem true according to the placement of Mita, that the sequences extend as they are repeated. Despite apparently less difficulty for the defender, the trajectory can often bypass him at the last moment. For the defender, it is then better to place himself slightly centered in relation to Mita: up or down, but more in the middle of the arena (vertical position; the horizontal position of the sweet spot does not change). For the player of Mita, this pattern can be carried out even close to the net, because the ambiguity between a classic or alternative pattern for the defender is of order to sow enough doubt to hope to score.
Great spin
Undoubtedly the super to use most often because of her versatility: the possibilities offered by the super spin really allow you to vary the super exchanges.
For more information on this super, see the Super Shot page.
Great lob
Mita's super lob has no specificity. He seems in the average of the start ups of the characters. It's as always a good variation of the super game, which we can also favor at the net.
For more information on this super, see the Super Shot page.
Land
Beach and Tiled
Services
The lob will be the most interesting service tool for Mita: any other shot, simple or effect, will be too slow or will not uncross enough and will therefore be too easy for the opponent to kick.
Strategy
The playing space being limited, the toss are easy to achieve. It will therefore be necessary to use Mita's walking speed to quickly get into the trajectory of the Frisbee and perform a perfect toss to send the Frisbee forward to perform open effects: often aiming for the corner to force the opponent to do slips, sometimes forcing a rebound to punish a possible premature dash by the opponent. Variation is the key word: the more different and effective the trajectories and effects, the greater the chance of misleading the opponent.
Lawn and Stadium
Services
A diagonal shot will suffice in most cases: the two fields being wide, the disc will touch the bases at the precise place where the disc will touch the wall.
Concrete
Services
Diagonal shooting will be done most of the time. However, Mita has an ambiguous effect when she is placed slightly up on serve: the disc sent with the bell effect up (↖↑) will collide with the high bumper before continuing her journey straight. , thus offering the player the opportunity to score 5 points if the opponent does not know the setup. It will however be necessary to identify the few positions allowing this variation in the serve (often slightly above the service line and a little behind), otherwise the disc will frequently be sent right into the bumper, causing a free toss for the opponent.
Offensive Options
The service effect described above can of course be used in full exchange, provided that you reproduce a placement conducive to the disc skimming the bumper from the top.
The super custom is a tool of choice on Concrete. By standing slightly above the center line of the field, it is possible to make him shave the top bumper and leave straight to the top five-point goal. This super variation is one of the most powerful in the game because it is very hard or even impossible to predict: many players generally expect the custom in the middle of the field. Additionally, since this variation is quite difficult to pull off, the custom will often perform a more ordinary stroke, or may even reverse when hitting the bumper, adding many hard-to-stop variations.
At net, the wide angle used from a relatively central position is a great effect as it allows embrace the widest angle left by Concrete's bumpers while aiming for 5-point goals: achieved with a supershot, it will mislead many opponents or force them to attack, a situation where they still will not be sheltered from this effect which can easily slip into the slightest defensive breach.
Defensive Options
When serving the opponent, the best solution to avoid taking easy points is to get to the net with a forward dash, even before the server sends the disc: Mita can then stop all the discs with the through a dash (if the disk is too far to be tossed) or a toss from this position. Be careful if the opponent is very behind in points: he can then perform a supershot on the serve which will push the Mita player to be more reactive.
Clay
Overview
Mita's offensive possibilities are reinforced on Clay just like his fragility in defense: if it will be easy to score points, it will be even faster to cash in a lot of points due to the character's small hitbox which gives him a margin of error much more restricted than a character like Miller or Biaggi. A good reading of the trajectories is therefore essential for successful matches on Clay.
Services
The uncrossing effect is to be favored on the serve because of her propensity to bounce off the bumpers. However, you have to look carefully at Mita's position on serve: if Mita is placed on the horizontal line or higher, then you will have to perform the upward effect (↑↗ + shot). Otherwise, the downward effect (↓↘) must be performed. The bumper will then take variable trajectories, sometimes murderous and sometimes quite harmless, depending on the exact placement of Mita in relation to the bumper.
Offensive Options
Mita's wide angle is among his best effects on Clay as it makes it easy to get around both bumpers from a slightly peripheral position in the center of the field, as the opponent can be tricked into anticipating a collision with the bumpers and therefore dashing into the wrong way. The super custom can also be devastating in many situations where it comes into contact with the bumpers, provided you are able to send it back in the event of a reversal custom from the opponent.
Defensive Options
When serving the opponent, the best solution to avoid taking easy points is to get to the net with a forward dash, even before the server sends the disc: Mita can then stop all the discs with the through a dash or a toss from this position. Be careful if the opponent is very behind in points: he can then perform a supershot on the serve which will push the Mita player to be more reactive.
Hitboxes
One of Mita's big weak points remains her hitbox, by far the smallest in the game. It remains stable and only changes during a dash. However, Mita's sprite being smaller than these companions, her hitbox overflows the character's body (especially at the top in neutral position) which can prove to be both life-saving and misleading.
Launch
Mita has the weakest throw in the game: she doesn't throw very quickly and quickly loses speed. To compensate, you have to re take advantage of his ease in releasing supersonic shots and decide without waiting for his next throw.