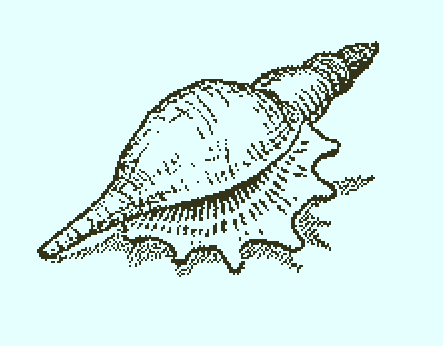
Mysterious shells, along with the Formosan chest, are among the main plot devices in Return of the Obra Dinn. The exact nature, function, or origin of the shells is not explained in the narrative. However, they attract the attention and greed of multiple characters on the Obra Dinn, which leads to a multitude of conflicts and deaths throughout the story.
The shells are slightly larger than a human hand and emit bright light. When placed in the liquid that the Formosan chest contains, nearby mermaids are weakened.[1]
Story
A shell is first seen in Murder, part 1 when one is in the bottom drawer of the Formosan chest. Second Mate Edward Nichols had opened the drawer before attacking passenger Nunzio Pasqua. The narrative does not explain whether Nichols is after the chest, the shell, or both.
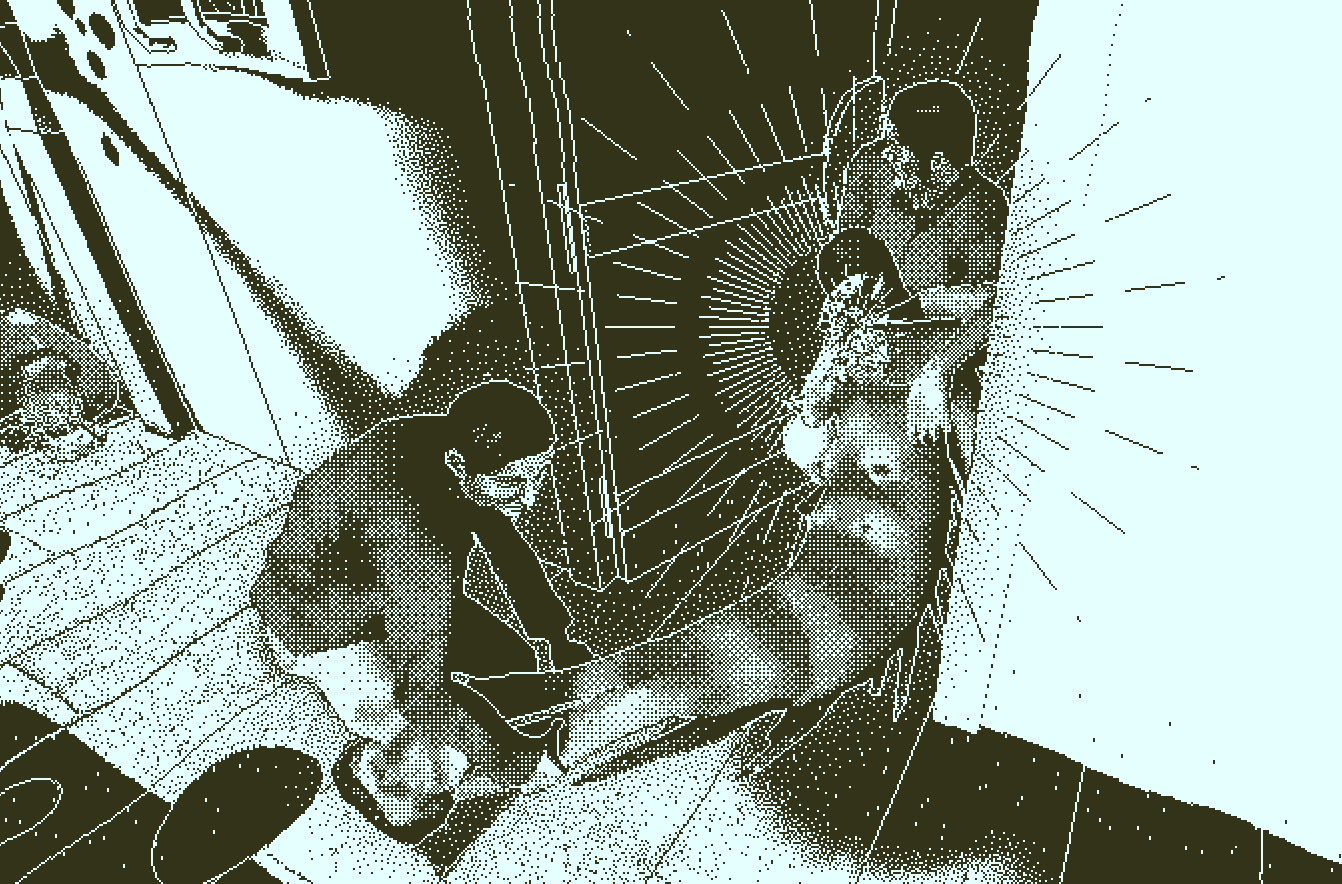
Later, two of three mermaids are seen having a shell tangled in their hair as they attack Nichols and his party on the open sea.[2] During the battle, passenger It-Beng Sia submerges a shell into the liquid in the Formosan chest, burning his hand and stunning the mermaids.[1] It is unclear if the beams shown are coming from the shell and homing in on the mermaids or a representation of the mermaid's life force going into the shell. The sole survivor of the battle, Second Mate Nichols, brings mermaids and their shells back to the Obra Dinn. As the crew moves the mermaids to the lazarette, the cook of the ship, Thomas Sefton, is drawn to the shells. As he jokes about cooking a mermaid and tries to reach for its shell, the mermaid slashes its tail to strike him dead.[3]
After two rounds of supernatural monsters attacking the ship, the crew gives the last surviving mermaid a shell and releases her, asking her to guide the Obra Dinn back to port.[4] The same shell can be seen glowing in the distance when the inspector is aboard the Obra Dinn at Falmouth five years later.
Even though one of the mermaids is released, the fate of the other two shells carried by the mermaids in the lazarette remains unknown. Captain Witterel told some of the crew that he threw the shells into the ocean. This is referenced twice: first by the First Mate's steward Paul Moss as he, Third Mate Martin Perrott, and Fourth Mate's steward Davey James actually find a shell in the lazarette.[4] Later, the Captain himself says the same, but seaman Henry Brennan refuses to believe him.[5] By the time of the latter incident, there are only four people alive on board, and previously loyal crew members, including First Mate and Captain's brother-in-law William Hoscut, have stormed the captain's quarters looking for the shells.[6] The mutiny could be due to the shells affecting the otherwise-loyal mutineers, but this is not confirmed in the narrative.
Trivia
The distant glow of the shell, seen by the chief inspector, can be reached using the game's (normally hidden) debug menu. It is much closer to the ship than it appears, and is simply an object floating a few feet above the water level.

References
- ↑ 1.0 1.1 Seen in The Calling, part 4
- ↑ In chapter IV, The Calling
- ↑ In Unholy Captives, part 2
- ↑ 4.0 4.1 In chapter VIII, part 4
- ↑ In The End, part 2
- ↑ Stated by First Mate Hoscut in The End, part 1 when he says "Open the door – – lest we break it down and take more than those shells."