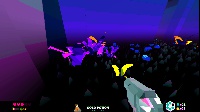
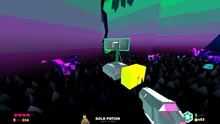
Enemies consist of two types: bugs and turrets. With some exceptions, each enemy takes only one shot to kill. However, some enemies have some means of defending themselves against bullets.
Bugs
Bugs are the biological enemies of the game. Whether they are the primary hunting targets at High Rise or part of an infestation is unknown. Most bugs will chase the player once within eyesight, often following them around corners or crossing large distances. Apart from bomb bugs, each bug deals half a heart of damage.
Imp
Appears at all levels. Imps are the most basic enemy and the first the player will encounter. They have small, black bodies with beady pink eyes and bright blue teeth. They also sport tiny pointed ears and a small tail.
Imps will directly charge the player once within eyesight, no matter how far away they are. Once spotted, they will chase the player even around corners. Whenever they spot the player, either from first contact or from rounding a corner, they will pause and give a small cry.
Imps can be shot at any time. If a player rounds a corner or peeks through tall grass slowly enough, they may spot an imp before it notices them.
Crawler
Begins appearing at Level 2. Crawlers are one of the few enemies capable of blocking the player's shots. They do so by periodically covering their faces with large metal claws when the player is aiming at them.
Crawlers can be killed by shooting the main body; firing upon the claws does nothing. It helps to fire in a slow, rhythmic fashion, so as to hit them when their claws open again. Alternatively, you can kill Crawlers with explosives as they cannot block explosions.
Wasp
Begins appearing at Level 2. A flying enemy. Wasps can often be heard through walls because of their wings, giving warning to their presence. Otherwise, they behave much like imps and will die in a single shot. Wasps have a chance to poison the player upon contact.
Wasps appear to spawn in groups of 2-4 and rarely 5 at the same time.

Snakeworm
The snakeworm is a snakelike enemy that hides in long grass and bushes. Although it can be dispatched with a single bullet, it is still one of the most deadly enemies in the game due to its ability to catch an unaware player off-guard.
Snakeworms will not attack the player unless they stray too close the worm or step on it. Once a snakeworm has made its first attack, it will then chase the player until it is killed or the player dies. Snakeworms will emit a small noise when the player gets too close, giving them a small window to back away before it attacks.
Snakeworms have a chance to poison the player upon dealing damage. Poison will deal damage over time until it wears off. You can remove the effect by using an antidote. You can find it randomly or you can buy it from a vending machine.
Multiple items in-game directly counter snakeworms, including the repellent and the snakeworm boots.

Chargers
Begins appearing at Level 5. Clunky-looking bugs with a horned, bulletproof helmet. They clumsily charge towards the player. Chargers are defeated by side-stepping their charge, allowing them to embed themselves in a wall momentarily, exposing their bright pink rump, which can then be shot. Getting hit by a Charger will cause the player to drop the item(s) they have equipped, but not the item(s) in their backpack.
Protip: If the player has Last Will equipped when they die to a Charger, they will drop it and lose its effect.
Bomb Bug
Begins appearing at Level 2. The Bomb Bug appears as four pink spheres arranged in a pyramid. Charges the player and explodes on contact or on death. They make a loud, screeching noise as they run.
Bomb Bugs are the only enemy that chases the player in a straight line as long as they see them, allowing the player to get some distance away if they break their sightline. They deal a full heart of damage if caught in their explosion.
Bomb bugs' explosions can kill enemies and destroy props including vending machines.
Bombfly
Begins appearing at Level 6. Airborne versions of bomb bugs. These appear only after Level 4 and will chase players around corners. Like wasps and flying turrets, the noise of their wings can be heard from a distance, which can alert the player to their position and proximity. If a Bombfly spots the player, they will relentlessly charge at them even if the player breaks their line of sight, unlike the Bomb Bug.
Egg Cluster
Appears exclusively at Level 8. Egg Clusters are small, lumpy stacks of spheres, similar to bomb bugs. They remain stationary and will tremble when the player approaches. They explode on contact or when shot.
Egg clusters are particularly helpful when fighting the final boss, as their explosions can be used to take out distant or unseen enemies.
Turrets
Turrets are machines that attack the player with lasers, bombs, rockets, etc. It does not do anything until the player is seen. Turrets cannot be directly shot; instead, the player must shoot the battery next to them. Turrets' shots can also kill enemies, but it will not count as a kill for the player (though they still drop gold). Some turrets deactivate when the player is far enough away.
Because turrets can shoot very quickly after they activate, players are encouraged to not rush out behind corners and stay out of the way when opening doors. Players can often peek around corners to shoot a turret's battery before it activates.
Normal turret
Appears at all levels. Shoots lasers in an erratic and unpredictable pattern, but they always shoot toward the player. Normal turrets never deactivate and will fire toward the player even when they are behind walls.

Auto Turret
Begins appearing at Level 2. Shoots lasers at a higher rate of fire. Looks like a large, cubic version of normal turrets. Auto turrets have a short warm-up period in which they can be fired upon without retaliation. They will also deactivate if the player hides for long enough.
Rocket Turret
Begins appearing at Level 3. Shoots rockets instead of lasers. Rocket turrets have the same warm-up period as upgraded turrets, but the rockets they fire travel faster than lasers.
Mortar Turret / Bomb Launcher Turret
Begins appearing at Level 3. It's relatively large and shoots bombs. These bombs bounce off walls, and can sometimes arc over players' heads. Like any other bomb, they can destroy other enemies, vending machines, and even the turret that fired them. Mortar Turrets' range is limited, meaning the fired bombs cannot reach the player if they are too far away.
Caution: Explodes when destroyed.
Slowing Turret
Begins appearing at Level 4. Slowing Turrets fire a solid white beam that slows down the player while the player is in their line of sight.
There is always a slowing turret within the turret boss room on level four.
Spider Turret
Begins appearing at Level 5. A mobile version of the Auto Turret that shoots lasers and chase the player once spotted. Spider Turrets have no activation sound, making them slightly more difficult to spot.
Players are again advised to hide behind a corner and wait for the turret to turn.
Flying Turret
Begins appearing at Level 5. An airborne version of the Spider Turret, Flying Turrets will chase the player once spotted, flying up and down and firing wildly. They are highly inaccurate at a distance but can be difficult to hit due to their motion.
If spotted, players are advised to duck behind a corner and wait. As the turret rounds the corner, it cannot shoot at the player, giving the opportunity to aim and fire.
Leech Turret
Begins appearing at Level 6. Leech turrets fire a yellow laser at the player in a similar fashion to Slow Turrets, damaging the player over time if the beam remains unbroken. While the beam is firing, the turret cannot turn, and the player can break the beam by turning far enough from the Leech Turret. It has two power sources, one on each side of the turret. Destroying one of the batteries will momentarily disable it; destroying both will deactivate the leech turret permanently.
Large Turret
A massive turret that appears exclusively at Level 7, and serves as a sort of mini-boss. Large Turrets rapidly fire rockets after a long charge-up time when the player is in their line of sight. This is the only turret that doesn't have a battery. Instead, it is wired to a large circuit breaker which can be activated to overload the turret.
This turret has a very long charging period, allowing the player to easily dash to the circuit breaker, which is often behind a corner and out of range.
Bosses
There are two bosses, the first at the end of level four, and the second at the end of level eight. Boss rooms are marked with a pink skull above their door. Players enter a small hallway before entering the actual boss room, giving them time to prepare for the fight.
Turret Boss
A large, mobile missile turret flanked by two laser turrets, appearing at the end of level four. The turret boss sports four batteries, one on each side of its base. The player must destroy all four batteries to defeat the boss. The turret boss is arguably the most difficult enemy in the game.
Preparation
The turret boss's attacks deal massive, rapid damage, and are chaotic and often difficult to see or avoid. As such, the player should upgrade max health and carry as many healing items or silver lives as possible. Additionally, the player should stock up on bombs, as they are an effective means of fighting the boss.
Strategy
The turret boss is always accompanied by a slowing turret, which appears directly to the player's left or right when entering the room. The player should deal with the slowing turret before moving onto the boss.
While the four columns can be used to block the boss' missiles, the player is still vulnerable to the flanking lasers. Players are encouraged to stay on the move. Additionally, staying too close to the columns or walls can be fatal, as the missiles' explosion can still reach the player and deal damage.
Explosive weapons are an effective means of defeating the turret boss, as shooting the individual batteries can be difficult, since the boss will turn to face the player, hiding the ones in back. Players should circle the turret boss, periodically tossing bombs into the center. However, great care must be taken, as the boss can shoot bombs, causing them to detonate.
Mother Brain
A large, tentacled blob that rests on top of the security mainframe at the end of level eight. The mother itself is immobile, attacking the player by hurling explosive eggs. The player must activate three circuit breakers throughout the room to defeat the boss.
The mother brain is accompanied by a horde of bugs, turrets, and egg clusters.
Preparation
Due to the nature of the fight, the player should have 15-20 reserve bullets. As usual, healing items take top-priority, but if there is room for another, a sniper scope or bullet magnet are both advisable items to carry.
Strategy
Rushing into the boss room straight away is almost guaranteed death. Instead, the player should stay inside the hallway after opening the door. The bugs will take notice, but the mother brain and turrets will remain inactive.
After dealing with the bugs, the player can then shoot and deactivate any visible turrets. Shooting egg clusters can help to hit turrets in the distance, as well as take out unseen enemies lying behind the mainframe.
Once visible turrets have been dealt with (or if the player has run out of ammo), the room can be entered. Immediately, the boss will begin throwing eggs at the player, which bounce off of walls and explode upon touching the ground. There is often a column that the player can hide behind to block incoming eggs. Likewise, the player can duck back inside the hallway. Like other explosive items, the eggs can be used to defeat enemies.
The three circuit breakers are located to the left, right, and back of the mainframe. Once the surrounding enemies are dispatched, the player should be able to quickly dash between the three. However, there is a high chance of being attacked by a hidden bug or turret, so the player should remain vigilant and pay attention to their health.
Once all three circuit breakers have been activated, the boss is defeated. However, any remaining enemies can and will still damage the player. To end the level, the player must push "reset" on the mainframe after defeating the boss, at which point the fight is over and the game is won.
The player receives $5,000 for beating the game.
